
Payments Guide
May 2013

Table of Contents
1 Overview 5
A. Additional Resources 7
Basic Guides 8
Online Help 8
CitiDirect Customer Support 8
B. Sign-on to CitiDirect BE
SM
9
2 Payments 11
A. Local Language Availability 13
B. Payment Methods 15
C. Payment Types 17
D. Payments Setup 19
3 CitiDirect Libraries 21
A. Library Maintenance 23
B. Payment Libraries 25
4 My Preferences 29
A. Available Preference Criteria for Payments 31
B. Library Lookup Favorites 33
5 Payment Forms 35
A. Payments Summary Form 37
Tabs 39
Action Buttons 39
Submit Button 39
New Button 40
Delete Button 40
Go to Details Button 40
Other Options Button 40
B. Payment Detail Form 42
Payment Method 43
Payment Type 44
Payment Amount 44
Subsidiary Identifier/Name 44
Transaction Reference Number 45
Value Dates 45
Library Lookup Favorites Button 45
Multiple-Line Button 45
Sub-Forms 46
Actions Buttons 46
Submit Button 46
Submit and Create Preformat Button 47
Submit and Copy Button 47

Table of Contents
Copy Button 47
Delete Button 47
Next Button 48
Return to Summary Button 48
Other Options Button 48
6 Outgoing and Incoming Payments 50
A. Outgoing Payment Methods 52
B. Incoming Payment Methods 55
7 Create Payments from Preformats 57
8 Create Payments Using Quick Entry from Preformats 63
A. Correct Quick Entry from Preformat Transactions with Errors 66
9 Create New Outgoing Payments 68
10 Create New Incoming Payments 72
11 Create New Incoming/Outgoing Payments Using Copy 77
12 View Payment Details 82
13 Delete Payments 86
14 Modify Payments 90
15 Verify Payments 94
A. Verify Payments from the Verification Required Tab 96
Require Detail-Level Verification 100
B. Verify Payments from the Payment Detail Form 102
16 Authorize Payments 105
A. Authorize Payments from the Authorization Required Tab 107
Require Detail-Level Authorization 111
B. Authorize Payments from the Payment Detail Form 112
C. Authorize Batches of Payments 115
New Batches Button 119
Update Screen button 119
D. Authorize Offline 121
E. Offline Authorization Tab—Action Buttons 129
17 Release Payments 132
A. Release Payments from the Release Required Tab 134
B. Release Payments from the Payment Detail Form 139
C. Release Batches of Payments 143
New Batches 146
Update Screen 146

Table of Contents
18 Repair Payments 148
19 Print On-Site Cheques 152
A. Print On-Site Cheques from the Print Cheques Tab 154
B. Print On-Site Cheques from the Payment Detail Form 158
20 Void On-Site Cheques 161
A. Void On-Site Cheques from the Print Cheques Tab 163
B. Void On-Site Cheques from the Payment Details Form 165
21 Search/Sort the Payments on a Summary Form 168
Operators 170
22 Print a Summary List of Payments 172
23 Print Payment Details from a Summary Form 174
24 View Payment Totals 176
25 Enter New or View Existing Comments 178
26 View Transaction Flow 181
27 View Transaction History 184
28 Payments Reports and Inquiries 187
A. Reports 189
Report Service Classes 190
Cash Balance Reports 190
Cash Statements Reports 191
Cash Transaction Initiation Reports 192
Offline Authorization Report 193
B. Inquiries 194
Cash Statement Inquiries 195
Canada ACH Inquiries 196
Bank Search Inquiry 196
WorldLink Inquiries 196
1

1 Overview

Overview
This guide provides an overview of the Payments capability in CitiDirect BE
SM
. Descriptions of the major
payment methods currently supported and procedures for creating, verifying, authorizing, modifying, deleting,
repairing and releasing payments for processing are presented.
Also presented are an overview of the process flow that CitiDirect clients can specify for their payment
transactions and descriptions of the reports, inquiries and libraries that support CitiDirect Payments services.
In addition, this guide provides the procedures required to set your preferences for:
1. Default values for information required on payments, report and inquiry forms.
2. The debit and/or credit accounts that appear on your Library Lookup Favorites list.
2

A. Additional Resources

Additional Resources
Basic Guides
In conjunction with this Payments guide, you are encouraged to read the CitiDirect Basics guides, available in
the CitiDirect Basics section of the Learning Center at www.citidirect.com.
The CitiDirect Basics guides provide an overview of CitiDirect, including installation, sign-on procedures,
basic navigation and procedures for customizing the CitiDirect navigation bar and summary forms, specifying
your global user preferences, running reports and submitting inquiries.
Online Help
For general questions while working in CitiDirect BE
SM
, you can use Online Help. Online Help, a
comprehensive self-service capability, contains detailed information and descriptions of terms for all
functionality and services offered through CitiDirect.
You can access Online Help by pressing F1 on your keyboard or by clicking the Help button at the bottom of
the CitiDirect navigation bar.
For help with your current task, click anywhere on the CitiDirect form displayed in your workspace to ensure
that it is active, and then access Online Help.
CitiDirect Customer Support
In addition to Online Help, the following CitiDirect customer support resources are available to you:
www.citidirect.com contains frequently asked questions (FAQs) addressing both the use of the application
and the website. The website also features the Learning Center section where you can access training
support materials anytime.
Customer Service Centers You can contact our CitiDirect BE
SM
Service Representatives, who are available to
support your technical needs, as well as to assist you with general CitiDirect questions. For a list of
representatives in your area, go to the Contacts section of .
3

B. Sign-on to CitiDirect BE
SM

Sign-on to CitiDirect BE
SM
In order to follow all the procedures included in this Payments guide, you must successfully sign on to
CitiDirect BE
SM
.
For sign-on procedures, see the CitiDirect Basics: Getting Started guide, available in the Learning Center at
www.citidirect.com.
4

2 Payments

Payments
The Payments service class in CitiDirect BE
SM
provides you with the convenience of a broad range of
payment methods and real-time access to important transactional information.
Use Payments to enter, modify, delete, verify, authorize, release, repair and/or view payments.
5

A. Local Language Availability

Local Language Availability
CitiDirect BE
SM
lets you view details, execute transactions, produce information reports and perform inquiries
in many local languages. A complete list of the local languages supported by CitiDirect is available on
www.citidirect.com under the About CitiDirect tab in the CitiDirect Platform section.
6

B. Payment Methods

Payment Methods
The Payments service class supports multiple specific payment methods, with each method having one or
more forms depending upon the Local (country- and region-specific) and Global variations.
Subject to the processing capabilities of the Citibank branch, you can enter the following outgoing and
incoming payments from one single point of input.
Outgoing Payment Methods
Incoming Payment Methods
ACH
Cr
edit
/
GIR
O
ACH
Debit
Book
T
r
ans
f
e
r
Advice
to
Receive
Cheque
Book Debit
Cross-Border Funds
T
r
ans
f
e
r
Dr
a
wdo
wn/
ChargeWire
Domestic Funds
T
r
ans
f
e
r
Due
C
u
s
t
omer Adjus
tment
Due Citibank Adjus
tment
Incoming Domestic Funds
T
r
ans
f
e
r
Funds
T
r
ans
f
e
r
Due
C
u
s
t
omer Adjustment Incoming
Mexico Tax
P
a
yment
On-Site Cheque
Pan European ACH
Payroll Cards
Window Payment
SEPA
Faster Payment
7

C. Payment Types

Payment Types
Payment types are variations of a particular payment method. Cashier’s Cheque and Managers Cheque are
examples of payment types that may be available when Cheque is the selected payment method.
Payment types vary depending on the payment method and region or country where the payment is
processed. For a description of the payment types associated with specific payment methods, please refer to
CitiDirect Online Help.
Notes:
The availability of payment methods can vary based on the CitiDirect BE
SM
services assigned to each client,
the access profile assigned to each user and the Citibank branch processing capabilities.
The branch where a payment is processed and the payment method of the transaction determine the
payment types that are available for that transaction.
Once you enter the required key details common to all payment methods, CitiDirect automatically determines
which payment methods and payment types are available to you, as well as the forms and sub-forms that are
needed to process your transaction.
The payment forms and sub-forms presented to you, reflect the particular requirements of a specific
transaction and the country in which the transaction will be processed.
Standard payment methods are presented in this guide. Region-, country- and product-specific payment
methods are presented in the Online Help and in individual guides that are available in the Learning Center at
www.citidirect.com.
8

D. Payments Setup

Payment Setup
CitiDirect lets users customize its services to suit their business needs. Access to many of the services
required to set up CitiDirect is restricted to local Security Managers only. Your assigned access profile
determines whether or not you have access to a CitiDirect service.
When CitiDirect BE
SM
is installed, local Security Managers:
1. Set client preferences, which apply to all users. Examples are base currency, auto-save frequency,
whether or not transaction reference numbers are automatically generated and whether or not the
subsidiary name/ID appears on the Payment Detail form;
2. Specify the flow each payment must follow before it is sent to Citibank for processing. Verification
Required, Authorization Required and Release Required are examples of flow-control requirements;
3. Establish users and assign their access profiles;
4. Ensure that records are created and saved in the CitiDirect Payments libraries that are used for data
input and validation. To see a list of libraries, refer to the Payments Libraries section of this guide.
9

3 CitiDirect Libraries

CitiDirect Libraries
Libraries are separately maintained tables within the CitiDirect database that store information needed to
support data input, validation and processing rules. All Payments-related service classes reference various
CitiDirect BE
SM
libraries.
When you select information from a library lookup list, the relevant information automatically populates the
current field and any related fields, reducing typing time and eliminating typing errors. For example, when you
select a bank name from the Bank Library Lookup list, the related bank address fields are automatically
populated.
Most library lookup lists provide a search feature to enable you to search for and retrieve an entry from a
library.
My Preferences, the CitiDirect service that allows you to set your preferences and customize CitiDirect to
meet your specific needs, provides a feature that enables you to create a Library Lookup Favorites list of the
account numbers that you use most often. For more information, see the Selecting Debit/Credit Account
Library Lookup Favorites section of this guide.
10

A. Library Maintenance

Library Maintenance
Citibank maintains libraries that store information used by all CitiDirect clients. The Currency, Country,
Payment Method, Branch and Account libraries are examples of Citibank-maintained libraries.
Local Security Managers maintain the libraries that store information specific to their client entity. The Account
Familiar Name, Preformat and Ordering Party libraries are examples of client-maintained libraries.
All client-maintained libraries should be populated before you begin using the CitiDirect services that support
Payments. For a description of many of the client-maintained libraries referenced by Payments- related
service classes, see the Payments Libraries section of this guide.
Notes:
1. The libraries list presented in this guide does not include Payments libraries that are region-,
country- or product-specific. Refer to CitiDirect Online Help for a description of any libraries not
included in this guide.
2. If preferences have been set in Client Preference or My Preferences, some fields are pre-populated
when you access the CitiDirect forms used to create a new payment, run a report or submit
an inquiry.
3. Client Preference settings apply to all CitiDirect users within an organization.
4. My Preference settings apply to your sign-on name and ID only.
5. For information about accessing My Preferences to set your preferences, see the Set Your
6. Preferences for Payments section of this guide.
11

B. Payment Libraries

Payment Libraries
An alphabetical list of some of the CitiDirect libraries that support data input and validation for the Payments
service class is provided below. Library availability varies based on product, country, and/or region. Refer to
Online Help for a description of region, country and product specific libraries.
Library Name
Description
Maintenance Responsibilities
Account
Stores all of your entitled Citibank accounts that can be debited or
credited. This library includes a description of the account type, account
number and other information required for transaction processing. The
data stored in this library is used to process transactions and to
allocated credit and expenses.
Citibank enters information into this
library, but clients can add data to some
fields.
Account
Familiar Name
Stores all client-defined familiar names for entitled internal Citibank
accounts (not funding accounts or non-Citibank-managed accounts).
This library identifies the account name that you want to see on reports,
which replaces the legal account name on reports.
Clients maintain this library and all
records are private.
Account Grouping
Stores all group names that clients have defined to group accounts
(debit accounts) for reporting purposes. Certain CitiDirect reports may
be run for account groups when present.
Clients maintain this library and all
records are private.
Account Type
Stores the account types that are available for each country/region. It is
used to support the lookup of account types during payment creation.
Citibank maintains this library.
Bank (Beneficiary
Bank)
Stores information about various banks required for use in transactions.
Data includes bank name and location, as well as routing information.
By providing the processing center with complete details about the non-
Citibank bank parties involved in a transaction, this library is used by
transaction classes to improve straight-through processing.
Beneficiary
Stores the names of all of a client’s beneficiaries (payees) and supports
lookup in the beneficiary fields when creating payments.
Clients maintain this library and all
records are private.
Business Days
Stores information about the business days in each country where
Citibank has branch operational capability.
Citibank maintains this library.
Cheque Number
Maintenance
Stores all the cheque numbers available for on- site cheque payment
transactions. Each library profile lists the available cheque number
range for a specific client/company combination. Use
this library to define input for new cheque number ranges, or to modify,
repair and review existing cheque number ranges.
Clients maintain this library and all
records are private.
Cheque Stock
Maintenance
Stores client-defined cheque stock forms. Each stock form can be
named, the stock print form can be identified and the logo and micro-
line information printed on the cheques can be defined.
Citibank maintains this library.
Customer EAN
Stores all client-defined customer EAN descriptions. It is used to
support lookup of customer EAN descriptions and default values on
payment input forms.
Clients maintain this library and all
records are private.
Date Rolling
Stores the way a payment value date should be rolled, forward or
backward, when it falls on a holiday, weekend, or after cutoff time as
defined by a CitiDirect client. The library uses the types of payments
(e.g., salary payments and tax payments), defined by Citibank in the
Document Type library, to define date-rolling library records.
Clients maintain this library and all
records are private.
Delivery Method
Stores the cheque delivery methods available by country and branch. It
is used to support the lookup of delivery methods during payment
creation.
Clients maintain this library and all
records are private.
Document
Description
Stores the document types that are available for cheques that can be
included with payment transactions. It is used to support the lookup of
document types during payment creation.
Clients maintain this library and all
records are private.
Document Type
Stores the document types that are available for cheque processing. It
is used to support the lookup of document types during payment
creation.
Citibank maintains this library.
Employee
Stores the names of all client employees, who can be paid with a salary
payment. This library is used to validate the employee-related detail
information that is needed when creating a salary payment transaction.
Clients maintain this library and all
records are private.
12

Payment Libraries (Cont'd)
Library Name
Description
Maintenance Responsibilities
Holiday (Branch/
Legal Vehicle)
Stores holidays in various branches and/or legal vehicles. It is used by
transaction services to evaluate processing availability and to establish
value and process-date parameters.
Citibank maintains this library.
Holiday
(Country)
Stores holidays in various countries. It is used by transaction services to
evaluate processing availability and to establish value and process-data
parameters.
Citibank maintains this library.
Holiday
(Currency)
Stores currency holidays. It is used to prevent a payment from
processing on a currency holiday. This library is currently being used by
Europe and Canada.
Citibank maintains this library.
Instruction
Code
Stores the instruction codes (and corresponding descriptions) that can
be used in the Instruction Code field for a branch and a payment
method. This library is used to support lookup in the Instruction Code
field when creating payments for Domestic Fund Transfers, Cross-
Border Fund Transfers and Book Transfers for European branches.
Citibank maintains this library.
Invoice Type
Stores all client-defined invoice forms, which are used to format the
invoice data entry form and define any expressions or totals that apply
to that form for invoice information that is included with
a payment. Based on back-end processing system functionality and/or
requirements, the number of columns that can be defined may vary by
region or country.
Clients maintain this library and all
records are private.
K-Symbol
Stores descriptive text corresponding to K-Symbol codes (indicating
economic nature). It is used
to select valid K-Symbol codes when creating payments.
Citibank maintains this library.
Licensee
Stores licensee names and corresponding licensee IDs. It is used to
select valid licensee IDs and names for a payment.
Citibank maintains this library.
Location (Payable
at Location)
Stores cheque-delivery locations, other than Citibank branches, that are
available for a country or region. It is used to support the lookup of
locations when creating payments.
Citibank maintains this library.
Nature of
Payment
Stores nature of payment code descriptions, which are used to codify
the nature of a payment for Central Bank Reporting purposes in Europe.
Citibank maintains this library.
Holiday
(Country)
Stores holidays in various countries. It is used by transaction services to
evaluate processing availability and to establish value and process-data
parameters.
Citibank maintains this library.
Holiday
(Currency)
Stores currency holidays. It is used to prevent a payment from
processing on a currency holiday. This library is currently being used by
Europe and Canada.
Citibank maintains this library.
Instruction
Code
Stores the instruction codes (and corresponding descriptions) that can
be used in the Instruction Code field for a branch and a payment
method. This library is used to support lookup in the Instruction Code
field when creating payments for Domestic Fund Transfers, Cross-
Border Fund Transfers and Book Transfers for European branches.
Citibank maintains this library.
Invoice Type
Stores all client-defined invoice forms, which are used to format the
invoice data entry form and define any expressions or totals that apply
to that form for invoice information that is included with
a payment. Based on back-end processing system functionality and/or
requirements, the number of columns that can be defined may vary by
region or country.
Clients maintain this library and all
records are private.
K-Symbol
Stores descriptive text corresponding to K-Symbol codes (indicating
economic nature). It is used
to select valid K-Symbol codes when creating payments.
Citibank maintains this library.
Licensee
Stores licensee names and corresponding licensee IDs. It is used to
select valid licensee IDs and names for a payment.
Citibank maintains this library.
Location (Payable
at Location)
Stores cheque-delivery locations, other than Citibank branches, that are
available for a country or region. It is used to support the lookup of
locations when creating payments.
Citibank maintains this library.
13

Payment Libraries (Cont'd)
Library Name
Description
Maintenance Responsibilities
Nature of
Payment
Stores nature of payment code descriptions, which are used to codify
the nature of a payment for Central Bank Reporting purposes in Europe.
Citibank maintains this library.
Non-Citibank
Managed
Accounts
Stores Non-Citibank customer accounts that Citibank Asia manages. It
is used to identify customers debiting their Citibank Funding Account.
Clients in Asia use this library when creating payments from non-
Citibank accounts.
Citibank maintains this library.
Ordering Party
Stores the name, address, ID type and ID for various ordering parties,
which are used when creating payments. The ordering party is the party
on whose behalf the payment is being made. This may be
a party that is making the payment from its own account or from the
account of another entity to which the ordering party has access.
Clients maintain this library and all
records are private.
Payment
Description
Stores standard payment descriptions text that you can access easily at
run-time by simple entering a code, which then expands to the text held
in this library. This library is used to support lookup of description text
during payment creation.
Clients maintain this library and all
records are private.
Payment Type
Stores the payment types that are available for each country or region.
It is used to support the lookup of payment types when creating
payments.
Citibank maintains this library.
Purpose of
Funds
Store the purpose of funds codes, the description and a detailed
explanation of the code, which is used during payment creation.
Citibank maintains this library.
Purpose of
Funds Sub-Code
Stores the purpose of fund sub-codes, the description and a detailed
explanation of the code, which is used during payment creation.
Citibank maintains this library.
Preformat
Stores information about a payment that can be re-used to create future
payments. This library supports the lookup and selection of preformats.
There are three types of preformats: Full, Beneficiary and Template.
Clients maintain this library and all
records are private.
Preformat
Group
Stores the group names that clients have defined to group multiple
preformat records. It is used to support preformat creation and
organization.
Clients maintain this library and all
records are private.
Priority
Stores the priority codes that are available for each country or region,
which are used to support the lookup of priority codes when creating
payments.
Citibank maintains this library.
Reason Code
Stores reason code descriptions, which are used to support the lookup
of reason codes when creating payments.
Citibank maintains this library.
Subsidiary
Identifier
Stores information about subsidiaries, including
their unique identifiers, name and address. It is used when creating
preformats.
Clients maintain this library and all
records are private.
Tax Category
Stores the tax categories that are available for each country or region,
which are used to support the lookup of tax categories when creating
payments.
Citibank maintains this library.
Tax Code
Stores the tax codes that are defined for each country or region, which
are used to support the lookup of tax codes when creating payments.
Citibank maintains this library.
Transaction
Code
Stores transaction codes that are available for each country, which are
used during payment creation.
Citibank maintains this library.
Transaction
Nature
Stores transaction nature codes and their descriptions, which are used
during payment creation.
Citibank maintains this library.
Transaction
Type
Stores transaction types that are available for each country or region,
which are used to support look up of transaction types when creating
payments.
Citibank maintains this library.
VAT Type
Stores value-add tax (VAT) types that are available for each country or
region. It is used to support lookup of VAT types when creating
payments.
Clients maintain all records in this
library.
WHT Type
Stores withholding tax (WHT) types that are available for each country
or region. It is used to support lookup of WHT types when creating
payments.
Clients maintain this library and all
records are private.
14

4 My Preferences

My Preferences
Use My Preferences to set your preferences for the Payments service class and to create a Library Lookup
Favorites list of the debit and credit accounts that you use most often.
Notes:
For step-by-step procedures for setting your preferences, please refer to the CitiDirect Basics: Setting Your
Preferences guide, available in the Learning Center at www.citidirect.com.
Make sure that you set your Global preferences, which include date format, amount format, default menu and
default application.
All preferences that you define are specific to your CitiDirect sign-on name and ID and cannot be shared with
or viewed by others.
15

A. Available Preference Criteria
for Payments

Available Preference Criteria for Payments
The preference criteria available on the My Preferences form for payments are listed in the table below.
Preference Category
Available Preference Criteria
Description
CitiDirect Default Settings
Edit Defaults
Debit Account
The Account Familiar Name and Account
Number that appears on payments forms.
Not Specified
Credit Account
The Account Familiar Name and Account
Number that appears on payments forms.
Not Specified
Company
The default company that appears on the
Payment Detail form.
Not Specified
Ordering Party
The Ordering Party Name that appears on the
Payment Detail form.
Not Specified
Default Subsidiary
Identifier
The Default Subsidiary Identifier that appears
on the Payment Detail form. This option is
available if set in Client Preferences.
Not Specified
Use This Currency
For Next Payment
The currency that is to be used for the next
payment when the indicator is selected.
Not Specified
Other
Confidential
Payments
Select the Confidential Payments checkbox if
you want to be able to indicate that a payment
is confidential. If Confidential Payments is not
selected, the Confidential Payments checkbox
does not appear on the payments forms. Only
entitled users can change this preference-
criteria setting.
No (not selected)
Override Payables
Preference Matrix
Select the Override Payables Preference Matrix
checkbox if you want to have the ability to
override the Payables Preference Matrix. If
Override Payables Preference Matrix is not
selected, you will not be able to change any
payable preferences on Payments forms.
No (not selected)
Retain Data Between
Transactions
Select the Retain Data Between Transactions
checkbox if you want CitiDirect to use the same
payment method form, the same checks from
the same account and the same payment data.
No (not selected)
Auto-generate
WorldLink® reports
Select one or several reports to be auto-
generated.
Not Specified
Include Latin American
Creation Methods from
Outside CitiDirect
Includes payment methods that are specific to
Latin America, not CitiDirect.
Yes
Library Lookup
Favorites
Credit Account
Select one or several accounts to add to your
Favorites list on the Payment Detail form.
Not Specified
Debit Account
Select one or several accounts to add to your
Favorites list on the Payment Detail form.
Not Specified
16

B. Library Lookup Favorites

Library Lookup Favorites
The Library Lookup Favorites feature, available as criteria on the My Preferences form, allows you to create a
list of frequently used debit and credit account numbers that you can easily access when you are entering
payment details.
When you set your Library Lookup Favorites, a blue down arrow will appear in the Library Lookup button
next to the debit or credit account fields on the Payment Detail form, indicating that you have created a list of
library lookup favorites.
17

5 Payment Forms

Payment Forms
All processes are performed using a summary form that displays key fields of information or a detail form that
contains all of the information required to make a payment to a beneficiary (payee). You can also access
various sub-forms to enter additional information for a specific payment transaction.
18

A. Payments Summary Form

Payments Summary Form
Summary forms present data in a tabular format, much like a spreadsheet. Individual payment records are
displayed in rows within the table, and individual data elements related to each payment are displayed as
columns.
Use the Payments Summary form to input, view and act on a batch of transactions or an individual
transaction.
1. The tabs within the summary form are determined by the actions that must be taken on a payment or
a group of payments.
2. The entitlements included in the access profile assigned to you by your local Security Managers
determine the tabs that you see and the payment transactions that you can take action on.
19

Payments Summary Form (Cont’d)
Tabs
Click a tab to activate it. All payments that are in the same state within your Payments flow-control process
are listed on the appropriate tab. Your access profile determines the tabs that you see when you are working
in Payments.
Action Buttons
The action buttons displayed on the Payments Summary form can vary based on the active tab. (The buttons
shown in this example appear on the Input/Modify tab.)
Submit Button
Click the Submit button to create one or more payment transaction records in the Payments database.
1. Each selected payment is assigned a system- or user-defined transaction reference number, and the
payment details are validated against CitiDirect validation rules.
2. If the payment passes validation, it moves to its next state as determined by your payment flow-
control requirements. If a payment fails validation, its status is updated to Invalid and the payment
record appears in red text on the Input/Modify tab.
20 21

Payments Summary Form (Cont’d)
3. If your flow-control settings indicate that verification, authorization and release are required, the
system automatically releases the payments to the processing branch and updates the status of each
payment to Released.
New Button
Click the New button to create a new payment transaction. Your access profile determines the creation
methods you can use to create new payments:
1. From Preformat
2. Quick Entry From Preformat
3. New Outgoing
These options are also available directly on the navigation bar.
Delete Button
Click the Delete button to delete the selected payment transactions.
Go to Details Button
Click the Go to Details button to view all of the details for the selected payment transactions. The Payment
Detail form appears. All details of the first selected payment are displayed. For more information, see the
Payment Detail Form section of this guide.
Other Options Button
The Other Options button that appears in the lower right of the Payments Summary form contains a menu
that provides additional actions you can perform.
22 23

Payments Summary Form (Cont’d)
1. Click the Other Options button and select the Update Screen command to refresh the summary form
list with the most recent data.
2. Other Options menu options are presented throughout this guide. Menu options can vary based on
the status of a transaction and the tab within the Payments Summary form where the payment
transaction is listed.
24

B. Payment Detail Form

Payment Detail Form
The Payment Detail form displays all the details of the payment, along with any corresponding actions that
you may need to perform on that payment. Below is an example of the Book Transfer Payment Detail form.
Note: The fields in the below screen can vary based on the Payment Initiation Incoming or Outgoing or
Payment Method and other parameters.
1. Use the Payment Detail form to enter and submit the details of new payments and to manage and act
on individual payments.
2. The Payment Detail form can only be accessed from a summary form. However, once in a detail
form, you can move between multiple payments by clicking the Next button.
For every payment that you create, you are required to enter several key details that are common to all
payments. A red asterisk identifies required key detail fields.
Payment Method
The details you enter enable CitiDirect to automatically determine exactly which processing options (payment
methods) are available to you, as well as the specific forms and sub-forms that are needed for each available
payment method.
All available processing options appear as selections when you click the dropdown arrow in the Payment
Method field on the Payment Detail form. Once the payment method is selected, CitiDirect is able to
25 26

Payment Detail Form (Cont’d)
determine the available payment types, load the appropriate Payment Detail form and sub-forms, apply the
appropriate edits, and determine the appropriate product-processing system.
Payment Type
The Payment Type field is located in the payment-method selection section of the Payment Detail form.
1. The selected payment method determines whether or not the payment type field is available.
2. The list of payment types may vary based on region or country.
3. Payment types are displayed in the language you selected when you signed on to CitiDirect.
Payment Amount
The Payment Amount field is formatted for the number of decimal places required for the selected payment
currency, and it is checked against any amount limits that may be specified in your access profile. Amounts
are evaluated using the exchange rate of the currencies.
Region and/or country level limits can also be defined for the payment amount. The most common region- or
country-specific requirement is a maximum number of digits for the payment amount value. This maximum
value limitation is performed when you click the Submit button to submit the payment for processing, not
when you enter the value in the Payment Amount field. You cannot enter a negative amount in this field.
Subsidiary Identifier/Name
This subsidiary information is used to identify a client subsidiary within a payment transaction. This
information allows you to group payment transactions on payment-transaction initiation reports by subsidiary.
A client preference setting determines whether or not the Subsidiary Identifier/Name fields appear on the
Payment Detail form.
27

Payment Detail Form (Cont’d)
Transaction Reference Number
To identify the payment, each CitiDirect payment transaction must have a transaction reference number. The
method by which the transaction reference number is determined may vary by region. The following rules are
consistent across all regions:
The transaction reference number assignment is dictated by a client preference setting, which indicates
whether it is fully system-assigned, partially system-assigned or manually entered.
If the transaction reference number is fully system-assigned, the reference number is generated and stored
when you click the Submit button on the Payment Detail form; however, the assigned reference number is not
visible until the transaction is displayed on a different tab within the Payments Summary form (e.g.
Authorization Required).
If the transaction reference number is partially system-assigned, it is composed of a combination of a
predetermined set of characters, based on a client preference setting, and a suffix that you must enter in the
appropriate field on the Payment Detail form when you create a new payment transaction.
If the transaction reference number is manually entered, you must enter it in the appropriate field on the
Payment Detail form when you create a new payment transaction.
Note:
To avoid duplicate reference numbers, CitiDirect generates a new internal reference number when a payment
selected on the Repair Required tab is repaired and resubmitted.
Value Dates
As part of the payment creation process, CitiDirect automatically computes a default value date for each
payment based upon parameters, such as cutoff time or number of disposition days that apply to the
combination of branch, payment method and currency of the payment.
Library Lookup Favorites Button
If the library lookup button for the debit and/or credit account field contains a blue down-arrow, a Library
Lookup Favorites list has been created. This feature enables you to select from a list of the account numbers
that you use most frequently. For more information, see the Select Debit/Credit Account Library Lookup
Favorites section of this guide.
28 29

Payment Detail Form (Cont’d)
Multiple-Line Button
Each field on a Payment Detail form can display a specific number of characters. When a field, such as
Payment Details or Bank Details, contains more information than is currently visible, a multiple-line button
appears next to that field. When the multiple-line button is present, click it to see all information in the field.
Sub-Forms
Sub-forms allow you to enter additional information pertaining to a payment. In general, the display of a sub-
form is triggered when you click a show sub-form link or button. For example, CitiDirect users in certain
regions and countries have the option to enter bank details, central bank reporting information and detail
information about invoices being paid.
1. When a sub-form link or button is clicked, the sub-form is displayed in a separate window to allow you
to enter the additional information.
2. In certain cases where you can choose one of a specific set of sub-forms, the available sub-forms are
displayed in a dropdown list. To access the sub-form, select the desired sub-form first and then click
the adjacent link.
Actions Buttons
The action buttons displayed on the Payment Detail form can vary based on the tab within the Payments
Summary form from which the detail form was accessed. The action buttons shown in this example appear
when the Payment Detail form is accessed from the Input/ Modify tab.
Submit Button
Click the Submit button to create one or more payment transaction records in the Payments database. Each
payment is assigned a system- or user-defined transaction reference number, and the payment details are
validated against CitiDirect validation rules.
1. If the payment passes validation, it moves to its next state as determined by your payment flow-
control requirements (e.g., Verification Required, Authorization Required, or Release Required).
2. If your flow-control settings indicate that verification, authorization and release are required, CitiDirect
automatically releases the payment to the processing branch and updates its status to Released.
30

Payment Detail Form (Cont’d)
Submit and Create Preformat Button
If you are entitled to submit payments and create preformats, the Submit and Create Preformat button is
available at the bottom of the Payment Detail form.
1. When you click the Submit and Create Preformat button, the payment information is validated.
2. Once validated, the payment proceeds to its next state in your payments process, as determined by
your flow-control requirements. The payment details are saved as a preformat record.
3. The preformat record moves to its next state as determined by your preformat library authorization
requirements.
4. After the preformat record passes all authorization requirements, it is stored in the preformat library,
where it can be selected and used as a template for creating new payments.
Submit and Copy Button
Click the Submit and Copy button to submit the current transaction for processing and to copy all payment
details, except the value date. The Payment Detail form remains open to allow you to submit another payment
transaction containing the copied payment details. If the transaction reference number is not automatically
generated, you must update it for the new payment transaction.
Copy Button
Click the Copy button to copy the payment details that are currently displayed on the Payment Detail form,
without submitting the current transaction. All of the payment details are copied except the value date. You
can then modify payment details as required to create a new payment transaction. If the transaction reference
number is not automatically generated, you must update it. Once you are sure that all payment details are
correct, click the Submit button to submit the new payment for processing.
Delete Button
Click the Delete button to delete the payment transaction that is currently displayed on the Payment Detail
form.
The Delete button is not active when you are using the Payment Detail form to create new payment
transactions, or when you have accessed the Payment Detail form from the View tab.
31

Payment Detail Form (Cont’d)
Next Button
Click the Next button to see the details of the next selected payment. This button is active when multiple
payments were selected on a tab within the Payments Summary form. If the Payment Detail form contains the
details of the last selected payment, clicking the Next button returns you to the active tab.
Return to Summary Button
Click the Return to Summary button to return to the active tab within the Payments Summary form.
If you are entering new payments or modifying or repairing existing payments, the Save? Dialogue box
appears.
Click the Yes button to save any changes. The statuses of new payments are changed to Input, and they are
listed on the Input/Modify tab. If you are modifying existing payments, the payment information is listed in
orange text to indicate that the payment details may be outdated.
Other Options Button
Click the Other Options button to access a menu. The available menu items, which are described in the
following table, may vary based on the tab from which the Payment Detail form is accessed.
33 32

Payment Detail Form (Cont’d)
Menu Option
Select
t
o
Edit Account Number
Change
the Debit Account Number
s
t
or
ed
in a
preformat
.
Ent
e
r
/
V
i
e
w Comments
Enter new or view existing comments that are
at
t
ached
to
a p
a
yment
.
Print
De
t
ail
Print the
de
t
ails
of
the payment
tr
ansaction.
Run TI
De
t
ail
R
epor
t
f
or
Single
It
em
Runs the Transaction Initiation
De
t
ail
R
epor
t
for
the selected
tr
ansaction.
View Error Messages
View any errors associated with the payment
tr
ansaction.
View Offline
B
a
t
ch
De
t
ails
View
de
t
ails
of
the
offline b
a
t
ch,
including the b
a
t
ch name, creation
time
,
s
t
at
us
and authorizer name.
View Submission
S
t
at
us
De
t
ails
View the submission
s
t
at
us
of
the payment, including the user ID
of the
user who
submit
t
ed
the transaction, the date and time
of
submission, and any
sub-s
t
a
t
u
s
.
View Transaction Flow
View a
list of
transaction flow
s
t
at
e
s
that the transaction
mus
t
go through, based
upon the current data values
of
the payment, before it is sent
to
Citibank
for
processing (including its current
s
t
at
e
)
.
View Transaction
His
t
ory
View the his
t
ory
of
all actions
t
a
k
en
on a payment, including the name o
f
the
CitiDirect user who performed each action and the date and time
the
action was
t
a
k
en.
34

6 Outgoing and Incoming Payments

Outgoing and Incoming Payments
The major difference between the Payment Detail forms for incoming and outgoing payments is that a debit
account must be selected for outgoing payments, while a credit account must be selected for incoming
payments.
35

A. Outgoing Payment Methods

Outgoing Payment Methods
ACH Credit/ GIRO Transfer — Payments made electronically to the beneficiary’s bank, which are routed
through local clearing systems that traditionally handle either small or large value but large volumes of
transactions. ACH is primarily known as a clearing method for USD transactions; however, countries with
similar clearing systems may refer to these transactions as ACH payments, GIRO payments, direct payments,
etc. For this document, the term ACH is used to refer to all of these local clearing systems, regardless of
country.
Book Transfer — A specific type of a Funds Transfer transaction where a transfer is made between two
accounts in the same Citibank branch. By definition, this type of transfer is a local transaction because it
occurs within a single country and currency. Since a Book Transfer generally occurs within a single Citibank
branch, the bank name and branch information needed for a typical Funds Transfer transaction are not
required.
Notes:
In some cases, a Book Transfer can occur between accounts held at Citibank within the same country, not
necessarily same branch.
In some cases, Book Transfers cannot be done between branches in a single country.
Book Transfers in the United States can be for more than two parties. A payment can be considered a Book
Transfer when the first account number after the debit account branch and the debit account branch are from
the same branch.
Cheque — Paper-based payments generated from an electronic instruction. All cheques generated through
Payments result in the creation of a:
1. WorldLink® Payment Services cheque;
2. PayLink® cheque printed at a Citibank processing center and sent directly to the beneficiary or to the
initiating customer;
3. Bank Draft in Canada
All cheques are drawn on local branches around the world.
Cross-Border Funds Transfer — Payments made electronically to the beneficiary’s bank. They can be
routed through several standard methods, depending on the currency being paid and the bank that is
processing the transaction.
Domestic Funds Transfer — Payments made electronically to the beneficiary’s bank using a domestic/ local
processing system to process the transaction.
Due Citibank Adjustment — A WorldLink® Payment Services payment method used to send additional
funds to Citibank. It is normally used due to an under-remittance on an earlier foreign exchange transaction.
Funds Transfer — A payment made electronically to a beneficiary which can be routed through several
standard methods.
Mexico Tax Payment — A payment method used to make annual and provisional tax payments using a
dynamic template provided by the Mexican Government.
36 37

Outgoing Payment Methods (Cont’d)
On-Site Cheque — A paper-based payment generated from an electronic instruction. On-Site cheques will
be printed at the customer’s location rather than at a Citibank processing center.
Pan-European ACH — A payment method used to create low-value, high-volume, non-urgent transactions in
Europe. It is based on the Domestic Funds Transfer and Cross-Border Funds Transfer transactions. Pan-
European ACH payments are rerouted through the Step 2 clearing system and are used for creating
transactions for values lower than or equal to EUR 12,500.
Payroll Cards — Customers instruct Citibank to debit the customer’s account (in local currency) and credit
one or more individual (employee) card local accounts.
Notes:
1. To use the Payroll Card payment method, you must first create a Domestic Funds Transfer for the
sum of the payroll payments. On the same day, create a Payroll Card payment that specifies the
individual accounts to be paid.
2. Payroll Card payments are specific to Kazakhstan, Romania, Russia and the Ukraine.
SEPA — A credit transfer or priority payment made electronically to a beneficiary bank within the SEPA
(Single Euro Payments Area).
Notes:
1. The SEPA zone comprises the 31 countries of the Greater European Area, as listed: Austria,
Belgium, Britain, Bulgaria, Cyprus, Czech Republic, Denmark, Estonia, Finland, France, Germany,
Greece, Hungary, Iceland, Ireland (Republic of Ireland), Italy, Latvia, Liechtenstein, Lithuania,
Luxembourg, Malta, Netherlands, Norway, Poland, Portugal, Romania, Slovenia, Spain, Sweden and
Switzerland.
2. Under SEPA, a basic credit transfer in Euro must have a maximum execution timeframe of three
banking days.
Faster Payment — A payment method where same-day payments are processed in near-real-time to reduce
clearing times on electronic payments. This is available in the United Kingdom.
Window Payments — A payment method used to initiate a cash-based payment within Mexico, where the
funding currency is the same as the payment currency. Cash-based payment instructions are sent to the bank
with details about the intended transaction and the order can be delivered to the specified branch.
38

B. Incoming Payment Methods

Incoming Payment Methods
The incoming payment methods in CitiDirect BE
SM
are described below.
ACH Debit — Incoming payments made electronically from a debit party to the Citibank customer. The
payments are routed through local clearing systems that traditionally handle large volumes of transactions of
either small or large value.
Advice to Receive — Incoming payment method that allows customers to initiate an electronic message to a
beneficiary bank advising them of funds to be received on a particular day. The customer initiates an Advice
to Receive. CitiDirect creates and sends a message to the back-end systems for forwarding to the appropriate
beneficiary bank.
Book Debit — Payment instructions to Citibank are made electronically to the debit party account using a
domestic/local processing system to process the transaction.
Drawdown/ChargeWire — An incoming payment request made electronically from a debit party to the
Citibank customer, using a domestic or local processing system to process the transaction.
Due Customer Adjustment — A WorldLink® Payment Services payment method that can be initiated as a
result of an FX Contract Sell Back transaction, or as a mechanism for the customer to instruct Citibank on
what to do with a balance that is external to CitiDirect BE
SM
(e.g., from the stop or cancellation of an FX
payment that was created outside of CitiDirect).
Incoming Domestic Funds Transfer — Payments made electronically from a debit party’s bank to a
CitiDirect customer using a domestic or local processing system to process the transaction.
Note:
The CitiDirect services assigned to each client and the access profiles assigned to each CitiDirect user
determine the available incoming and outgoing payment methods. Payment methods are also limited by the
processing capabilities of each Citibank branch.
Due Customer Adjustments Incoming — A WorldLink Payment Services payment method that is:
1. An instruction to Citibank regarding a balance which is external to Citibank;
2. A result of a Stop or Cancellation of an FX payment transaction that was created outside of CitiDirect;
3. An adjustment that is a result of an FX contract Sell Back transaction.
39

7 Create Payments from Preformats

Create Payments from Preformats
Preformats, or templates, help users initiate repetitive payments more efficiently. In order to create payments
from preformats, valid preformats must exist in the preformat library. Preformats are created and saved
directly in the preformat library or by clicking the Submit and Create Preformat button on the Payment Detail
form when creating new payments.
CitiDirect supports the following types of preformats:
Full – Limited Modifications — All data fields, with the exception of Value Date or Processing Date (as
applicable), Payment Amount, Payment/Addenda Details, Beneficiary Reference, and Bank Details, are
protected/locked and cannot be modified.
Predefined Beneficiary — All fields containing beneficiary-related data items are protected/locked and cannot
be modified.
Editable Template — All fields are populated with the values saved with the preformat, but they can be
modified.
Notes:
1. Flow-control requirements for payments created from preformats apply to payment transactions
created from full preformats only. A payment created from a beneficiary preformat or a template
preformat is subject to the flow-control requirements defined for free-form entry payment transactions.
2. Your assigned access profile determines whether or not you can create preformats and the types of
preformats you can create.
Create a new payment from preformats by following the steps below.
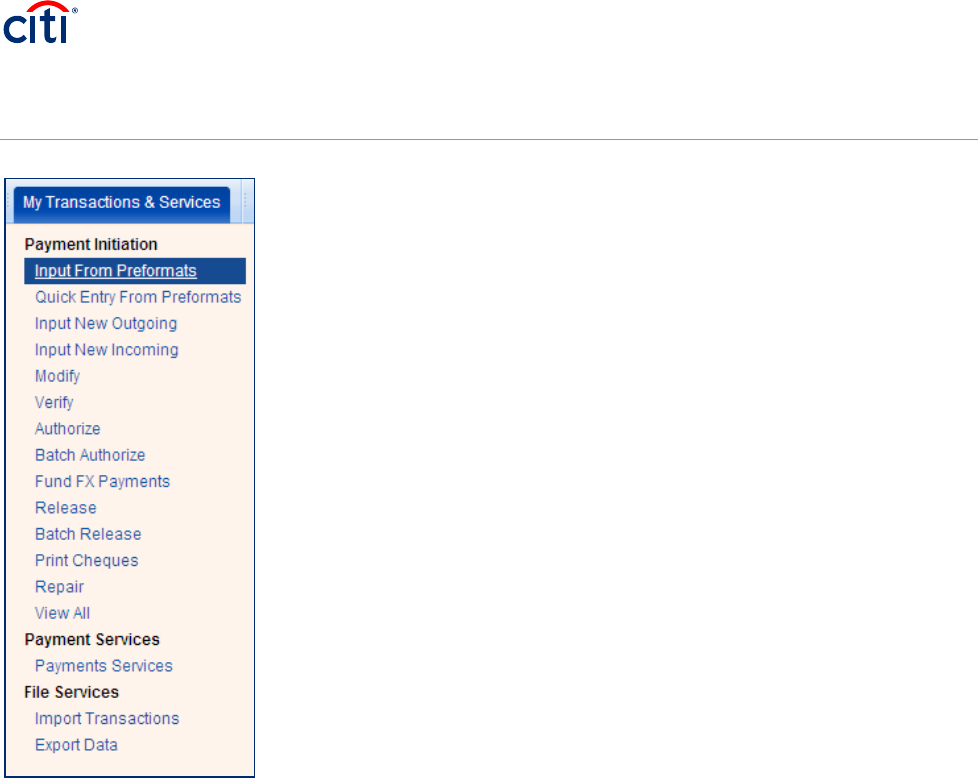
1. On the CitiDirect navigation bar, click Payments and then click Input From Preformats. You can also
access this option by clicking the New button on the Input/Modify tab.
40
Create Payments from Preformats (Cont’d)
A Search Definition Dialog box appears.
41

Create Payments from Preformats (Cont’d)
2. Enter search criteria to find the preformats you want to use to create new payments and click the Run
Search button.
1. A Library Look Up Dialog box displays that shows all preformats that match your search criteria.
Select the desired preformat and click the OK button.
The Payments Summary form displays with the Input/Modify tab active.
42

Create Payments from Preformats (Cont’d)
2. Proceed with one of the following steps:
Modify fields directly on the Input/Modify tab as required, then select all completed transactions and
click the Submit button. Modifiable fields will vary based on the type of preformat you are using.
Click the Go to Details button. The details of the first selected preformat are displayed on the
Payment Detail form. Make any necessary changes and click the Submit button to submit the
current payment for processing. The details of the next selected preformat appear. Repeat this
process until all payments are submitted.
To change the debit account information stored in the preformat
On the Payment Detail form, click the Other Options button.
Select the Edit Account Number command. The Edit Account Number dialog box appears.
Click the library lookup button, select a new debit account number and click the OK button.
Notes:
1. Your organization may have defined a maximum allowable payment amount for preformats. If the
preformat you selected to create this payment is subject to a maximum allowable payment amount
and the payment amount exceeds that maximum, an error message is displayed. You must change
the payment amount before the payment can be submitted for processing.
43 44

Create Payments from Preformats (Cont’d)
2. If you decide that you do not want to create a payment using the details of the preformat that is
currently displayed on the Payment Detail form, click the Next button to view the details of the next
selected preformat.
3. If the details of the last selected preformat are displayed, clicking the Next or Submit buttons returns
you to the Input/Modify tab.
4. For procedures for using the Submit and Create Preformat and Submit and Copy features on the
Payment Detail form, please refer to the Create New Outgoing Payments section of this guide.
45

8 Create Payments Using Quick Entry
from Preformats

Create Payments Using Quick Entry from
Preformats
If you are entitled to create payments from preformats Quick Entry From Preformats appears on the
CitiDirect navigation bar. Use this feature to create numerous repetitive payments quickly and efficiently.
Your assigned access profile determines the preformats you can access.
Create new payments using Quick Entry From Preformat by following the steps below.
1. On the CitiDirect navigation bar, click Payments, and then click Quick Entry From Preformats.
You can also access this option by clicking the New button on the Input/Modify tab.
A new Input/Modify form appears.
46
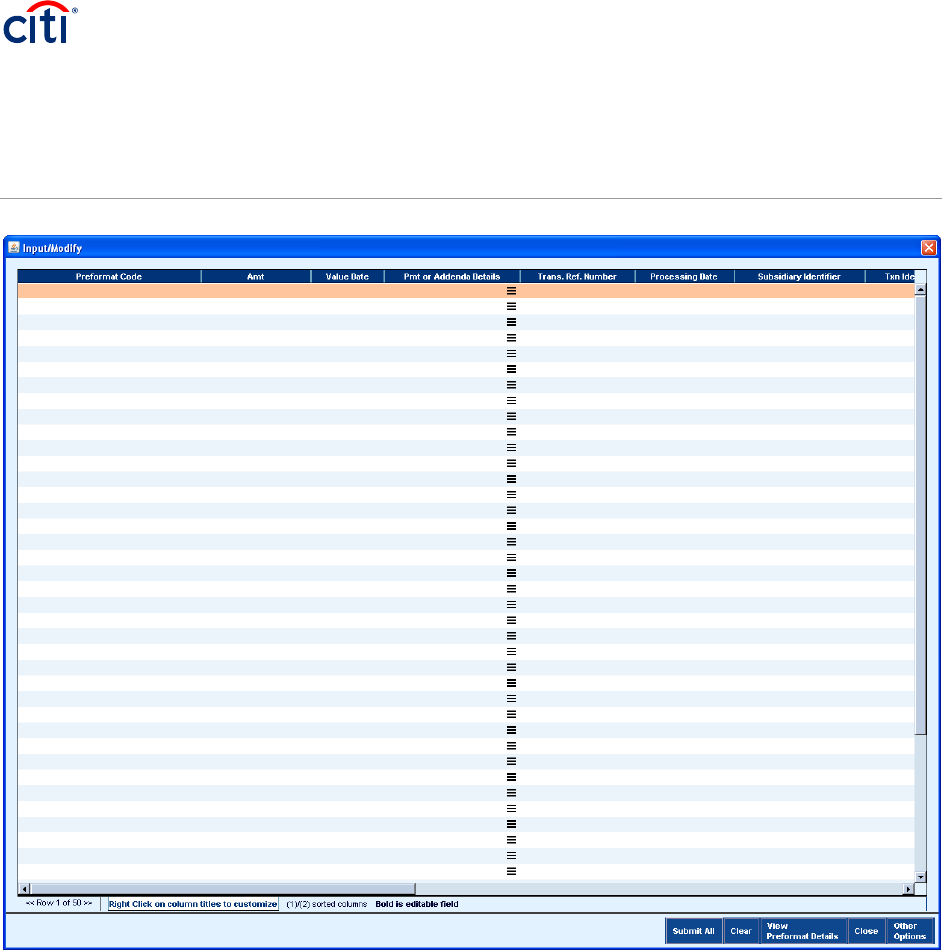
Create Payments Using Quick Entry from
Preformats (Cont’d)
2. In the Preformat Code field, enter the code of the preformat you want to use to create the
payment. You must enter a valid preformat code (for a preformat stored in the preformat library).
3. Enter payment details in the appropriate fields on the Input/Modify form. Press the tab key to
move from field to field. When you have entered information in the last field in one row, pressing
the tab key moves you to the next row.
4. When the details of all payments have been entered, click the Submit All button. All valid
payments move to the next step in the payment process, as defined by your flow-control
requirements.
47

A. Correct Quick Entry from Preformat
Transactions with Errors

Correct Quick Entry from Preformat
Transactions with Errors
After you click the Submit All button, any payments containing errors remain on the Input/Modify form,
and the payment information appears in red text.
1. On the Input/Modify form, select the row containing the payment.
2. Click the Other Options button, and then click the View Error Messages command.
3. Review any errors in the payment.
4. Make any required changes directly on the Input/Modify form.
5. If necessary, repeat steps 2, 3 and 4 to correct all payments with errors (listed in red).
6. Click the Submit All button to resubmit all corrected payments.
48

9 Create New Outgoing Payments

Create New Outgoing Payments
Your assigned access profile determines whether or not you can create new outgoing payments as well
as the accounts, payment methods, payment types, currencies, etc. that you can access.
Create a new outgoing payment by following the steps below.
1. On the CitiDirect navigation bar, click Payments and then click Input New Outgoing. You can also
access this option by clicking the New button on the Input/Modify tab.
A Payment Detail form appears.
2. The Preformat Code field should be left blank when creating a new outgoing payment; however, if
you are going to submit and create a preformat, a preformat code is required.
3. The Debit Account Number/Currency/Name field defaults to the value previously specified in your
preferences. If you are entitled to multiple accounts and you want to change the debit account,
clear the field, click the library lookup button and select a different account number.
4. The Payment Currency field defaults to the value previously specified in your preferences. If you
are entitled to create payments for multiple currencies and you want to change the payment
currency, clear the field, click the library lookup button and select a different currency. The
Currency Library Lookup will only list currencies that are supported by the branch of the debit
account.
5. In the Payment Amount field, enter the amount of the payment in the selected currency.
6. In the Payment Method field, click the library lookup button. A Payment Method dialog box
appears.
49

Create New Outgoing Payments (Cont’d)
Note: Your Solution Package, Access Profile, Payment Currencies and process capabilities of Citibank
branch will the available payment methods for you.
1. Select a payment method and click the OK button. The Payment Detail form expands to display
data input fields specific to the selected payment method.
2. Based on the selected payment method, currency, etc., the Payment Type field may be available.
If so, click the dropdown arrow and select a payment type, if applicable.
3. The Subsidiary Identifier/Name field defaults to the value previously specified in your preferences.
If you are entitled to select multiple subsidiaries, clear the field, click the library lookup button and
select a different subsidiary identifier/name. These fields are only available if set in client
preferences.
4. Complete all required fields and any optional fields for the payment. A red asterisk (*) identifies all
required fields. Step-by-step procedures for completing the Payment Detail form for each
payment method, by region and country, are available in CitiDirect Online Help.
Notes: For procedures for specifying your preferences for the debit account, payment currency,
subsidiary identifier / name, etc., refer to the Set Your Preferences for Payments section of this guide.
Proceed with one of the following steps.
Click the Submit button. CitiDirect validates each data item. Once validated, the payment moves to the
next step in the payment process flow, as defined by your flow-control requirements. If the payment
does not pass CitiDirect validation, its status is changed to Invalid and it is listed on the Input/Modify
tab.
Click the Submit and Copy button to submit the current payment transaction for processing and to
copy all transaction details, except the value date. The payment details remain on the Payment Detail
form to allow you to create a new payment using the copied transaction details. If the transaction
reference number is not automatically generated, you must update it for the new payment transaction.
Click the Submit and Create Preformat button to submit the payment for validation and to save the
payment information as a preformat. If you select this option, a valid preformat code is required. The
Save Preformat dialog box appears. Your access profile determines whether or not you can create
preformats.
50

Create New Outgoing Payments (Cont’d)
Select the preformat type, complete all required fields, select the appropriate checkboxes and then click
the Save button. Both the payment and the preformat move to the next step in their respective processes,
as defined by your flow-control requirements.
51

10 Create New Incoming Payments

Create New Incoming Payments
Your assigned access profile determines whether or not you can create new incoming payments, and the
accounts, payment methods, currencies, etc., that you can access.
Create a new incoming payment by following the steps below.
1. On the CitiDirect navigation bar, click Payments and then click Input New Incoming. You can also
access this option by clicking the New button on the Input/Modify tab.
The Payment Detail form appears.
52

Create New Incoming Payments (Cont’d)
2. The Preformat Code field should be left blank.
3. The Credit Account Number/Currency/Name field defaults to the value previously specified in
your preferences. If you are entitled to multiple accounts and you want to change the credit
account, clear the field, click the library lookup button and select a different account.
4. The Payment Currency field defaults to preference settings or the currency of the last payment if
the checkbox is selected. If you are entitled to create payments in multiple currencies, clear the
field, click the library lookup button and select a different currency.
5. The Use This Currency For Next Payment checkbox defaults to the value previously specified in
your preferences. Select this checkbox, if applicable.
6. In the Payment Amount field, enter the amount of the payment in the selected currency.
7. In the Payment Method field, click the library lookup button. A Payment Method dialog box
appears.
53

Create New Incoming Payments (Cont’d)
8. Select a payment method and click the OK button. Your solution package, access profile, the
payment currency and the processing capabilities of the Citibank branch determine the available
payment methods. The Payment Detail form expands to display detail fields for the selected
payment method.
9. Based on the selected payment method, currency, etc., the Payment Type field may become
available. If so, click the dropdown arrow and select a payment type, if applicable.
10. The Subsidiary Identifier/Name field defaults to the value previously specified in your preferences.
If you are entitled to select multiple subsidiaries, clear the field, click the library lookup button and
select a different subsidiary identifier/name. These fields are only available if set in client
preferences.
11. Complete all required fields and any optional fields for the payment. A red asterisk (*) identifies all
required fields. Step-by-step instructions for completing the Payment Detail form for each
payment method, by region and country, are available in CitiDirect Online Help.
12. Proceed with one of the following steps.
Click the Submit button. The payment is sent to CitiDirect. Each data item is validated. Once
validated, the payment moves to the next step in the payment process flow, as defined by your
flow-control requirements. If the payment does not pass CitiDirect validation, its status is
changed to Invalid and it is listed on the Input/Modify tab.
Click the Submit and Copy button to submit the current payment transaction for processing and
to copy all transaction details, except the value date. The payment details remain on the
Payment Details form to allow you to create a new payment using the copied transaction
details. If the transaction reference number is not automatically generated, you must update it
for the new payment transaction.
Click the Submit and Create Preformat button to submit the payment for validation and to save
the payment information as a preformat. If you select this option, the Save Preformat dialog box
appears and a valid preformat code is required. Your access profile determines whether or not
you can create preformats.
54

Create New Incoming Payments (Cont’d)
Select the Preformat Type, complete all required fields, select the appropriate checkboxes, and then click
the Save button. Both the payment and the preformat move to the next step in their respective processes,
as defined by your flow-control requirements.
Note: For procedures for specifying your preferences for the credit account, payment currency, subsidiary
identifier/name, etc., refer to the Set Your Preferences for Payments section of this guide.
55

11 Create New Incoming/Outgoing
Payments Using Copy

Create New Incoming/Outgoing Payments
Using Copy
The CitiDirect Copy feature enables you to select existing payment transactions and copy all of the
payment details, except the value date, to create and submit new transactions. CitiDirect automatically
computes a default value date for each transaction based upon parameters that apply for the combination
of branch, payment method and currency (e.g., cutoff time, number of disposition days).
Select the payments you want to copy and create new payment transactions using the Copy feature by
following the steps below.
1. On the CitiDirect menu, click on Modify under My Transactions & Services as shown below:
2. To find the transactions you want to copy, click the Search button at the bottom left or click the
Other Options button and select the Search command on the bottom right side of the screen.
56

Create New Incoming/Outgoing Payments
Using Copy (Cont’d)
A Search Definition Dialog box appears.
3. Enter search criteria to find the payment transactions you want to copy, and then click the Run
Search button. You can specify criteria to find transactions that are assigned a Released status,
which are not available for modify or delete. All payment transactions that match your search
criteria are listed on the Input/Modify tab.
57

Create New Incoming/Outgoing Payments
Using Copy (Cont’d)
4. On the Input/Modify tab, select the payment transaction that you want to copy and then click the
Go to Details button. The Payment Detail form appears. The details of the first payment
transaction selected on the Input/Modify tab are displayed.
5. Click the Copy button. An Information dialog box appears.
58

Create New Incoming/Outgoing Payments
Using Copy (Cont’d)
6. All details are copied, except for the transaction reference number and value date.
7. Enter/modify payment details as required. If the transaction reference number is not automatically
generated, you must update it for this new payment transaction.
8. Click the Submit button. The new payment moves to the next step as defined by your flow-control
requirements. The details of the next payment transaction selected on the Input/Modify tab
appear.
9. Repeat steps 5, 6, 7 and 8 to create and submit additional new payments using the Copy feature.
Notes:
1. Click the Submit and Create Preformat button to submit the current payment for validation and to
save the payment information as a preformat. If you select this option, a preformat code is
required. Both the payment and the preformat move to the next step in their respective
processes, as defined by your flow-control requirements for payment transactions and library
records. Your access profile determines whether or not you can create preformats.
2. Click the Submit and Copy button to submit the current payment for validation and to copy all
details except the value date. The Payment Detail form remains open to allow you to make any
necessary changes to create and submit a new transaction.
3. If you do not want to copy the payment details that are currently displayed on the Payment Detail
form, click the Next button. The details of the next selected payment transaction appear. When
the Payment Detail form displays the details of the last selected payment transaction, clicking the
Next button returns you to the Input/Modify tab.
59

12 View Payment Details

View Payment Details
Select payments and view all payment details by following the steps below.
1. On the CitiDirect navigation bar, click Payments and then click View All.
The View tab of the Payments Summary form appears.
60

View Payment Details (Cont’d)
2. Select one or more payments, and click the Go to Details button. Click the Search button to find
specific payments. Your assigned access profile determines the payments that you can view. For
procedures for using the Search function, refer to the Search/Sort the Payments on a Summary
Form section of this guide.
Note: The availability of the Services button on the View tab is determined by the processing capabilities
of the Citibank branch. When available, entitled users can click Services to access Payments Services
and submit service requests (Stop Payment, Cancel Payment, etc.) to Citibank for processing. The
entitlements in your access profile determine whether or not you can access Payments Services.
Payments Services is described in the Payments Services guide, available in the Learning Center at
A Payment Detail form appears. The details of the first selected payment are displayed.
61

View Payment Details (Cont’d)
3. Review the payment details and proceed with one of the following steps:
Click the Next button to view the details of the next selected payment. When the Payment Detail
form contains the details of the last selected payment, clicking the Next button returns you to
the summary form.
Click the Return to Summary button to return to the summary form.
Click the Other Options button to access a menu listing additional actions that you can perform.
62

13 Delete Payments

Delete Payments
You can delete payments with an Input, Invalid, Verification Required, Authorization Required or Release
Required status. Your assigned access profile determines the payments that you can delete.
Delete payments by following the steps below.
1. On the CitiDirect navigation bar, click Payments and then click Modify.
The Input/Modify tab of the Payments Summary form appears.
63

Delete Payments (Cont’d)
2. Select one or more payments to delete. You can click the Search button to find specific
payments.
3. Click the Delete button. The Enter a Reason dialog box appears.
4. Enter a reason for deleting the payment and then click the OK button. If the same reason for
deletion does not apply to all selected payments, you must delete each payment separately. An
information message appears.
64

Delete Payments (Cont’d)
5. Click the OK button to close the message. The payments are removed from the system.
Notes:
1. You can delete payments from the Input/Modify tab and the Payment Detail form.
2. If you want to review all details of a selected payment before deleting it, click the Go to Details
button and then click the Delete button on the Payment Detail form.
3. If you have selected an On-Site Cheque payment and the cheque has been printed, the following
message appears if you attempt to delete it. “The payment may not be deleted as a cheque has
already been printed. To delete this payment, you must void the cheque in the Print Required
tab.” For more information, see the Print On-Site Cheques section of this guide.
65

14 Modify Payments

Modify Payments
You can modify payments with an Input, Invalid, Verification Required, Authorization Required and/or
Release Required status.
Modify payments by following the steps below.
1. On the CitiDirect navigation bar, click Payments and then click Modify.
The Input/Modify tab of the Payments Summary form appears.
66

Modify Payments (Cont’d)
2. Select one or more payments to modify. You can click the Search button to find specific
payments.
3. Click the Go to Details button. The Payment Detail form appears. The details of the first selected
payment are displayed.
67

Modify Payments (Cont’d)
4. Make any necessary modifications to the payment details and then click the Submit button. The
payment is treated as new and is subject to all flow-control requirements.
68

15 Verify Payments

Verify Payments
Payment verification takes place after payment input or
import
and before authorization. The purpo
s
e
of
payment verification is
to
have a second person confirm that all
of
the
de
t
ails
for
a payment
ar
e
correct.
During verification, payments can be verified, sent
to
repair or dele
t
ed.
If your flow-control requirements stipulate that payments
mus
t
be verified, all payments that are
r
e
ady
for
verification are lis
t
ed
on the Verification Required
t
a
b
,
where they can be selected and verified by an
entitled user.
Payments can be verified from the Verification Required
t
ab
or from the Payment
De
t
ail
f
orm.
1. When you are verifying payments from the Verification Required tab, the verification method can
be either none, re-key or sight for each verifiable field displayed. As a different verification method
can be required for each field, it is possible that combinations of verification methods may be
required.
2. When you are verifying payments from the Payment Detail form, you must review the details of
each payment, but no specific verification method is required.
Notes:
1. Your access profile determines whether or not you are entitled to verify payments and the
payment transactions you can verify.
2. If you submitted the payment, you cannot verify it.
3. CitiDirect clients can require that all payments be verified from the Payment Detail form. If your
organization has stipulated this requirement, a message appears when you attempt to verify
payments from the Verification Required tab. For more information, refer to the Verify Payments
from the Payment Detail Form section of this guide.
69

A. Verify Payments from the Verification
Required Tab

Verify Payments from the Verification
Required Tab
CitiDirect clients specify the fields that require verification and which
of
the following v
erifi
c
ation
methods
mus
t
be used:
1. None — No specific action is required on the field that requires verification. You must review the
information displayed in the field to ensure that it is accurate.
2. Re-key — The field requiring verification is blank and you must enter the correct information into
that field. If the information you enter matches the information entered when the payment was
created, the field is verified.
3. Sight — A checkbox appears to the left of the field requiring verification. You must select the
checkbox to indicate that the information displayed in the field is correct.
Verify payments from the Verification Required
t
ab
by following the
s
t
ep
s
below.
1. On the CitiDirect navigation bar, click Payments, and then click Verify.
The Payments Summary
form
displays. The Verification Required
t
ab
is active and all payments with a
Verification Required
s
t
at
us
that you are entitled
to
verify are lis
t
ed.
70
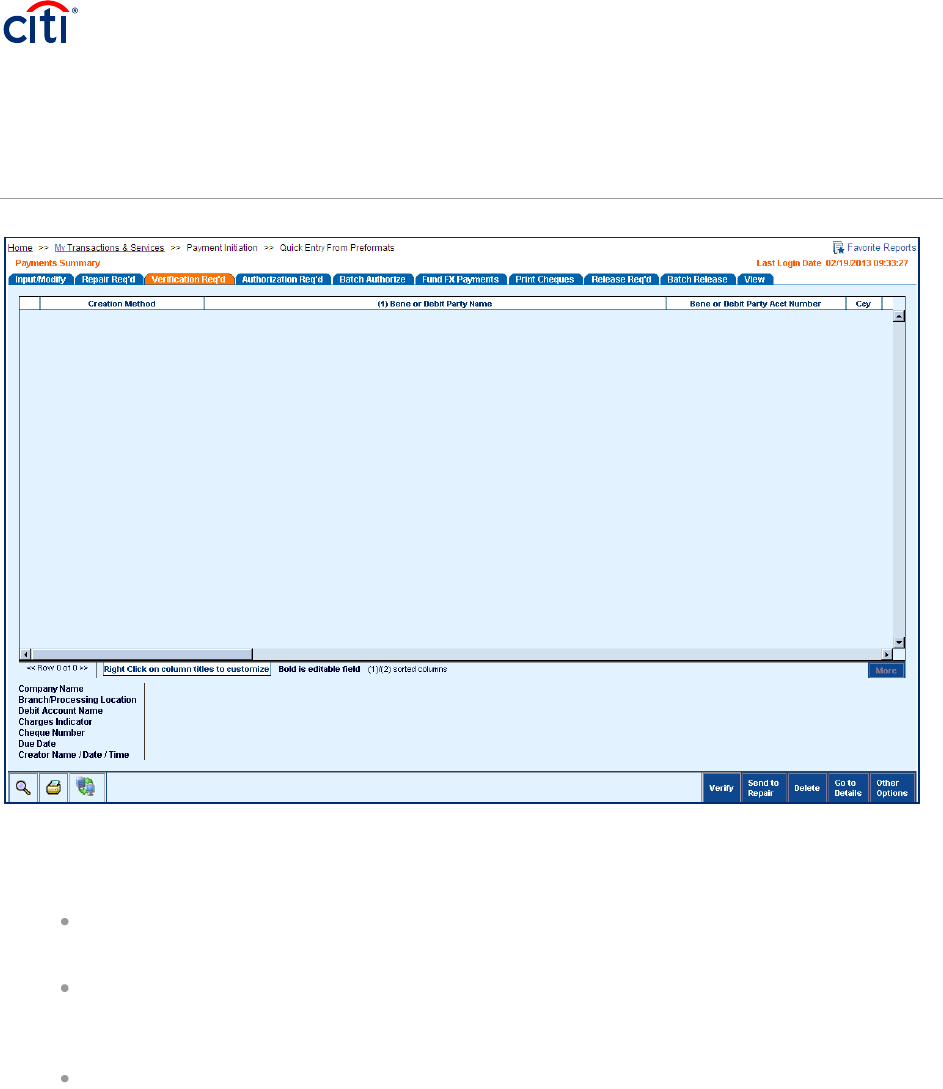
Verify Payments from the Verification
Required Tab (Cont’d)
2. Select a payment and, based on the required verification method, proceed as follows:
If none is the specified verification method, review the
information
displayed in a payment
de
t
ail field
to
ensure that it is
c
orr
ect
.
If re-key is the specified verification method, enter the correct payment
de
t
ail into each blank
field. If the
information
you enter matches the
information
entered when the payment was
cr
ea
t
ed,
the field is v
erifi
ed.
If sight is the specified verification method, select the checkbox
to
the left
of
each field
to
indic
at
e
that
information
in the field is
c
orr
ect
.
3. If a payment contains errors and cannot be verified, click the Send to Repair button. An Enter a
Reason dialog box appears.
71

Verify Payments from the Verification
Required Tab (Cont’d)
Enter the reason that the payment requires repair and click the OK button. The status of the
selected payment is changed to Repair Required and it is moved to the Repair Required tab,
where it can be repaired and resubmitted. Once resubmitted, it is treated as new and subject to
all flow- control requirements.
If you are sending more than one payment to repair and the same reason for repair does not
apply to all selected payments, send each payment to repair individually.
4. If the payment cannot be verified and should be deleted, click the Delete button. The Enter a
Reason dialog box appears.
Enter the reason
for
deleting the payments and click the OK button. The selected payments
ar
e
removed from the system.
72
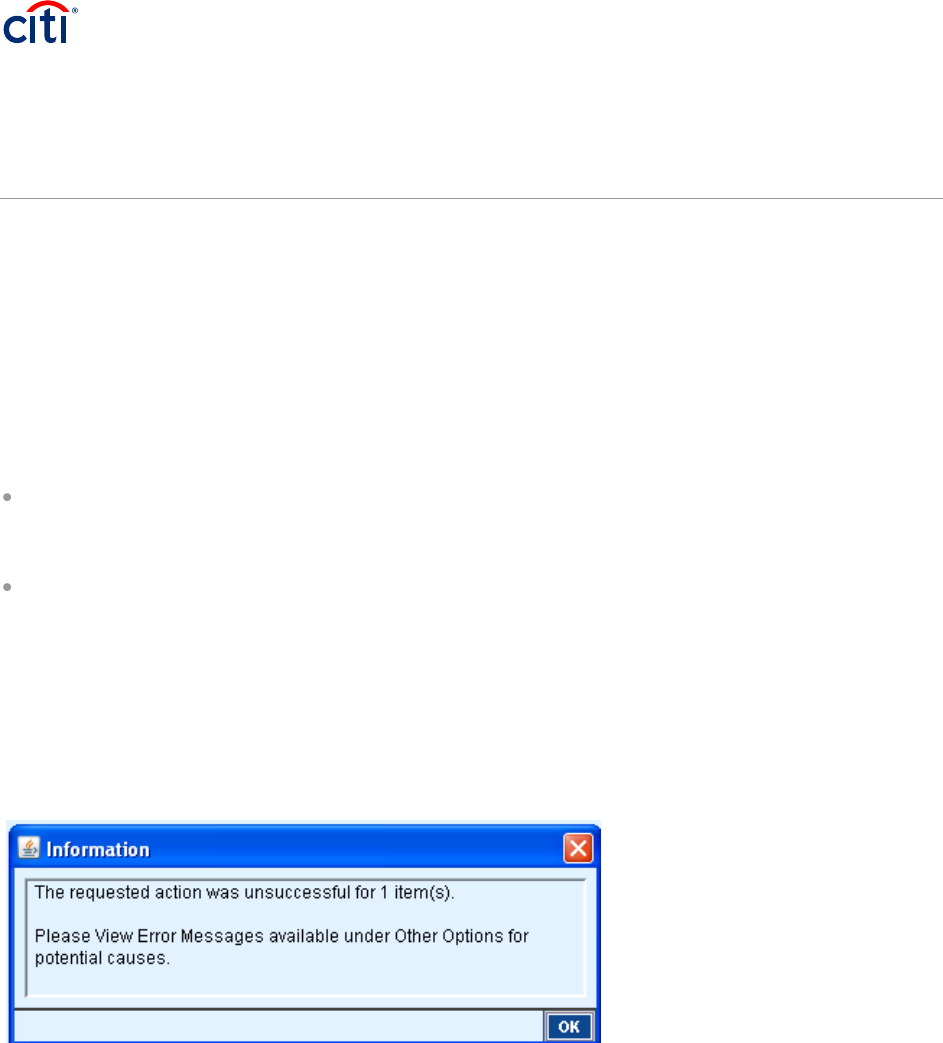
Verify Payments from the Verification
Required Tab (Cont’d)
If you are deleting more than one payment and the same reason
for
deletion does not apply
to
all
selected payments, dele
t
e
each payment individually
.
5. Select all verified payments and then click the Verify button. All selected payments move to the
next step in the payments process, as defined by your flow-control requirements.
Notes:
If the payment method is On-Site Cheque and the cheque has been printed, the following message
appears if you attempt to delete it. “The payment may not be deleted as a cheque has already been
printed. To delete this payment, you must void the cheque in the Print Required tab.”
To review the details of payments before verifying them, select one or more payments on the
Verification Required tab, and then click the Go to Details button. For more information, refer to the
Verify Payments from the Payment Detail Form section of this guide.
Require Detail-Level Verification
CitiDirect clients can require
de
t
ail-level verification for
payments
cr
ea
t
ed
from preformats or b
y
entering
full
de
t
ails
.
If your organization has stipulated this requirement and you
attempt to
select and verify a
payment directly on the Verification Required
t
a
b
,
the
message
below appears:
If you receive this
information
message
and you want
to
verify payments from the Payment
De
t
ail
f
orm,
follow
the
s
t
ep
s
below
to
verify the selected p
a
yment
s
.
1. Click the OK button to close the information message.
2. With the payment selected on the Verification Required tab, click the Other Options button and
then click the View Error Messages command. A View Error Messages dialog box appears.
73

Verify Payments from the Verification
Required Tab (Cont’d)
3. Click the OK button to close the dialog box. The selected payment will now be listed on the
4. Verification Required tab.
74

B. Verify Payments from the Payment
Detail Form

Verify Payments from the Payment
Detail Form
Verify payments from the Payment Detail form by following the steps below.
1. On the Verification Required tab, select the payments to verify and then click the Go to Details
button.
The Payment Detail form displays. The details of the first payment selected on the Verification
Required tab are displayed.
75

Verify Payments from the Payment
Detail Form
2. Review all payment details and proceed with one of the following steps:
Click the Verify button to verify that the payment is correct. The payment moves to the next
step in the payment process, as defined by your flow-control requirements, and the details
of the next selected payment appear.
Click the Send to Repair button to indicate that some payment details are not correct.
Enter the reason for repair in the Enter a Reason dialog box and then click the OK button.
The payment status is changed to Repair Required and it is moved to the Repair Required
tab, where an entitled user can repair and resubmit it. Once resubmitted, the payment is
treated as new and subject to all flow-control requirements. The details of the next
selected payment appear.
Click the Delete button to delete the payment. Enter the reason for deleting the payment in
the Enter a Reason dialog box and then click the OK button. The payment is deleted from
the system and the details of the next selected payment appear.
Click the Next button if you do not want to verify the current payment. The details of the
next selected payment appear.
3. Repeat this process until all selected payments are verified, sent to repair or deleted.
76

16 Authorize Payments

Authorize Payments
When
payments are ready
for
authorization, they are lis
t
ed
on the Authorization Required
t
a
b
,
where
they
can be selected and authorized by an entitled user. During the authorization process, payments can
be authorized, sent
to
repair or dele
t
ed.
CitiDirect suppor
t
s
nine levels
of
authorization. If your organization requires multiple authorizations
,
payments remain on the Authorization Required
t
ab
until they
pass
all required authorizations
.
Your
access
profile
de
t
ermine
s
whether or not you are entitled
to
authorize payments and the p
a
yment
transactions you can authorize. If you submit
t
ed
the payment, you cannot authorize
it
.
Note:
CitiDirect clients can require that all payments be authorized from the Payment
De
t
ail
f
orm. If your
organization has stipulated this requirement, a
message
appears when you
attempt to
s
elect and
authorize payments directly on the Authorization Required
t
a
b
.
For more information, see
the
Authorize
Payments from the Payment
De
t
ail Form section
of
this guide.
77

A. Authorize Payments from the
Authorization Required Tab

Authorize Payments from the Authorization
Required Tab
Authorize payments from the Authorization Required
t
ab
by following the
s
t
ep
s
below.
1. On the CitiDirect navigation bar, click Payments and then click Authorize.
The Payments Summary
form
appears. The Authorization Required
t
ab
is active. All payments with an
Authorization Required
s
t
at
us
that you are entitled
to
authorize are lis
t
ed.
78

Authorize Payments from the Authorization
Required Tab (Cont’d)
2. Select one or more payments, and proceed with one of the following steps.
Click the Authorize button to authorize all selected payments. The payments move to the next
step in your payments process flow. If this is the last step, the authorized payments are
released to Citibank for processing.
Click the Send to Repair button if the selected payments contain errors and cannot be
authorized. The Enter a Reason dialog box displays.
79

Authorize Payments from the Authorization
Required Tab (Cont’d)
Enter the reason the payments require repair and click the OK button. If the same reason for repair does
not apply to all selected payments, send each payment to repair individually.
The status of the payment is changed to Repair Required and it is moved to the Repair Required tab,
where an entitled user can repair and resubmit it. Once resubmitted, all payments are treated as new and
subject to all flow-control requirements.
Click the Delete button if the selected payments cannot be authorized and should be deleted. The
Enter a Reason dialog box displays.
Enter the reason for deleting the payments and click the OK button. The payment is removed from the
system. If the same reason for deletion does not apply to all selected payments, delete each payment
individually.
80

Authorize Payments from the Authorization
Required Tab (Cont’d)
Note: To review the details of payments before authorizing them, select one or more payments on the
Authorization Required tab and then click the Go to Details button. For more information, see the
Authorize Payments from the Payment Detail Form section of this guide.
Require Detail-Level Authorization
Clients can require detail-level authorization for payments created from preformats or by entering full
details. If your organization has this requirement and you attempt to select and authorize a payment
directly from Authorization Required tab, the message below appears.
If you receive this
information
message
and you want
to
authorize payments from the Payment
De
t
ail
form, follow
the
s
t
ep
s
below
to
authorize the selected p
a
yment
s
.
1. Click the OK button to close the information message.
2. With the payment selected on the Authorization Required tab, click the Other Options button and
then click the View Error Messages command. A View Error Messages dialog box appears.
3. Click the OK button to close the error message. You are returned to the Authorization Required
tab.
81

B. Authorize Payments from the Payment
Detail Form

Authorize Payments from the Payment
Detail Form
Authorize payments from the Payment
De
t
ail
form
by following the
s
t
ep
s
below.
1. On the Authorize Required tab, select the payments to authorize and then click the Go to Details
button.
The Payment
De
t
ail
form
appears.
82

Authorize Payments from the Payment
Detail Form (Cont’d)
2. Review all payment details and proceed with one of the following steps:
Click the Authorize button to authorize the payment. The payment moves to the next step in your
payments process flow and the details of the next selected payment appear on the Payment
Detail form. If this is the last step in your payments process flow, the payment is released to
Citibank for processing.
Click the Send to Repair button if the payment contains errors and cannot be authorized. Enter
the reason for repair in the Enter a Reason dialog box and click the OK button. The payment
status is changed to Repair Required and it is moved to the Repair Required tab, where an
entitled user can repair and resubmit it. Once resubmitted, the payment is treated as new and
subject to all flow-control requirements. The details of the next select payment appear.
Click the Delete button if the payment cannot be authorized and should be deleted. Enter the
reason for deleting the payment in the Enter a Reason dialog box and click the OK button. The
payment is deleted from the system and the details of the next selected payment appear.
Click the Next button if you do not want to authorize the current payment. The details of the next
selected payment appear.
3. Repeat this process until all selected payments are authorized, sent to repair or deleted.
83

C. Authorize Batches of Payments
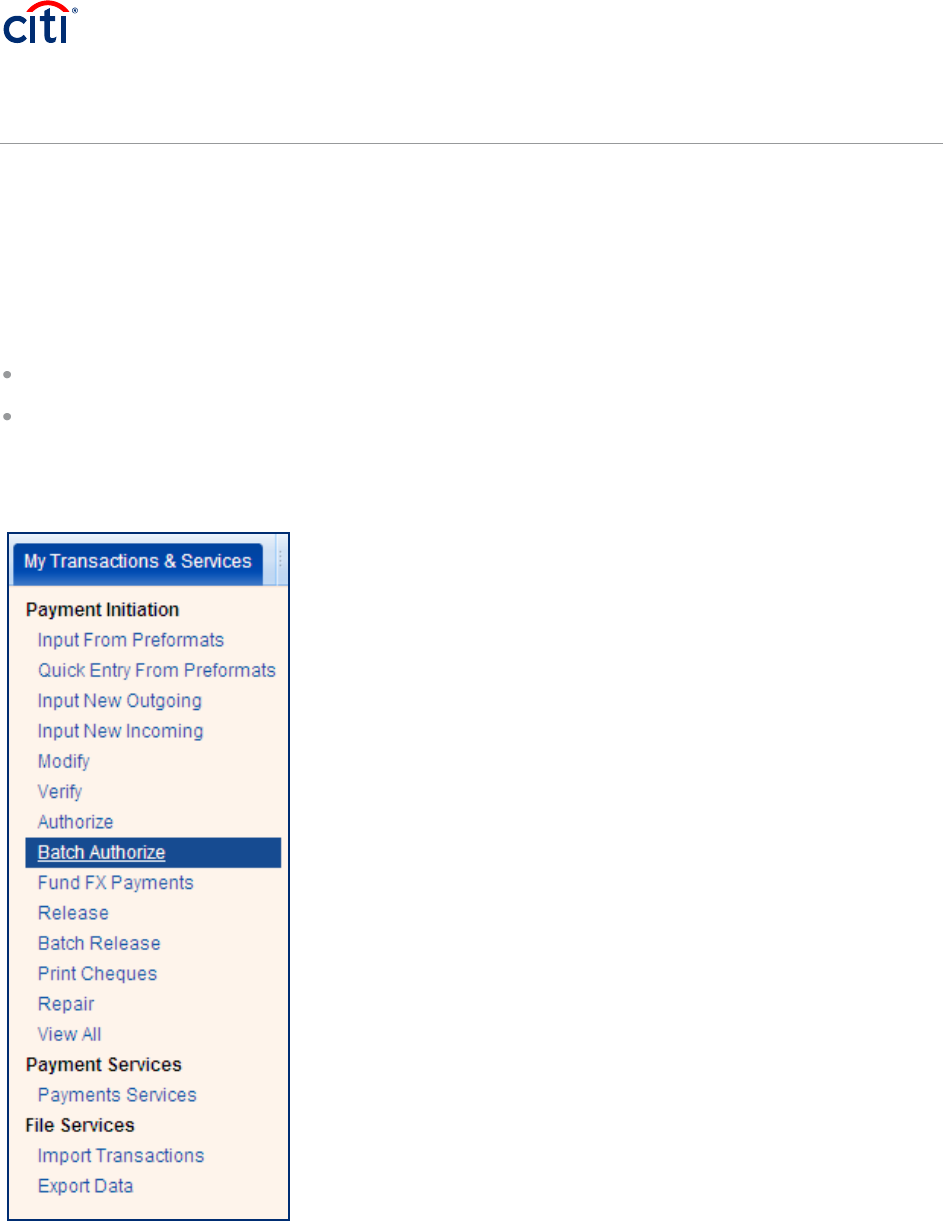
Authorize Batches of Payments
The purpose of the Batch Authorization process is to allow you to group payment transactions together to
create (in an automated way) batches of payments for authorization. If authorization is the final process
based on your flow-control requirements, all valid payment transactions in the batch are completely
authorized and released to Citibank for processing. Your access profile determines whether or not you
can create and authorize batches of payments.
Notes:
The ability to authorize batches of payments may vary by product, country or region.
CitiDirect enables clients to specify whether or not batch authorization is allowed.
Create and authorize batches of payments by following the steps below.
1. On the CitiDirect navigation bar, click Payments and then click Batch Authorize.
The Payments Summary
form
appears.
84

Authorize Batches of Payments (Cont’d)
2. The Batch Authorize tab is active.
If the batches you want to authorize are created and listed, go to step 5.
If there are no defined batches, the Batch Authorization tab is blank and a Please select criteria
for Authorize batches dialog box appears.
85

Authorize Batches of Payments (Cont’d)
If the dialog box does not appear automatically, click the New Batches button on the Batch
Authorize tab.
3. Click the library lookup buttons and select criteria to batch payments by any combination of File
Run ID/Name/Completion Date and Time (for imported payments), Account Number, Payment
Currency, Subsidiary Identified, Payment Value Date, or Status. Click the OK button to create a
batch. An information message appears.
4. Click the OK button to close the information message.
5. When all batches are listed on the Batch Authorize tab, select the batches to authorize and then
click the Authorize button.
86

Authorize Batches of Payments (Cont’d)
If there are no update conflicts (as described in the Notes section below) or other error conditions (cut-off
time failure, etc.), the batch status is changed to Completed and all payments included in the batch are
authorized and moved to their next state, as defined by flow-control requirements. If authorization is the
final step in the process, all valid payments are sent to Citibank for processing.
Notes:
CitiDirect automatically checks each individual transaction within a batch to ensure that no payments
have been changed or updated in any way since the batch was created.
If an individual payment within a batch has been changed, the authorization of that payment fails and the
status of the batch is updated to Completed with Errors. The Status column on the Batch Authorize tab
allows you to clearly see partially processed batches.
If the status of a batch is Completed with Errors, you must click the Other Options button and select the
View Error Messages command to see the reason for the partial processing of the batch.
The status of all failed payment transactions is changed to Repair Required and they are listed on the
Repair Required tab, where they can be repaired, resubmitted and then included in a new batch. Once
resubmitted, each payment is treated as new and subject to all flow-control requirements. For step-by-
step procedures, refer to the Repair Payments section of this guide.
New Batches Button
To create another batch of payments to authorize, click the New Batches button. Any remaining
unauthorized batches are cleared and a dialog box is displayed to allow you to create a new batch.
If you click the New Batches button and a batch creation job is already pending or in progress, the
following message appears.
Update Screen button
When you click the Update Screen button during batch authorization:
If batches are still being processed in the background, the following message appears:
87

Authorize Batches of Payments (Cont’d)
If no batches are being processed in the background, the following messages appears:
88

D. Authorize Offline

Authorize Offline
The Authorize Offline
feature
allows an entitled CitiDirect user
to
authorize b
a
t
che
s
of transactions on
behalf
of
another entitled CitiDirect authoriz
e
r
.
Authorize Offline is available on the Offline Authorization tab on the Payments Summary form. From
the Offline Authorization tab, batches can be authorized or deleted, but individual payment
transactions cannot be modified or changed.
The Authorize Offline process flow includes two roles: the entitled CitiDirect user who is performing
the offline authorization procedures in CitiDirect and the entitled authorizer on whose behalf the
authorization is completed. Steps for both roles are provided below.
An entitled CitiDirect user authorizes offline by following the steps below.
1. On the CitiDirect navigation bar, click Payments and then click Authorize Offline.
The Payments Summary
form
appears. Any existing b
a
t
che
s
of transactions awaiting o
f
fl
ine
authorization are lis
t
ed.
The
s
t
at
us
column lis
t
s
the current
s
t
at
us
of
each b
a
t
ch.
89

Authorize Offline (Cont’d)
All possible status assignments are described in the following table.
Status
Description
Creating
The batch is in the process of being created.
Available
The batch is ready to be authorized.
Authorizing
The batch is in the authorization process.
Locked
An invalid response has been entered repeatedly and the batch cannot be authorized.
Expired
The batch has been listed longer than 24 hours and cannot be authorized. A
new batch must be created.
Processed
The batch is authorized.
Failed
The batch contains errors and could not be created. Click the Other Options
button and then select the View Errors command to see why the batch failed.
Completed with Errors
The batch has been created but it contains errors. Click the Other Options
button and then select the View Errors command to see all of the errors.
2. If the batch you want to authorize offline is not listed, click the New Batch button. A Search
Definition Dialog box appears.
90

Authorize Offline (Cont’d)
3. In the Authorizer Name field, click the library lookup button. A Library Look Up Dialog box
appears. Only established authorizers are listed.
4. Select the Authorizer Name and E-mail Address and click the OK button. The selected name and
e-mail address appear in the Search Definition Dialog box.
Not
e
:
If the authorizer you select does not have a valid e-mail address, a warning
message
appears. Your
local Security Manager can update the e-mail address in that authorizer’s user
pr
o
fi
le
.
5. In the Search Definition Dialog box, enter any additional search criteria to ensure that you find all
transactions that you want to authorize on behalf of the selected authorizer, and then click the
Run Search button. A Library Look Up Dialog box appears. All transactions awaiting authorization
that match your search criteria are listed, batched by payment method and currency.
91
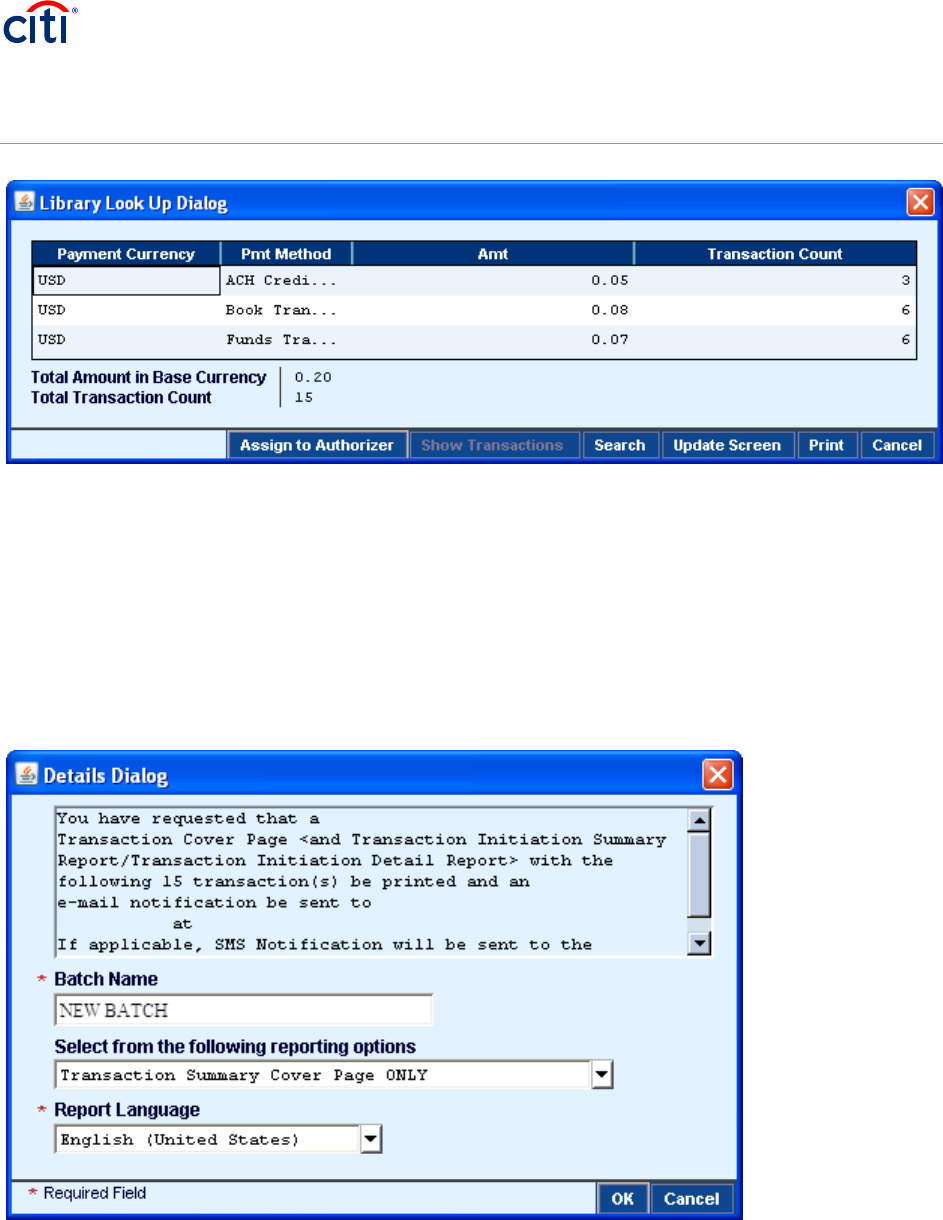
Authorize Offline (Cont’d)
6. Select one or more batches of transactions to authorize offline and then click the Assign to
Authorizer button.
Note: Select a row containing one b
a
t
ch of transactions and click the Show Transactions
button
t
o see a
list of
all transactions included in that b
a
t
ch.
A library lookup dialog box appears. Each transaction
included in the selected b
a
t
ch is lis
t
ed,
along with corresponding payment
de
t
ails
,
which include
s
t
at
us
,
creation method, beneficiary name, currency, amount, value date, payment
me
thod, payment
t
ype
,
and
transaction reference numbe
r
.
A
De
t
ails Dialogue box appears.
Note: The name of the authorizer for whom you will authorize transactions offline appears here
92

Authorize Offline (Cont’d)
7. In the Batch Name field, enter a unique name for the batch you want to authorize on behalf of the
selected authorizer. (The authorizer’s name appears in the text box at the top of the Details
Dialog box.)
8. In the Select from the following reporting options field, click the dropdown arrow and select
Transaction Summary Cover page ONLY, Cover page and Transaction Initiation Detail Report, or
Cover Page and Transaction Initiation Summary Report.
9. In the Report Language field, select the language for the report and then click the OK button. The
batch is assigned an Available status and it is listed on the Offline Authorization tab. An Available
status indicates that the batch is ready for authorization. If the status is not updated automatically,
click the Update Screen button.
10. Press the Alt+R keys on your keyboard to print or save the report. The saved report is available in
the Offline Authorization Reports service class.
11. Send the report to the selected authorizer (the authorizer’s name appears in the text box at the
top of the Details Dialog box) using your selected delivery method (e.g., fax, e-mail). CitiDirect
locks all of the transactions included in the batch and automatically sends and e-mail notification
to that authorizer. All transactions included in the batch are removed from their respective
Authorization Required tabs and are visible on the View tab only.
12. The selected authorizer follows the steps below:
a. Check the e-mail notification from CitiDirect.
b. Review the CitiDirect report printed with the CitiDirect watermark and presented by the
CitiDirect user performing the offline authorization.
c. Enter the Challenge information printed in the CitiDirect report into your SafeWord™ card.
d. Write the Response information on the CitiDirect report.
e. Return the report to the CitiDirect user performing the offline authorization using your selected
delivery method. (e.g., fax, e-mail).
13. The CitiDirect user performing the offline authorization proceeds with the following steps:
a. Collect the report from the authorizer, including the written authorizer’s response.
b. Click the Offline Authorization tab.
93

Authorize Offline (Cont’d)
c. Select the batch with an Available status that you want to authorize offline and then click the
Authorize button. A Details Dialog box appears.
94

Authorize Offline (Cont’d)
d. In the Response field, enter the response generated by the selected authorizer’s SafeWord™
card and click the OK button.
The batch record is authorized and its batch status is updated to Processed. All transactions
included in the batch are authorized.
If this is the last step in your flow-control process, all authorized transactions are released to
Citibank for processing. Transactions requiring multiple authorizations remain accessible to a
new authorizer.
Notes:
If you enter six invalid responses in the Response field, the status of the batch is changed to Locked.
To authorize a locked batch, you must delete and then recreate the batch.
After 24 hours, the status of all unauthorized batches is changed to Expired. To authorize an expired
batch, delete the batch and create a new one.
If you select a batch and click the Delete Batch button, you delete the Offline Authorization batch only.
All transactions included in the batch still appear on the Authorization Required tab of the original
authorizer.
95

E. Offline Authorization Tab—Action
Buttons

Offline Authorization Tab—Action Buttons
The Action
but
t
ons
available at the
bot
t
om
of
the Offline Authorization tab are enabled or disabled based
upon the
f
ollowing:
The status assigned to the selected batch
Your entitlements
Whether you are the CitiDirect user who is creating the batch to be authorized or the authorizer on
whose behalf the batch is being authorized
96

Offline Authorization Tab—Action Buttons
(Cont’d)
The availability
of
the action
but
t
ons
is provided in the following
t
able:
Status
Description
New Batch
Available if your assigned access profile includes entitlement to the Offline
Authorization Reports service class.
Authorize
Available if the status of the selected batch is Available.
Delete Batch
Available if the status of the selected batch is Available, Locked or Expired.
Reprint Report
Available if the status of the selected batch is Available and:
Your access profile includes entitlement to the Offline Authorization Reports service class
You are either the creator or authorizer of the batch
Show Transactions
Enabled if the status of the selected batch is Available, Locked or Expired, and:
Your access profile includes entitlement to Show Detail Transactions in Offline
Authorization
You are the creator of the authorizer of the batch
Update Screen
Always available
Other Options
Always available
97

17 Release Payments

Release Payments
The purpose
of
the release process is
to
allow you
to
select payments and release them
to
Citibank
f
or
processing.
Release
also serves
to
initiate several processes required
for
funding payments that
r
equir
e
active
FX,
for
example WorldLink
®
Payment Services p
a
yment
s
.
Payments can be released from the Release
Required
t
ab
or from the Payment
De
t
ail
f
orm.
98

A. Release Payments from the Release
Required Tab

Release Payments from the Release
Required Tab
Release payments from the Release Required tab by following the steps below.
1. On the CitiDirect navigation bar, click Payments and then click Release.
The Payments Summary
form
appears. The Release Required tab is active. All payments with a Release
Required
s
t
at
us
that you are entitled
to
release are lis
t
ed.
99

Release Payments from the Release
Required Tab (Cont’d)
2. Select one or more payments to release and proceed with one of the following steps.
Click the Release button. The payments are released to Citibank for processing.
Click the Send to Repair button if the payment contains errors and it cannot be released. An
Enter a Reason dialog box appears.
100

Release Payments from the Release
Required Tab (Cont’d)
Enter the reason
for
the repair and click the OK
but
t
o
n.
If the same reason
for
repair does
not
apply
to
all selected payments, select and send each payment
to
repair individually. The
s
t
at
us
o
f
the payment is
changed
to
Repair Required and it is moved
to
the Repair Required
t
a
b
,
where an entitled user can repair
and resubmit
it
.
Once
r
e
submit
t
ed,
the payment is
tr
ea
t
ed
as new and subject
to
all flow-control
r
equirement
s
.
Click the Delete button if the payments cannot be released and should be deleted. The Enter a
Reason dialog box appears.
Enter the reason
for
deleting the payments and click the OK
but
t
on.
The payments are
r
emov
ed
from the
s
y
s
t
em.
The same reason
mus
t
apply
to
all selected payments. If the same reason does not apply, dele
t
e
each payment individually
.
101

Release Payments from the Release
Required Tab (Cont’d)
Note: The following error
message
appears if you
attempt to
release an On-Site
Cheque pa
yment and
your flow-controls require that it be printed before it is released: “The payment may not be released until
the cheque associated with this payment is printed. You
mus
t
print the cheque
fr
om the Print Required
t
ab
.
”
102

B. Release Payments from the Payment
Detail Form

Release Payments from the Payment
Detail Form
Review all details before releasing payments to Citibank for processing by following these steps:
1. On the Release Required tab, select one or more payments to release and then click the Go to
Details button.
The Payment Detail form appears. The details of the first selected payment are displayed.
103

Citi Business Name | Subgroup Name
Release Payments from the Payment
Detail Form (Cont’d)
2. Review the payment details and proceed with one of the following steps:
Click the Release button. The payment is released to Citibank for processing and the details of the
next selected payment appear.
Click the Send to Repair button if the payment contains errors and cannot be released.
Enter the reason for repair in the Enter a Reason dialog box and click the OK button. The payment
status is changed to Repair Required and it is moved to the Repair Required tab, when an entitled
user can repair and resubmit it. Once resubmitted, the payment is treated as new and subject to all
flow-control requirements. The details of the next payment selected on the Release Required tab
appear.
Click the Delete button if the payment cannot be released and should be deleted.
Enter the reason for deleting the payment in the Enter a Reason dialog box and click the OK button.
The payment is deleted from the system and the details of the next payment selected on the
Release Required tab appear.
104

Release Payments from the Payment
Detail Form (Cont’d)
Click the Next button if you do not want to release the current payment. The details of the next
selected payment appear.
3. Repeat this process until all selected payments are released, sent to repair or deleted.
105

C. Release Batches of Payments
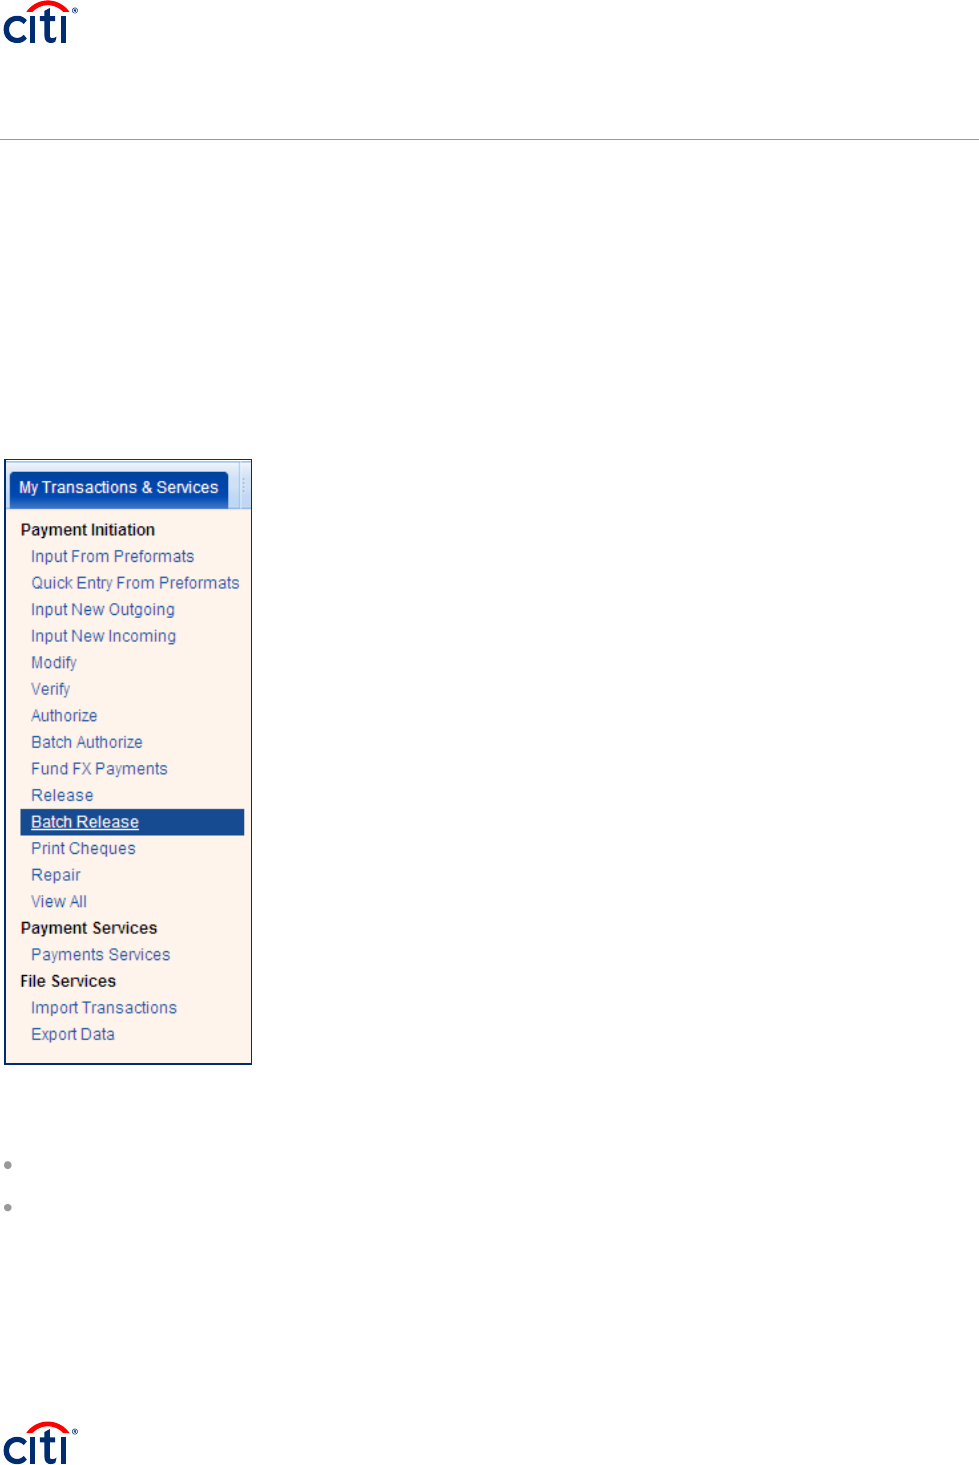
Release Batches of Payments
The purpose
of
the b
a
t
ch release process is
to
allow you
to
group payment transactions
t
oge
ther
t
o
cr
ea
t
e
(in an automated way) b
a
t
che
s
of
payments
for
release. To be eligible
to
be included in a b
a
t
ch,
transactions
mus
t
have
passed
all flow-control requirements. All payment transactions included in each b
a
t
ch that
pass
validation are released
to
Citibank
for
processing.
Your access profile determines whether or not you can create and release b
a
t
che
s
of p
a
yment
s
.
CitiDirect enables clients
to
specify whether or not
B
a
t
ch
Release
is allowed.
Crea
t
e
b
a
t
che
s
o
f
payments
and release them
for
processing by following the
s
t
ep
s
below:
1. On the CitiDirect navigation bar, click Payments and then click Batch Release.
The Payments Summary form appears. The Batch Release tab is active.
If the batches you want to release are created and listed, go to step 4.
If there are no defined batches, the Batch Release tab is blank and the Please select criteria for Release
batches dialog box appears.
If this dialog box does not appear automatically, click the New Batches button.
106

Release Batches of Payments (Cont’d)
2. Click the library lookup buttons and select criteria to batch payments by any combination of File Run
ID/Name/Completion Date and Time (for imported payments), Account Number, Payment Currency,
Subsidiary Identifier or Payment Value Date, and then click the OK button to create a batch of
payments to release. A message appears.
3. Click the OK button to close the information message.
4. When all batches to be released are listed on the Batch Release tab, select the batches you want to
release and click the Release button.
If there are no error conditions, the batch status is changed to Completed, all payments included in
the batch are released and the following information message appears.
107

Release Batches of Payments (Cont’d)
Notes:
The released batch is removed from the Batch Release tab and the status of all validated transactions is
updated to Released. This status is subsequently updated to CB Accepted or CB Rejected, based upon
the response from the processing system.
If a payment included in the batch fails server validation, a message is displayed, the status of the failed
payment is updated to Repair Required and it is moved to the Repair Required tab, where it can be
repaired, resubmitted and included in a new batch. For more information, refer to the Repair Payments
section of this guide.
To view a list of the payments included in the selected batch, click the Show Transactions button. No
payment details are shown; only individual payment transactions are listed.
New Batches
To create another batch of payments to release, click the New Batches button. Any remaining unreleased
batches are cleared. A dialog box is displayed, allowing you to specify new search criteria and create a new
set of batches.
If you click the New Batches button and a batch creation job is already pending or in progress, the
following message appears.
Update Screen
The following messages appear when you click the Update Screen button:
If batches are still being, the following message processed in the background appears:
108

Release Batches of Payments (Cont’d)
If no batches are being processed in the background, the following message appears:
109

18 Repair Payments

Repair Payments
All payments with a Repair Required, Repair Invalid or
CB
Rejected
s
t
at
us
are lis
t
ed
on the Repair Required
t
ab
and they
mus
t
be repaired before they can continue through the payments process, as defined b
y
your
flow-control requirements
.
A Repair Required status indicates that the payment has been sent to repair during the verification,
authorization or release process.
A Repair Invalid status indicates that the payment has failed “submit” from the Repair Required tab.
A CB Rejected status indicates that the Citibank host processor has rejected the payment.
Repair payments by following the
s
t
ep
s
below.
1. On the CitiDirect menu, click on Repair under My Transactions & Services as shown below:
The Payments Summary Form appears. The Repair Required
t
ab
is active. All payments with a Repair
Required, Repair Invalid and
CB
Rejected
s
t
at
us
are lis
t
ed.
110

Repair Payments (Cont’d)
2. Select one or more payments to repair and then click the Go to Details button.
Not
e
:
If you select an On-Site
Cheque
payment that has been printed, the following message appears: “The
cheque associated with this payment has already been printed. If repair
to this
payment is
necessary,
the
cheque
mus
t
be voided and a new payment generated reflecting the
change
s
.
”
The Payment Detail form appears. The details of the first selected payment are displayed.
111

Repair Payments (Cont’d)
3. Click the Other Options button and then click the View Error Messages command. A View Error
Messages dialog box appears.
4. Review the error listed and click the OK button to close the dialog box.
5. Make any necessary changes on the Payment Detail form and click the Submit button. The payment
is treated as new and subject to all flow-control requirements.
6. If multiple payments were selected, the details of the next selected payment appear. When the
Payment Detail form contains the details of the last selected payment, clicking the Next button returns
you to the Repair Required tab.
112

19 Print On-Site Cheques

Print On-Site Cheques
On-site cheques are printed at your location, rather than at a Citibank processing center. If
your
organization
has specified an initial printable
s
t
at
us
,
an On-Site
Cheque
transaction is not lis
t
ed
on
the
Print
Cheques
t
ab
until its
s
t
at
us
is updated
to
that initial printable
s
t
at
us
.
On-Site cheques can be printed from the Print
Cheques
t
ab
or the Payment
De
t
ail
form.
The
Print
Cheques
t
ab
is used
to
select and print On-Site
Cheque
payments. Payment transactions with a
Print
ed
or Voided
s
t
at
us
cannot be
print
ed.
113

A. Print On-Site Cheques from the Print
Cheques Tab

Print On-Site Cheques from the Print
Cheques Tab
1. On the CitiDirect navigation bar, click Payments and then click Print Cheques.
The Payments Summary form appears with the Print Cheques tab active.
114

Print On-Site Cheques from the Print
Cheques Tab (Cont’d)
2. Select one or more on-site cheques and then click the Print Cheque button. The Print Cheque Dialog
box appears.
115

Print On-Site Cheques from the Print
Cheques Tab (Cont’d)
3. In the Cheque Stock Description field, select the cheque stock. If you have selected a group of
cheques to print, all of the cheques are printed on the same cheque stock. If you want to print a
cheque on different stock, print it separately.
4. The Verify Printing field defaults to Each Cheque. The other options are None or First Check Only.
5. Click the Print Cheque button. The cheque is sent to your default printer and the transaction value
date is set to the date the cheque is printed. The cheques are printed in the order in which they are
listed on the Print Cheques tab.
Notes:
If you want to review all payment details before printing the cheque, click the Go to Details button. For
more information, refer to the Print On-Site Cheques from the Payment Detail Form section of this guide.
If Verify Printing is set to None, all selected cheques are printed without any further interaction.
If Verify Printing is set to Each Cheque, the following message appears after each cheque is printed: “Did
the cheque print correctly?” Click the Yes button to print the next selected check.
If Verify Printing is set to First Check Only, the following message appears after the first cheque is printed:
“Did the cheque print correctly?” Click the Yes button to continue printing all selected cheques.
116

B. Print On-Site Cheques from the Payment
Detail Form

Print On-Site Cheques from the Payment
Detail Form
Print on-site cheques from the Payment
De
t
ail
form
by following the
s
t
ep
s
below.
1. On the Print Cheques tab, select one or more on-site cheque payments and then click the Go to
Details button.
117

Print On-Site Cheques from the Payment
Detail Form (Cont’d)
2. Click the Print Cheque button. The cheque is printed and a message appears.
3. Click the OK button to close the information message. Details of the next selected on-site cheque
appear.
4. Repeat steps 2 and 3 until all selected on-site cheques have been printed.
118

20 Void On-Site Cheques

Void On-Site Cheques
You cannot repair or dele
t
e
an on-site cheque with a Print Required
s
t
at
us
.
You
mus
t
void an on-sit
e
check
payment before it can be dele
t
ed
or
r
e
p
air
ed.
119

A. Void On-Site Cheques from the Print
Cheques Tab

Void On-Site Cheques from the Print
Cheques Tab
Void on-site cheques from the Print Cheques tab by following the steps below:
1. On the Print Cheques tab, select one or more cheque payments to void.
2. Click the Void Cheque button. The status of each cheque is changed to Deleted and its associated
payment sub-status is changed to Cheque Voided.
The payment amount of the associated payment is changed to zero. The system sends a message to
the Citi processing system notifying it that the cheque number has been used.
Notes:
If you want to review all cheque details before voiding the selected payments, click the Go to Details
button. For more information, refer to the Void On-Site Cheques from the Payment Detail Form section of
this guide.
Click the Reprint Cheque button to reprint a cheque transaction. The original cheque is voided. (This is
only available for WorldLink Payment Services.)
120

B. Void On-Site Cheques from the Payment
Details Form

Void On-Site Cheques from the Payment
Details Form
Void on-site cheques from the Payment
De
t
ail
form
by following the
s
t
ep
s
below:
1. On the Print Cheques tab, select one or more on-site cheques to void and then click the Go to Details
button.
The Payment
De
t
ail
form
appears.
121

Void On-Site Cheques from the Payment
Details Form (Cont’d)
2. Click the Void Cheque button. The status of the cheque is changed to Deleted and its associated sub-
status is changed to Cheque Voided.
3. The payment amount of the associated payment is changed to zero and the system sends a
message to the Citi processing system notifying it that the cheque number has been used.
Not
e
:
Click the Reprint
Cheque
button to
reprint a cheque transaction. The original cheque is voided. (This is only
available
for
WorldLink Payment Services.)
122

21 Search/Sort the Payments on a Summary
Form

Search/Sort the Payments on a Summary
Form
The Search Definition Dialog box enables you to control the number of payment records that are listed on a
tab within the Payments Summary form and the order in which those records are displayed. For example, you
may wish to view only the payments for a particular beneficiary or only cheque payments.
Each tab that supports the search function has predefined search criteria that are automatically used by
CitiDirect when the tab is first displayed.
Not
e
:
The ability
to
search
for
and
sort
data is also available
for
ce
r
t
ain library lookup lis
t
s
,
particularly those
that might
return
a large amount
of
data.
Examples
include the Bank library and the Beneficiary
library
.
Use the search and sort features by following the steps below:
1. On the CitiDirect navigation bar, click Payments and then click the process (Modify, Verify, Authorize,
etc.) to access the Payments Summary form tab you need.
2. Proceed with one of the following steps.
Click at the bottom of the summary form grid.
Position your cursor on the summary form grid (not on a column title), right-click and then select the
Search command from the shortcut menu.
Click the Other Options button and then click the Search command.
123

Search/Sort the Payments on a Summary
Form (Cont’d)
A Search Definition Dialog box, such as the one below, is displayed.
3. Under Sort Criteria, click the dropdown arrow and select the Primary Sort and/or Secondary Sort, and
then specify the sort order: Ascending (A to Z) or Descending (Z to A). Sort is available for all fields
on the active tab and is applied against all payments listed.
4. Under Search Criteria, select an operator (starts with, equals, is not equal, etc.) and then enter
criteria in one or more fields.
If a field presents a dropdown list of possible items to search for, such as the Payment Method field,
use standard Windows selection techniques (such as Ctrl+click and Shift+click) to select multiple
items from the list presented.
To search for a single specific numeric or date value, enter that specific value as both the starting and
ending value of a range.
5. Click the Run Search button. Only those payments that match your search criteria are listed on the
active tab and all records are sorted in the order you specified.
Use the scroll bars to view all records, as the number of records that match your search criteria may
exceed the maximum number that can be viewed without scrolling.
Operators
The operators available
for
each field on the Search Definition Dialog box depend on the nature
of the
field.
For example,
text
fields can be searched based upon whether the data in the field
s
t
ar
t
s
with, equals, or
124

Search/Sort the Payments on a Summary
Form (Cont’d)
contains the criteria you specify. Date and amount fields can be searched based on whether the criteria in the
field are between a pair of values.
The specific filtering operators that are available, along with their functional meaning, are lis
t
ed
below:
Operator
Select to
Contains
Retrieve all records in the database that contain the specified value anywhere in the data value of the field.
Equals
Retrieve all records in the database where the data value of the field is exactly equal to the specified value.
Is not equal
Retrieve all records in the database where the data value of the field is any value other than the specified value.
Is not null
Retrieve all records in the database where some value has been entered into the field
(the field in the database is not completely empty).
Is null
Retrieve all records in the database where the field is completely empty (as differentiated from a Blank or Zero
value, which may be specifically entered).
Starts with
Retrieve all records in the database where the data value of the field begins with the specified value.
125

22 Print a Summary List of Payments

Print a Summary List of Payments
You can print a summary list of all payment records that you have selected on any tab within the Payments
Summary form.
Select payments and print a summary
list
by following the
s
t
ep
s
below.
1. On the CitiDirect navigation bar, click Payments and then click a process (Modify, Verify, Authorize,
etc.) to access the Payments Summary form tab you need.
2. Select one or more payments to include in your summary list.
3. Click or the Other Options button and then click the Print Summary command.
A summary
list of
selected payments with column headings and displayed
de
t
ails is
print
ed.
126

23 Print Payment Details from a Summary
Form
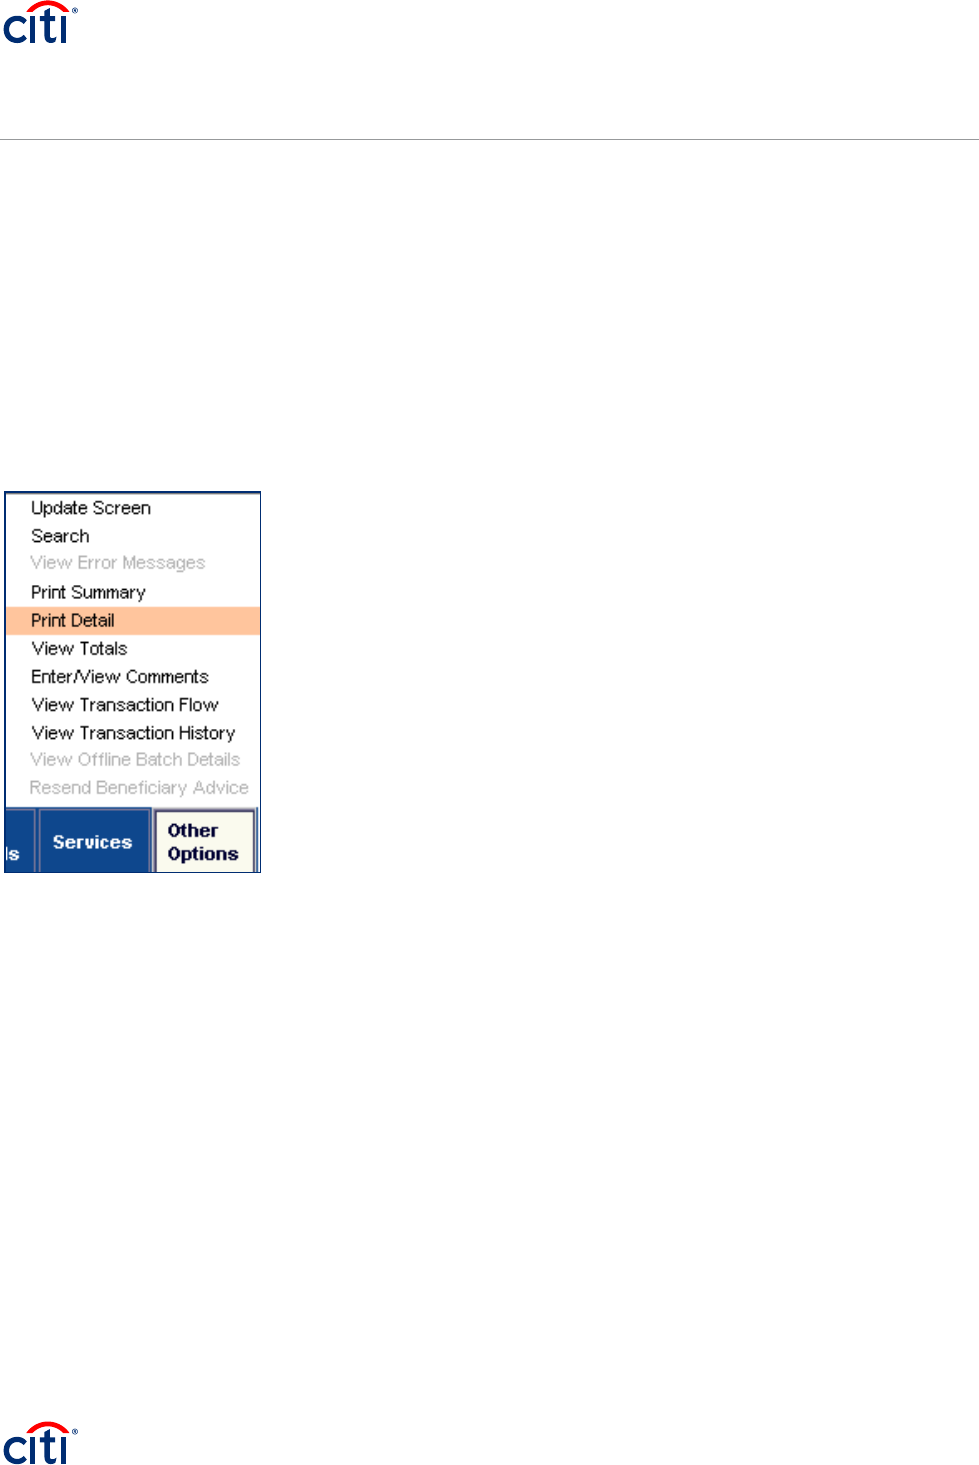
Print Payment Details from a Summary Form
You can print all
de
t
ails
of
the payment records selected on any
t
ab
within the Payments Summary
f
orm.
This option enables you
to
select multiple payments and print all payment
de
t
ails without having
to go
to
the
Payment
De
t
ail
form to
print the
de
t
ails
of
each payment individually
.
Select payments and print all details by following the steps below:
1. On the CitiDirect navigation bar, click Payments and then click a process (Modify, Verify, Authorize,
etc.) to access the Payments Summary form tab you need.
2. Select one or more payments to print.
3. Click the Other Options button and then click the Print Detail command. All details of each selected
payment are printed.
127

24 View Payment Totals

View Payment Totals
You can view a total summary, by payment currency, of all payment records selected on any tab within the
Payments Summary form. The total number of payments in each currency is also displayed.
Select payments and view payment totals by following the steps below.
1. On the CitiDirect navigation bar, click Payments and then click a process (Modify, Authorize, View All,
etc.) to access the Payments Summary form tab you need.
2. Select the payments to include in your total.
3. Click the Other Options button and then click the View Totals command.
A View Totals dialog box appears with amounts of selected payments totaled by currency.
4. Click the Print button to print the list of totals or click the Cancel button to close the View Totals dialog
box and return to the active tab.
128

25 Enter New or View Existing Comments

Enter New or View Existing Comments
Select a payment and enter new comments or view existing comments by following these
s
t
ep
s:
1. On the CitiDirect navigation bar, click Payments and then click a process (Modify, Authorize, View All,
etc.) to access the Payment Summary form tab you need.
2. Select the payment for which you want to attach a new or view an existing comment. You can select
only one payment.
3. Click the Other Options button and then click the Enter/View Comments command.
A Comments dialog box appears. Existing comments, if any, appear in the upper portion
of the
dialog box.
129

Enter New or View Existing Comments
(Cont’d)
4. To attach a new comment, position the cursor in the text box, type a comment and then click the OK
button. The comment is attached to the payment.
5. If you are not entering a new comment, click the Cancel button to close the dialog box.
130

26 View Transaction Flow

View Transaction Flow
You can select one payment and view a
list of
transaction-flow
s
t
at
e
s
that it
mus
t
go through, based upon
the current data values
of
the payment, before it is sent
to
Citibank
for
processing (including
it
s
current
s
t
at
e
)
.
Not
e
:
If the
s
t
at
us
of
the selected payment transaction is
CB
Accepted,
CB
Rejected or any
other
valid po
s
t
release
s
t
at
us
,
this menu choice is not available.
Select a payment and view a
list of
transaction flow
s
t
at
e
s
by following the
s
t
ep
s
below.
1. On the CitiDirect navigation bar, click Payments and then click a process (Modify, Authorize, View All,
etc.) to access the Payments Summary form tab you need.
2. Select the payment. Only one payment can be selected.
3. Click the Other Options button and then click the View Transaction Flow command.
A Transaction Flow dialog box appears. The pending
s
t
at
e
s
for
the selected payment are lis
t
ed.
In this
example, the current
s
t
at
us
of
the selected payment is Authorization Required. Once it is authorized, its
s
t
at
us
will change
to
Release
Required.
131

View Transaction Flow (Cont’d)
4. Click the OK button to close the dialog box or click the Print button to print the information.
132

27 View Transaction History

View Transaction History
You can select one payment and view the history of all actions taken on that payment, including the name of
the CitiDirect user who performed each action and the date and time the action was taken.
Select a payment and view its transaction history by following the steps below.
1. On the CitiDirect navigation bar, click Payments and then click a process (Modify, Authorize, View All,
etc.) to access the Payments Summary form tab you need.
2. Select one payment, click the Other Options button and then click the View Transaction History
command. Only one payment can be selected.
The View Transaction
His
t
ory
dialog box appears. This box displays the name
of
the CitiDirect
us
er
who
performed the action lis
t
ed
and the date and time the action was
t
a
k
en.
The date is
f
ormat
t
ed
as defined by
client
prefer
ence
s
.
3. Review the transaction history and proceed with one of the following steps.
Click the OK button to close the dialog box and return to the active tab.
Click the Update Screen button to update the list with the most recent information available.
Click the Print button to print the transaction history.
133

View Transaction History (Cont’d)
Click the More button to retrieve the next set of transaction history information. If all of the
information is shown, the More button is not available.
Click the Cancel button to close the dialog box.
134

28 Payments Reports and Inquiries

Payments Reports and Inquiries
This section of the guide presents a description of payments-related reports and inquiries, by service
class. For a description of all CitiDirect reports and inquiries, refer to the Online Help.
135

A. Reports

Reports
The
R
epor
t
ca
t
egory on the CitiDirect navigation bar contains service
classes
that are used
to
gr
oup
r
epor
t
s
designed
for
specific
business
purposes. Your solution package and
access
profile
de
t
ermine
the
r
epor
t
s
that
are available
to
you and the account and transaction information you can view.
CitiDirect allows you to select a report and edit its content so that your report includes only the information
you need.
Some reports are available as condensed reports. Condensed reports contain the same information as
regular reports, but the information is displayed to include more information on one page.
You can specify whether or not the report should include page breaks.
Note: The procedures for selecting, editing, running and viewing reports are the same for all CitiDirect reports.
For step-by-step procedures, refer to the CitiDirect Basics: Reports and Inquiry guide, available in the
Learning Center at
Report Service Classes
Reports associated with Payments are grouped within the service classes listed below:
Cash Balance Reports
Cash Statement Reports
Cash Transaction Initiation Reports
Cash Balance Reports
Cash Balance Reports (depending on the type) show a summary of all accounts with their ledger
balances, available balances or balances consolidated by a specified currency. The statement date is set
in the report criteria and is the basis on which the report is generated. The last entry date is the date of the
last entry across the account. The reports listed below are available in the Cash Balances Reports service
class.
Balance Summary Report — Lists a summary of all your accounts, sorted by account number and
grouped by branch and currency. This report allows you to drill down to more details for an account.
To view account statement information pertaining to a particular account, click the Statement Date (Group
by Account) or the Account Number (Group by Statement Date) for that account. The Account Statement
Report appears.
To view transaction detail information pertaining to a particular transaction, click the Entry Date for that
transaction. The Transaction Detail Advice Report appears.
Consolidated Balance Summary Report — Lists a summary of all of your accounts, consolidated by either
branch or currency. This report allows you to drill down to additional information for an account.
If you select the Consolidation by Branch (across multiple currencies) as report criteria, click the Branch
Number/Name to see additional information on the accounts that make up the branch balance.
136

Reports (Cont’d)
If you select Consolidation by Currency (across multiple branches) as report criteria, click the Statement
Date to see additional information on branches that make up the currency balance.
Customer Position Report — Lists balances and activity for your accounts. Information in this report is
grouped by customer number, currency and by account number and sorted by statement date.
Cash Statements Reports
Cash Statements Reports show summary and detailed information on cash transactions moving across an
account, grouped by account number. In addition, this data may also be used to generate only incremental
account information based on last run time. The reports listed below are available in the Cash Statements
Reports service class:
Account Statement Report — Lists summary-level information for all entries in an account for the
statement period. Information in this report is grouped by customer number, branch number, and account
number and sorted by statement date.
To view transaction detail information for a particular transaction, click the Entry Date or Amount field for
that transaction and the Transaction Detail Advice Report appears.
Account Statement Details Report — Lists detailed information related to entries in an account for the
statement period. All data is as of the last available day and is grouped by account number. This report is
available in condensed format.
Back Value Position Report — Lists all adjusted and unadjusted balances and a summary of debit and
credit back values for a selected date or date range. The balance component of this report is delivered
daily from Citichecking, and will display balances for all statement dates within a selected date range, even
if there is no back value activity for those dates.
To view detailed information for a specific date, click the As of Date and the Back Value Summary Report
appears.
Back Value Summary Report — Lists detailed information on each back value for a specified date or date
range.
To view detailed information on a particular transaction, click the Date Value Processed and the Back
Value Transaction Detail Advice appears.
Back Value Transaction Detail Advice Report — Lists the full details of each back value. Although similar
to the Transaction Detail Advice Report found in the Cash Statements Reports service class, this report
uses the back value MT940s delivered from North America as its source. This report is available in
condensed format.
Incremental Account Statement Report — Shows account statement data for the current date for only
those transactions that have posted since the last time the report was run for the selected accounts.
Incremental Account Statement Details Report — Shows the account statement data for the current date
at a detailed level for only those transactions that have posted since the last time the report was run for the
selected accounts. This report is available in condensed format.
137

Reports (Cont’d)
Statement Delivery Status Report — Shows when the last statement was received and posted to CitiDirect
for an account. The report contains the time the statement was processed and indicates when the
statement will become available for reports to be run.
Transaction Detail Advice Report — Lists payment details for credits and/or debits. This report is available
in condensed format (US only).
Transaction Float Summary Report — Shows a summary of transactions that contain float information.
This report only displays transactions that have float. To view transaction detail information pertaining to a
particular transaction, click the Value Date for that transaction and the Transaction Detail Advice Report
appears.
Transaction Summary Report — Lists summary information for all of your cash transactions. It also
displays summary information for US and Canada cheque transactions. Summary cheque information is
not displayed for other regions. This report allows you to drill down to transaction detail information. To
view detailed transaction information, click the Entry Date for a particular transaction and the Transaction
Detail Advice Report appears. For check information, click the Cheque Count Field to display the Cheque
Listing Report.
US ACH Transaction Details Report — Lists payment details and specific ACH descriptions for ACH
transactions. It is sorted by the ACH Transaction Description in descending order.
Cash Transaction Initiation Reports
Cash Transaction Initiation Reports show summary and detail information on transactions entered/ initiated
using the Payments service class in CitiDirect. The reports listed below are available in the Cash
Transaction Initiation Reports service class.
File Import Transaction Initiation Summary Report — Displays all the transactions that were imported in a
file. It can be initiated directly from the File Import screen or from the Cash Transaction Initiation Reports
service class. It contains the same fields as the regular Transaction Initiation Summary Report, except that
it includes two higher-level grouping fields, Run ID and File Name.
Payments Transaction Audit Report — Provides a history relating to a transaction, including all payment
details and all users who have modified the transaction. Historical data is available for a period of 15
months, minimum. The transaction history will only be reported from the date the payments audit data was
available.
Preformat Library Detail Report — Lists detailed information for all fields in each preformat. Use this report
as a printed record of your preformats. This report does not include WorldLink Payment Services
preformats. WorldLink customers should run the specific WorldLink Preformat Library Detail Report.
Preformat Library Summary Report — Lists all the fields included in preformats. Use it as a printed record
of your preformats. This report does not include WorldLink Preformats. WorldLink customers should run
the specific WorldLink Preformat Library Summary Report.
Transaction Initiation Detail Report — Lists all transactions entered into CitiDirect for all payment methods
for a specific date, drawn on a specific account, in a specific branch. Information in this report is sorted by
debit account number, payment method, payment type and payment currency. To view detailed
transaction and account information, click the Payment Amount and the Transaction Initiation Payment
Details Report appears.
138
Reports (Cont’d)
Transaction Initiation Summary Report — Summarizes all transactions entered into CitiDirect for all
payment methods for a specific date range. Debit account number, payment method, payment type and
payment currency sort information in this report. To view detailed account information, click the Value Date
and the Transaction Initiation Detail Report appears.
Transaction Initiation Payment Details Report — Displays ALL details associated with a payment. In
addition to being accessible via drill-down from the Transaction Initiation Details Report, this is also a
stand-alone report. As a stand-alone report, it displays fields from the Transaction Initiation Details
Reports, which are marked as stand-alone report fields only. The stand-alone report also displays any
sub-form fields that you specify in your report-selection criteria. This report eliminates the need to drill
down to see additional information.
Transaction Initiation Summary Report by Subsidiary Identifier Report — Shows at a summary level, all
transactions entered/initiated in Payments in CitiDirect, grouped by subsidiary, for all payment methods
within the date range specified.
Transaction Initiation Detail Report by Subsidiary Identifier Report — Provides, at a detailed level, all
transactions entered/initiated in the Payments in CitiDirect, grouped by subsidiary, for all payment
methods within the date range specified. This report shows a list of all payment methods issued in a
specific date range, drawn on a specific account, in a specific branch. The report also gives a detail view
of each transaction.
US — Preformat Library Detail Report — Lists detailed information for all fields in each preformat. Use this
report as a printed record of your preformats. This report includes only North America Preformats.
WorldLink customers should run the specific WorldLink Preformat Library Detail Report, and all other
customers should run the Preformat Library Detail Report.
US — Preformat Library Summary Report — Lists all the fields included in preformats. You can run this
report and use it as a printed record of your preformats. This report includes only North America
Preformats. WorldLink customers should run the specific WorldLink Preformat Library Summary Report
and all other customers should run the Preformat Library Summary Report.
Offline Authorization Report
The Offline Authorization Report lists all offline authorizations performed. Information in this report is
sorted by debit account number, payment method, payment type and payment currency.
The Offline Authorization Report can be found in the Offline Authorization Reports service class in the All
Reports category on the CitiDirect navigation bar.
139

B. Inquiries

Inquiries
Inquiries provide a point-in-time view
of
data, which is displayed while you are signed on
to
CitiDirect
.
Typically, CitiDirect inquiries are run
for
real-time reporting, when you prefer
to
view the information on your
screen.
An inquiry is generally faster than a report and is usually submitted when you want a crucial piece of
information immediately.
An inquiry can be printed. The end result is similar to a basic Microsoft Excel spreadsheet.
The timestamps for both when an inquiry was run and when it was printed are labeled on the inquiry
screen and on the printed inquiry.
Inquiry criteria are not saved. Once the inquiry is closed, the information is gone. The inquiry would have
to be created again to see the information.
Not
e
:
For
de
t
ailed procedures
for
submitting inquiries,
refer to
the CitiDirect
Basics:
R
epor
t
s
and Inquiry
guide, available in the Learning Center at
Cash Statement Inquiries
Account Statement Inquiry — Retrieves a summary of all booked movements of a defined account. You
can retrieve information on all booked movements for a branch, customer number, account, or any
combination.
Balance Summary Inquiry — Retrieves a summary of all accounts in a defined branch, with their ledger
and available balances.
Incremental Account Statement Inquiry — Retrieves current account statement data. This inquiry always
runs for the current date. The first time this inquiry is run each day, it returns the opening balance and any
intra-day transactions received. The next time you run it, your results will show transactions that have
posted since the last time you ran the inquiry.
N.A. Paid Cheques Inquiry — Retrieves a list of paid cheques for US and Canadian accounts.
Paid Cheques Inquiry — Retrieves a listing of all cheques that have been paid.
Statement Delivery Status Inquiry — Retrieves information on when the last statement for an account has
been received and posted to CitiDirect. The inquiry results contain the time the statement was processed,
indicating when the statement became available for inquiries to be run from it.
Transaction Detail Advice Inquiry — Returns payment details for credit and debit transactions.
Transaction Float Summary Inquiry — Returns a summary of transactions that contain float information.
Transaction Summary Inquiry — Retrieves a summary of all transactions across an account or branch, by
product type.
140

Inquiries (Cont’d)
Canada ACH Inquiries
ACH Processed Items Inquiry — Retrieves a summary and details of all Processed ACH items on
Canadian accounts.
Bank Search Inquiry
Bank Search Inquiry — Retrieves the details banks stored in the CitiDirect Bank Library, without requiring
entitlements to the library.
WorldLink Inquiries
FI Currency Rates Inquiry — Retrieves the daily FX rates *settlement rates and sell rates (cheque and
transfers) for established currency pairs.
FI Sell Rates Inquiry — Retrieves the daily FX rates – (sell rates (cheque and transfer)) for established
currency pairs. It is identical to the FI Currency Rates Inquiry, except that it does not display the settlement
rate.
141

IRS Circular 230 Disclosure: Citigroup Inc. and its affiliates do not provide tax or legal advice. Any discussion of tax matters in
these materials (i) is not intended or written to be used, and cannot be used or relied upon, by you for the purpose of avoiding any
tax penalties and (ii) may have been written in connection with the "promotion or marketing" of any transaction contemplated
hereby ("Transaction"). Accordingly, you should seek advice based on your particular circumstances from an independent
tax advisor.
In any instance where distribution of this communication is subject to the rules of the US Commodity Futures Trading
Commission (“CFTC”), this communication constitutes an invitation to consider entering into a derivatives transaction under U.S.
CFTC Regulations §§ 1.71 and 23.605, where applicable, but is not a binding offer to buy/sell any financial instrument.
Any terms set forth herein are intended for discussion purposes only and are subject to the final terms as set forth in separate definitive
written agreements. This presentation is not a commitment to lend, syndicate a financing, underwrite or purchase securities, or commit
capital nor does it obligate us to enter into such a commitment, nor are we acting as a fiduciary to you. By accepting this presentation,
subject to applicable law or regulation, you agree to keep confidential the information contained herein and the existence of and proposed
terms for any Transaction.
Prior to entering into any Transaction, you should determine, without reliance upon us or our affiliates, the economic risks and merits (and
independently determine that you are able to assume these risks) as well as the legal, tax and accounting characterizations and
consequences of any such Transaction. In this regard, by accepting this presentation, you acknowledge that (a) we are not in the business
of providing (and you are not relying on us for) legal, tax or accounting advice, (b) there may be legal, tax or accounting risks associated with
any Transaction, (c) you should receive (and rely on) separate and qualified legal, tax and accounting advice and (d) you should apprise
senior management in your organization as to such legal, tax and accounting advice (and any risks associated with any Transaction) and
our disclaimer as to these matters. By acceptance of these materials, you and we hereby agree that from the commencement of
discussions with respect to any Transaction, and notwithstanding any other provision in this presentation, we hereby confirm that no
participant in any Transaction shall be limited from disclosing the U.S. tax treatment or U.S. tax structure of such Transaction.
We are required to obtain, verify and record certain information that identifies each entity that enters into a formal business relationship with
us. We will ask for your complete name, street address, and taxpayer ID number. We may also request corporate formation documents, or
other forms of identification, to verify information provided.
Any prices or levels contained herein are preliminary and indicative only and do not represent bids or offers. These indications are provided
solely for your information and consideration, are subject to change at any time without notice and are not intended as a solicitation with
respect to the purchase or sale of any instrument. The information contained in this presentation may include results of analyses from a
quantitative model which represent potential future events that may or may not be realized, and is not a complete analysis of every material
fact representing any product. Any estimates included herein constitute our judgment as of the date hereof and are subject to change
without any notice. We and/or our affiliates may make a market in these instruments for our customers and for our own account.
Accordingly, we may have a position in any such instrument at any time.
Although this material may contain publicly available information about Citi corporate bond research, fixed income strategy or economic and
market analysis, Citi policy (i) prohibits employees from offering, directly or indirectly, a favorable or negative research opinion or offering to
change an opinion as consideration or inducement for the receipt of business or for compensation; and (ii) prohibits analysts from being
compensated for specific recommendations or views contained in research reports. So as to reduce the potential for conflicts of interest, as
well as to reduce any appearance of conflicts of interest, Citi has enacted policies and procedures designed to limit communications
between its investment banking and research personnel to specifically prescribed circumstances.
[TRADEMARK SIGNOFF: add the appropriate signoff for the relevant legal vehicle]
© 2013 Citigroup Global Markets Inc. Member SIPC. All rights reserved. Citi and Citi and Arc Design are trademarks and service marks of
Citigroup Inc. or its affiliates and are used and registered throughout the world.
© 2013 Citigroup Global Markets Limited. Authorized and regulated by the Financial Services Authority. All rights reserved. Citi and Citi
and Arc Design are trademarks and service marks of Citigroup Inc. or its affiliates and are used and registered throughout the world.
© 2013 Citibank, N.A. All rights reserved. Citi and Citi and Arc Design are trademarks and service marks of Citigroup Inc. or its affiliates
and are used and registered throughout the world.
© 2013 Citigroup Inc. All rights reserved. Citi and Citi and Arc Design are trademarks and service marks of Citigroup Inc. or its affiliates and
are used and registered throughout the world.
© 2013 [Name of Legal Vehicle] [Name of regulatory body.] All rights reserved. Citi and Citi and Arc Design are trademarks and service
marks of Citigroup Inc. or its affiliates and are used and registered throughout the world.
Citi believes that sustainability is good business practice. We work closely with our clients, peer financial institutions, NGOs and other
partners to finance solutions to climate change, develop industry standards, reduce our own environmental footprint, and engage with
stakeholders to advance shared learning and solutions. Highlights of Citi’s unique role in promoting sustainability include: (a) releasing in
2007 a Climate Change Position Statement, the first US financial institution to do so; (b) targeting $50 billion over 10 years to address global
climate change: includes significant increases in investment and financing of renewable energy, clean technology, and other carbon-
emission reduction activities; (c) committing to an absolute reduction in GHG emissions of all Citi owned and leased properties around the
world by 10% by 2011; (d) purchasing more than 234,000 MWh of carbon neutral power for our operations over the last three years;
(e) establishing in 2008 the Carbon Principles; a framework for banks and their US power clients to evaluate and address carbon risks in the
financing of electric power projects; (f) producing equity research related to climate issues that helps to inform investors on risks and
opportunities associated with the issue; and (g) engaging with a broad range of stakeholders on the issue of climate change to help advance
understanding and solutions.
Citi works with its clients in greenhouse gas intensive industries to evaluate emerging risks from climate change and, where appropriate, to
mitigate those risks.
efficiency, renewable energy & mitigation
