
Author: Zultys Technical Support Department
Zultys Advanced Communicator 6.0 – ZAC
User Manual
Technical Publications
Z u l t y s , I n c . 7 8 5 L u c e r n e S u n n y v a l e , C a l i f o r n i a , U S A 9 4 0 8 5 w w w . z u l t y s . c o m
March
20

Zultys Advanced Communicator 6.0 User Manual March 27, 2020
© 2020 Zultys, Inc. No reproduction or distribution without permission
Page 2 of 110
Technical Publications
No part of this document may be reproduced or transmitted in any form or by any means, electronic or
mechanical, for any purpose, without the express written permission of Zultys, Inc. Under the law, “reproducing”
includes translating the document’s content into another language or format.
Information in this document is subject to change without notice. Every effort has been made to ensure that the
information in this document is accurate. Zultys, Inc. is not responsible for printing or clerical errors. Any
troubleshooting suggestions or suggestions for resolving common issues included in this document are
recommendations made by Zultys Technical Support team and are not guaranteed to resolve every issue the
reader may encounter.

Zultys Advanced Communicator 6.0 User Manual March 27, 2020
© 2020 Zultys, Inc. No reproduction or distribution without permission
Page 3 of 110
Technical Publications
1 Contents
2 GETTING STARTED .............................................................................................. 6
2.1 DESCRIPTION ...................................................................................................... 6
2.2 PC REQUIREMENTS ............................................................................................... 6
2.3 MACINTOSH REQUIREMENTS .................................................................................... 6
2.4 OTHER REQUIREMENTS .......................................................................................... 6
2.5 WHAT’S NEW IN 6.0 ............................................................................................. 6
2.6 6.0.0.75 .......................................................................................................... 7
2.7 INSTALLATION ..................................................................................................... 7
2.7.1 PC ..................................................................................................................... 7
2.7.2 MACINTOSH ....................................................................................................... 10
3 OPERATION .......................................................................................................11
3.1 LOGIN SCREEN ...................................................................................................11
3.2 MAIN SCREEN ....................................................................................................13
3.3 SETTINGS MENU .................................................................................................21
3.3.1 APPLICATION: .................................................................................................... 21
3.3.2 ALERTS: ............................................................................................................ 24
3.3.3 CALL HANDLING: ................................................................................................ 27
3.3.4 VOICEMAIL NOTIFICATIONS: .................................................................................. 29
3.3.5 SOFTPHONE: ...................................................................................................... 30
3.3.6 PLANTRONICS HEADSET SUPPORT ........................................................................... 32
3.4 BUDDIES SCREEN .................................................................................................33
3.4.1 BUDDY GROUPS .................................................................................................. 34
3.4.2 PRESENCE CHANGE ALERT: .................................................................................... 36
3.4.3 MY CONTACTS ................................................................................................... 39
3.5 RECENT ACTIVITIES SCREEN ...................................................................................40
3.5.1 CALL LOG ......................................................................................................... 41
3.6 DIAL SCREEN(MINIMIZED MODE) ..............................................................................43
3.6.1 DRAG AND DROP OPERATIONS ............................................................................... 46
3.6.2 BLIND TRANSFER ................................................................................................. 47
3.6.3 ATTENDED TRANSFER .......................................................................................... 47
3.6.4 AD HOC CONFERENCE .......................................................................................... 48
3.7 VOICEMAIL SCREEN ..............................................................................................48
3.7.1 VOICEMAIL GREETINGS ......................................................................................... 52
3.8 CONTACTS SCREEN .............................................................................................54

Zultys Advanced Communicator 6.0 User Manual March 27, 2020
© 2020 Zultys, Inc. No reproduction or distribution without permission
Page 4 of 110
Technical Publications
3.8.1 ADDING LOCAL CONTACTS ................................................................................... 56
3.9 PARKED CALLS SCREEN .........................................................................................56
3.10 TEAM MESSAGING - CHAT GROUPS........................................................................59
3.10.1 FILE TRANSFER ................................................................................................. 64
3.10.2 SCREENSHOT .................................................................................................... 68
3.10.3 RECENT IMAGES/FILES ........................................................................................ 69
3.10.4 DRAG AND DROP OPERATIONS(FULL SCREEN MODE) .................................................. 71
3.11 FAX ...............................................................................................................72
3.11.1 PRINT TO FAX (WINDOWS ONLY) ........................................................................... 73
3.11.2 SENDING A FAX FROM THE FAX DRIVER: .................................................................. 77
3.12 CONFERENCE ...................................................................................................79
3.12.1 WEB CONFERENCE ............................................................................................. 82
3.13 NOTIFICATIONS ................................................................................................83
3.14 SYSTEM TRAY AND TASKBAR OPTIONS: ...................................................................85
4 MAXIMIZED SCREEN MODE .................................................................................86
5 AGENT ROLES/CALL GROUP OPERATION ..............................................................89
5.1 PRESENCE FOR OPERATORS ....................................................................................89
5.1.1 EMERGENCY NOTIFICATIONS .................................................................................. 89
5.2 PRESENCE FOR ACD AGENTS..................................................................................90
5.2.1 AGENT ROLES .................................................................................................... 92
5.2.2 SUPERVISOR FUNCTIONS ........................................................................................ 93
6 SMS 2.0 SERVICE ................................................................................................97
6.1 DESCRIPTION .....................................................................................................97
6.1.1 REQUIREMENTS ................................................................................................... 97
6.1.2 OVERVIEW PROCESS ............................................................................................. 97
6.2 OPERATION .......................................................................................................98
6.2.1 SENDING SMS MESSAGES ...................................................................................... 98
6.2.2 RECEIVING SMS MESSAGES .................................................................................. 100
7 MICROSOFT OFFICE UNIFIED COMMUNICATIONS ................................................ 103
7.1 DESCRIPTION ................................................................................................... 103
7.2 OPERATION ..................................................................................................... 103
7.3 CONDITIONS .................................................................................................... 106

Zultys Advanced Communicator 6.0 User Manual March 27, 2020
© 2020 Zultys, Inc. No reproduction or distribution without permission
Page 5 of 110
Technical Publications
8 COMMAND LINE PARAMETERS .......................................................................... 108
8.1 DESCRIPTION ................................................................................................... 108
Date
Revisions
February 2020
Added multiple voicemail deletion
option, added softphone DnD
operation
March 2020
Updated MAC OS minimum version
requirement

Zultys Advanced Communicator 6.0 User Manual March 27, 2020
© 2020 Zultys, Inc. No reproduction or distribution without permission
Page 6 of 110
Technical Publications
2 Getting Started
2.1 Description
Zultys Advanced Communicator (ZAC) is a Unified Communications client that
provides an easy to use interface to access the capabilities of the MX system.
2.2 PC Requirements
• Version –Windows 7 (32-bit or 64-bit)*, Windows 8 (32-bit or 64-bit),
Windows 10 (32-bit or 64-bit)
• RAM – 256 MB standard
• Processor – 1 GHz minimum
• Hard Drive Space – 100 MB
*NOTE: For Windows 7 machines, ZAC 6.0 requires SP 1 + KB 2999226
(both will be installed automatically if Windows Updates option is turned
on).
2.3 Macintosh Requirements
• Version – OS X v10.13 or higher (64-bit only)
• RAM – 1GB
• Processor – 1GHz Intel Core 2 Duo (64-bit)
• Hard Drive Space – 150 MB
2.4 Other Requirements
• MX software version 12.0.7 minimum. MX release 15.0.x is recommended
for full functionality
• Security certificate installed on the MX
• MXIE/ZAC license for each user
Note: MXIE and ZAC should not be running at the same time. This may cause
unexpected results in operation.
2.5 What’s new in 6.0
• Ability to see an image(avatar) associated with a user
*requires MX 15.0.x+
• Ability to create Buddy groups
*requires MX 15.0.x+

Zultys Advanced Communicator 6.0 User Manual March 27, 2020
© 2020 Zultys, Inc. No reproduction or distribution without permission
Page 7 of 110
Technical Publications
•
Agent role/presence status
*requires MX 15.0.x+
SMS 2.0 support
*requires MX 15.0.x+
• Location support
• Voicemail Screen UI changes
• Presence note clear icon
• Link to Web based SuperView for ICC Supervisors
2.6 6.0.0.75
• Emergency call notification pop up
• Application focus after answer from incoming pop up setting
• Presence display ZAC icon in System Tray
2.7 Installation
2.7.1 PC
Double click the download ZAC installation file. The installation process will
begin.

Zultys Advanced Communicator 6.0 User Manual March 27, 2020
© 2020 Zultys, Inc. No reproduction or distribution without permission
Page 8 of 110
Technical Publications
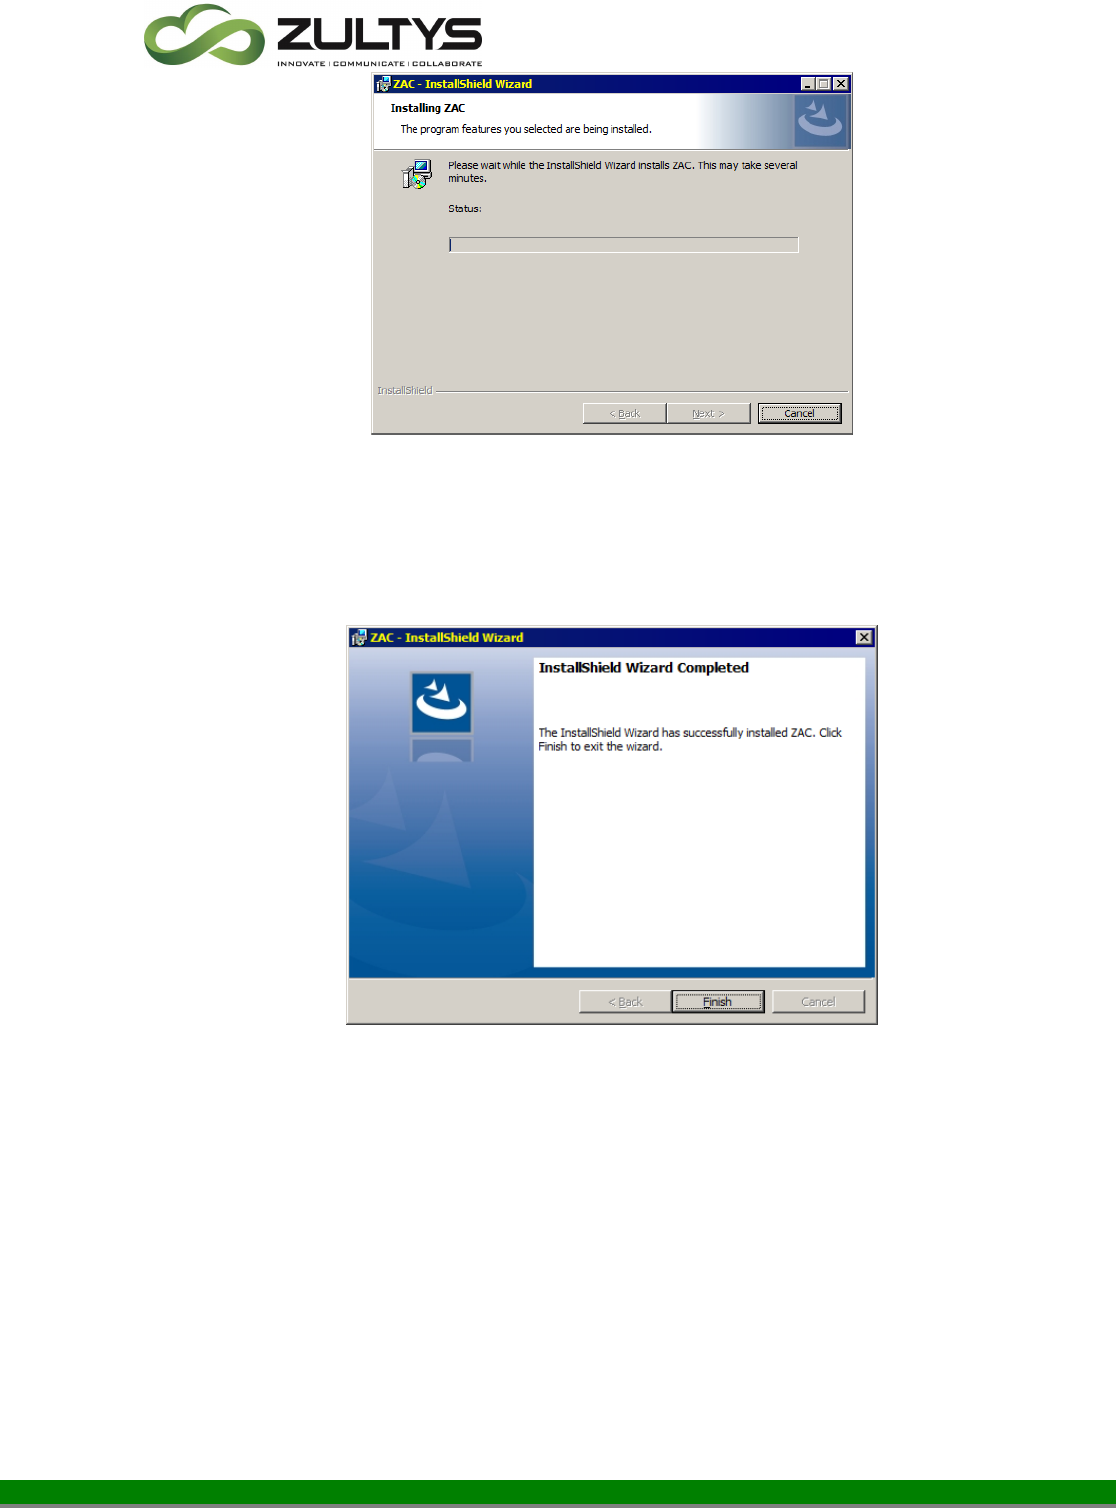
Click the Next button to continue
It is recommended to leave the default installation settings.
Click the Install button.
Zultys Advanced Communicator 6.0 User Manual March 27, 2020
© 2020 Zultys, Inc. No reproduction or distribution without permission
Page 9 of 110
Technical Publications
Click the Finish button to completer the installation.
NOTE: The ZAC installer contains .MSI logic that will facilitate group policy
scripts for installation. This allows the ZAC installer to work silently from the
command line parameter. An example of parameters:
"C:\Users\xxxxxxxxx\Desktop\ZAC_x64-6.0.0.47.exe /S /v/qn "- Install
"C:\Users\xxxxxxxxxx\Desktop\ZAC_x64-6.0.0.47.exe /S /x /v/qn" – Uninstall

Zultys Advanced Communicator 6.0 User Manual March 27, 2020
© 2020 Zultys, Inc. No reproduction or distribution without permission
Page 10 of 110
Technical Publications
2.7.2 Macintosh
Open the DMG file after downloading it.
Drag the program icon into the Applications folder
You may then open ZAC from the Applications folder.
Note: This process does NOT create an Alias in the Macintosh Doc at the
bottom of the screen. The user will need to do that themselves.

Zultys Advanced Communicator 6.0 User Manual March 27, 2020
© 2020 Zultys, Inc. No reproduction or distribution without permission
Page 11 of 110
Technical Publications
3 Operation
3.1 Login Screen
When you first start the program, the login screen will appear. You will need to
enter your login information in order to login to the program.
Enter your user name, password and the MX system address/domain name.
You may also select Remember password to avoid re-typing each time.
If you wish to utilize LDAP, enable the Use Windows Credentials and enter your
Windows login/password information. Macintosh users can also utilize LDAP for
logging in.
Click Login to proceed

Zultys Advanced Communicator 6.0 User Manual March 27, 2020
© 2020 Zultys, Inc. No reproduction or distribution without permission
Page 12 of 110
Technical Publications
If you are a member of a call group, you will be prompted to select any group
role for which you are a member of.
You may also select the desired location to log into as well.
You may select any or all roles you want to login to.
If you want to always login to specific roles, click the Apply to future login
checkbox.
Click Apply to login to ZAC.

Zultys Advanced Communicator 6.0 User Manual March 27, 2020
© 2020 Zultys, Inc. No reproduction or distribution without permission
Page 13 of 110
Technical Publications
3.2 Main Screen
Once you have logged in, the main screen will appear. ZAC has two basic screen
layout options, minimized mode or maximized mode.
Minimized mode

Zultys Advanced Communicator 6.0 User Manual March 27, 2020
© 2020 Zultys, Inc. No reproduction or distribution without permission
Page 14 of 110
Technical Publications
Maximized mode
• Presence Indicator/selector
You may click on your current presence state to drop down the presence menu.
Below the presence selection is an area to include a note that will be seen by
users in addition to your presence state.
Select the desired presence from the list.
Type a note and press ENTER to save the note.
To delete a note remove the note and press ENTER.

Zultys Advanced Communicator 6.0 User Manual March 27, 2020
© 2020 Zultys, Inc. No reproduction or distribution without permission
Page 15 of 110
Technical Publications
• Locations
You may select which location you want to be logged into using the locations
icon.
Click the location icon and select the desired location.
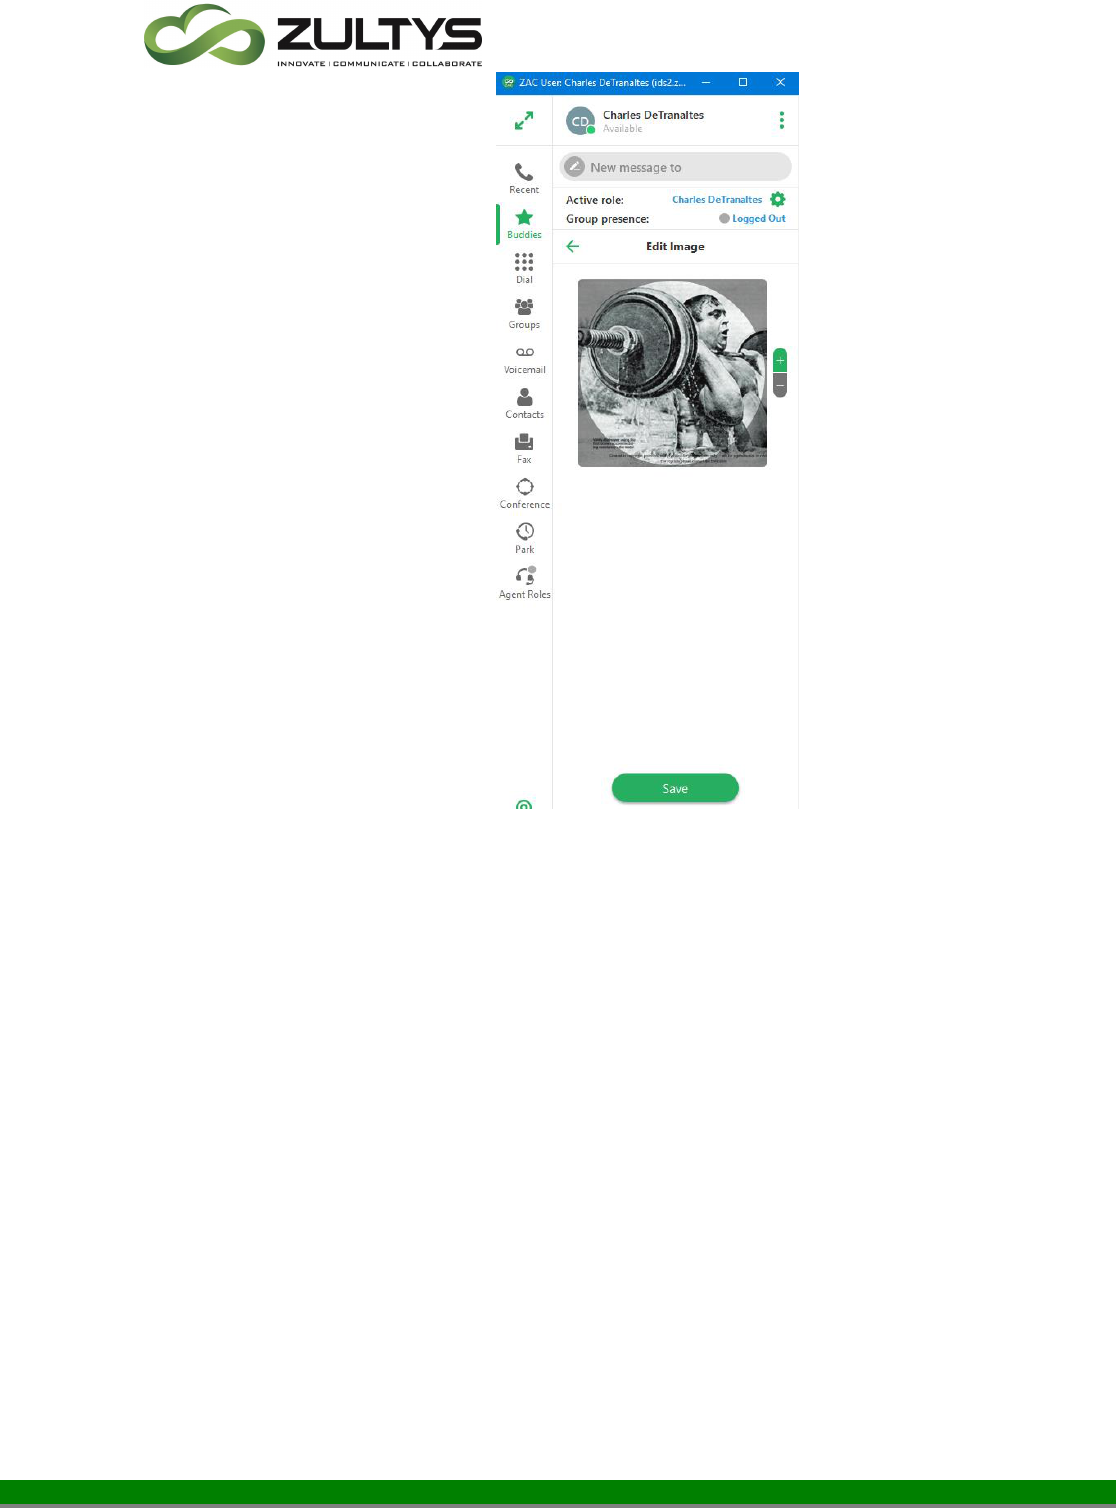
• User Information/Image
You may add an image that can be associated to you. You may also
add/edit your contact information in this area as well.
Click your name in the presence indicator bar. The My Info screen will
appear.

Zultys Advanced Communicator 6.0 User Manual March 27, 2020
© 2020 Zultys, Inc. No reproduction or distribution without permission
Page 16 of 110
Technical Publications
Click the Upload button. The File Explorer window will open. Navigate to
the location where your desired image is stored and double click on the
image.
Zultys Advanced Communicator 6.0 User Manual March 27, 2020
© 2020 Zultys, Inc. No reproduction or distribution without permission
Page 17 of 110
Technical Publications
You may size the image using the controls to the right of the image.
When you are finished, click Save.
You may edit your contact information:
Full name
Mobile phone
Home phone
e-mail

Zultys Advanced Communicator 6.0 User Manual March 27, 2020
© 2020 Zultys, Inc. No reproduction or distribution without permission
Page 18 of 110
Technical Publications
• Option Menu
This menu contains the About screen, Setup screen, Log off function, and the
Exit function. It is accessed by clicking on the icon in the upper right
corner.

Zultys Advanced Communicator 6.0 User Manual March 27, 2020
© 2020 Zultys, Inc. No reproduction or distribution without permission
Page 19 of 110
Technical Publications
• About – Displays the version number of the program
• Settings – Provides access to programmable areas that users can
customize. See Settings Menu section of this document for more details.
• Log off – This will log you out of the program but keep the program
open. You must login again to utilize the program.
• Exit – This will close the program and log you off of the system.
• Bind Area
ZAC can initiate voice calls and handle multiple voice calls only through SIP
devices or external numbers to which it is bound. ZAC instances can be bound
to only one device at a time. The Bind window is used to bind ZAC to a SIP
device, internal softphone for PC audio usage, or an external phone number.
To access the Bind window click the Bind to or current device in the lower
left corner of ZAC. A drop down menu will appear.
• Bind Recent: This option allows you to select from a menu of devices and
registered contacts to which your ZAC was recently bound.
• Bind Device by ID: This option binds your ZAC instance to an MX
managed device. When entering the MAC address, make sure you utilize
upper case for any letters in the MAC address.
• Bind to External Phone: This option allows you to bind to a Cell Phone,
Home Phone Line.

Zultys Advanced Communicator 6.0 User Manual March 27, 2020
© 2020 Zultys, Inc. No reproduction or distribution without permission
Page 20 of 110
Technical Publications
• Bind by call from device: This option binds your ZAC instance to an MX
managed device that you designate by making a voice call.
• Bind softphone: This option binds your ZAC instance to the ZAC internal
Softphone. You can bind only one instance to the Softphone.
• Cancel bind: This option cancels the current binding leaving ZAC with no
bound device.
Softphone DnD: When you are bound to the ZAC softphone you may place
ZAC in Do Not Disturb(DnD) mode.
Move the mouse over the softphone icon in the Bind area:
Click the icon:
Icon will change to:
To remove DnD click the icon again:
Zultys Advanced Communicator 6.0 User Manual March 27, 2020
© 2020 Zultys, Inc. No reproduction or distribution without permission
Page 21 of 110
Technical Publications
3.3 Settings Menu
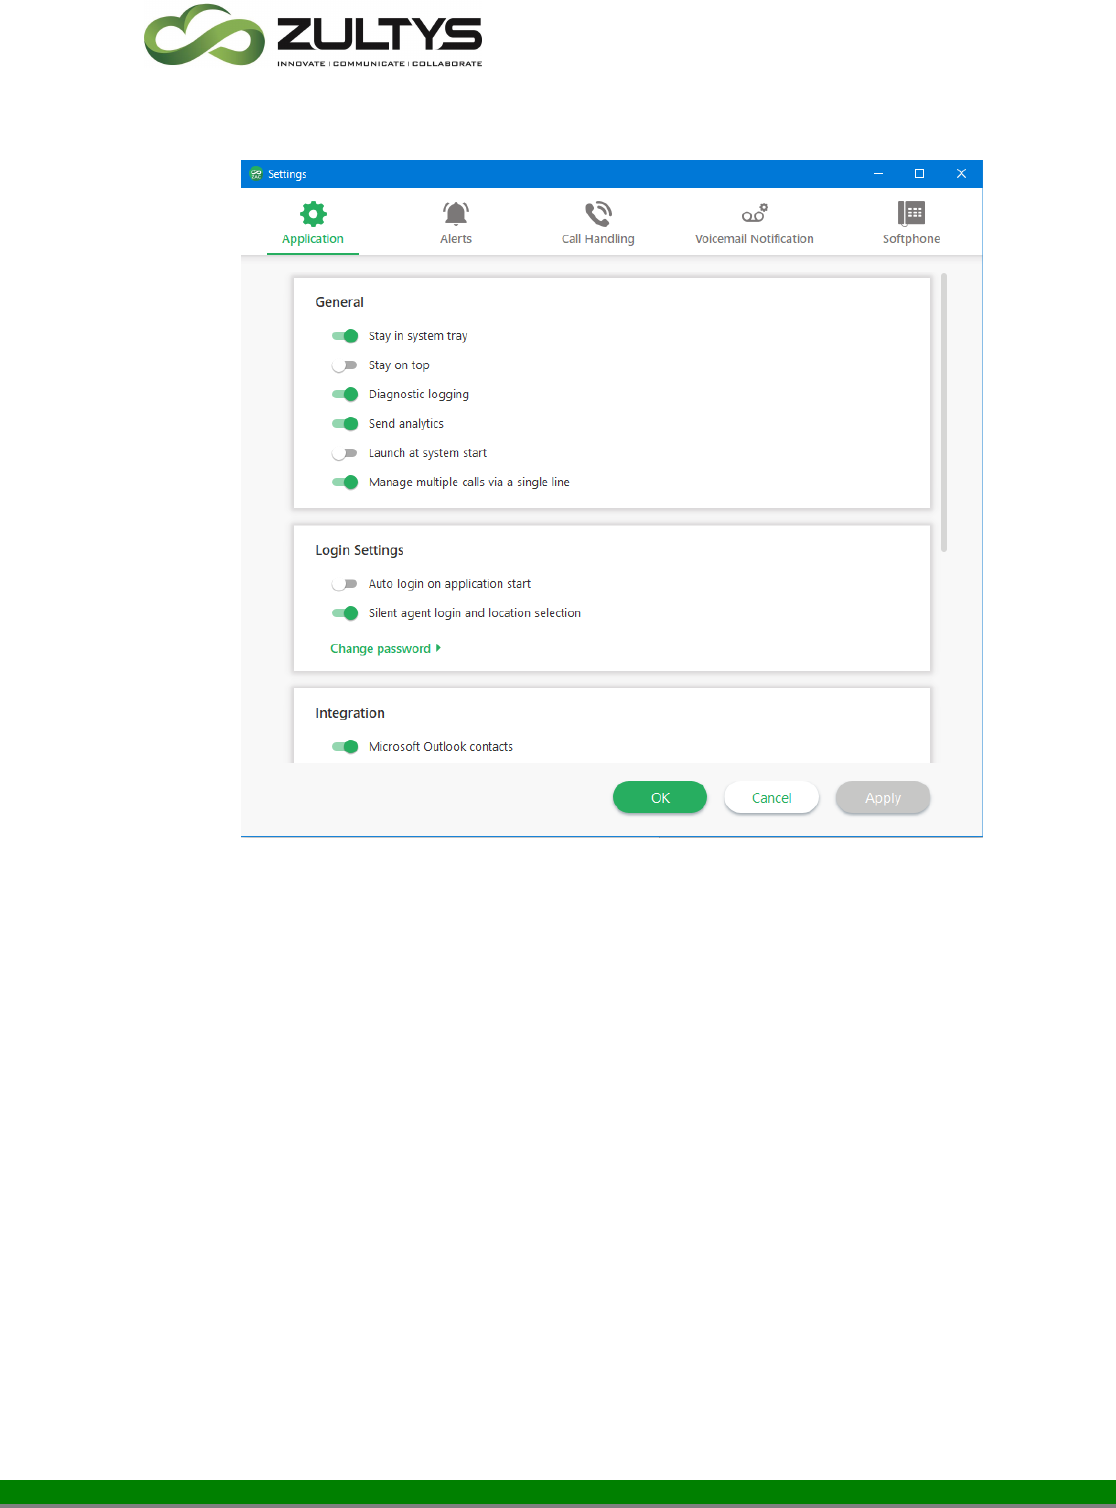
3.3.1 Application:
Stay in system tray – This option determines if the program logs the user off
and closes if the X in the menu bar is pressed. If the option is enabled, the
user/program remains and the program minimizes to the system tray. If the
option is disable, the pressing the X will exit the program.
Stay on Top – This setting allows the program to remain on the screen and in
focus.
Diagnostic Logging – This enables the diagnostic log which is used by Zultys
Technical support.
Send Analytics – This setting enables sending analytic data to Goggle analytics.
Zultys utilizes this data to improve the ZAC program based on actual usage.

Zultys Advanced Communicator 6.0 User Manual March 27, 2020
© 2020 Zultys, Inc. No reproduction or distribution without permission
Page 22 of 110
Technical Publications
Launch at System Start – This setting will start the program anytime the
computer starts.
Manage multiple calls via single line – This setting determines how multiple
calls are handled. The default setting is to have ZAC manage multiple calls
through the ZAC interface. Disabling this setting creates a
Manage via device
and you will not be using ZAC call control features, but will use all the call
control features of the device itself.
Auto Login on application start – This will perform an automatic login when the
program is started.
Silent Agent login – This setting will log the user in and have their call group
roles activated when the program starts. This bypasses the user having to
select the role each time at startup.
Change password – This allows you to change your user password. Click the
icon. You then need to enter your old, new and confirm new passwords.
Integration – This area allows you to select Outlook Contacts (32/64 bit),
Microsoft Unified Communications (see section 7), as well as the settings for
the screen dial feature.
If you enable Outlook Contacts, Outlook contacts will display in the
Contacts/Imported area.
Note: Supported on Windows version only

Zultys Advanced Communicator 6.0 User Manual March 27, 2020
© 2020 Zultys, Inc. No reproduction or distribution without permission
Page 23 of 110
Technical Publications
ScreenDial - You may define the hotkey combination that will be used to
activate the ScreenDial feature. In addition, you may add a prefix to use with
the screen dial feature. This is the number that will be inserted prior to the
highlighted screen dial number to be dialed before making the call. By default,
(CTRL+F12 on Windows, Command+F12 on MAC) invokes the screendial
feature.
Audio devices – This area allows the selection of the audio devices on the PC
that can be used for program audible notifications of various events. This area
is also used to select headset audio devices connected to the PC.
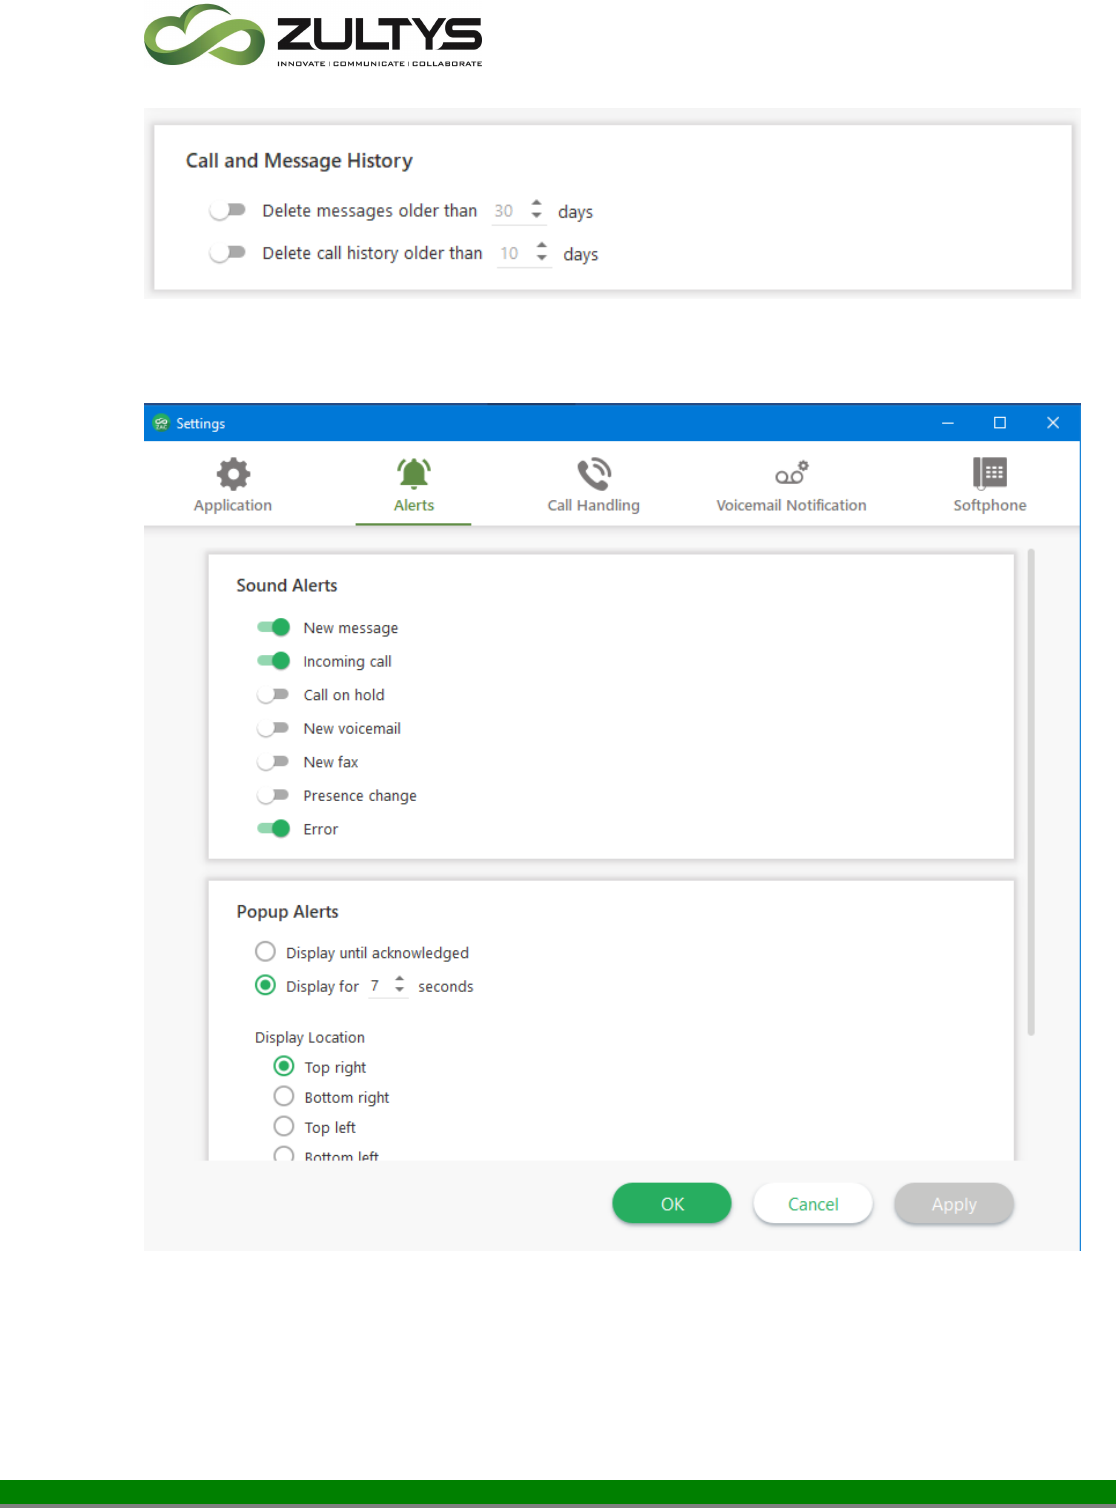
Delete messages older than - You may define the amount of time to store
instant messages. Messages older than the specified number of days will be
deleted automatically.
Delete call history older than – You may define the amount of time to store your
call history data. Data older than the specified number of days will be deleted
Zultys Advanced Communicator 6.0 User Manual March 27, 2020
© 2020 Zultys, Inc. No reproduction or distribution without permission
Page 24 of 110
Technical Publications
automatically.
3.3.2 Alerts:

Zultys Advanced Communicator 6.0 User Manual March 27, 2020
© 2020 Zultys, Inc. No reproduction or distribution without permission
Page 25 of 110
Technical Publications
Sound Alerts – Allows you to select which actions have an audible alert
associated with them.
Popup Alerts – This allows the selection of actions associated with popup
events. The duration and display location of popup alerts can be programmed
here.
Please note that incoming call popups will remain until the call is answered,
rejected, or the caller hangs up. The duration parameter does not apply to
incoming calls.
Popup alert for a message
Popup alert for incoming call
Incoming Call Pop Up Alert:
This setting controls if ZAC will come into focus after answering a call from the
incoming call pop up.
Enable = ZAC will take screen focus (default setting)
Disable= ZAC will not take screen focus

Zultys Advanced Communicator 6.0 User Manual March 27, 2020
© 2020 Zultys, Inc. No reproduction or distribution without permission
Page 26 of 110
Technical Publications
Presence Change Alert:
This area is where all active Presence Change Alerts can be viewed, cleared, and
edited.
Click See List to view all active change alerts.
You may edit any or clear all active alerts:

Zultys Advanced Communicator 6.0 User Manual March 27, 2020
© 2020 Zultys, Inc. No reproduction or distribution without permission
Page 27 of 110
Technical Publications
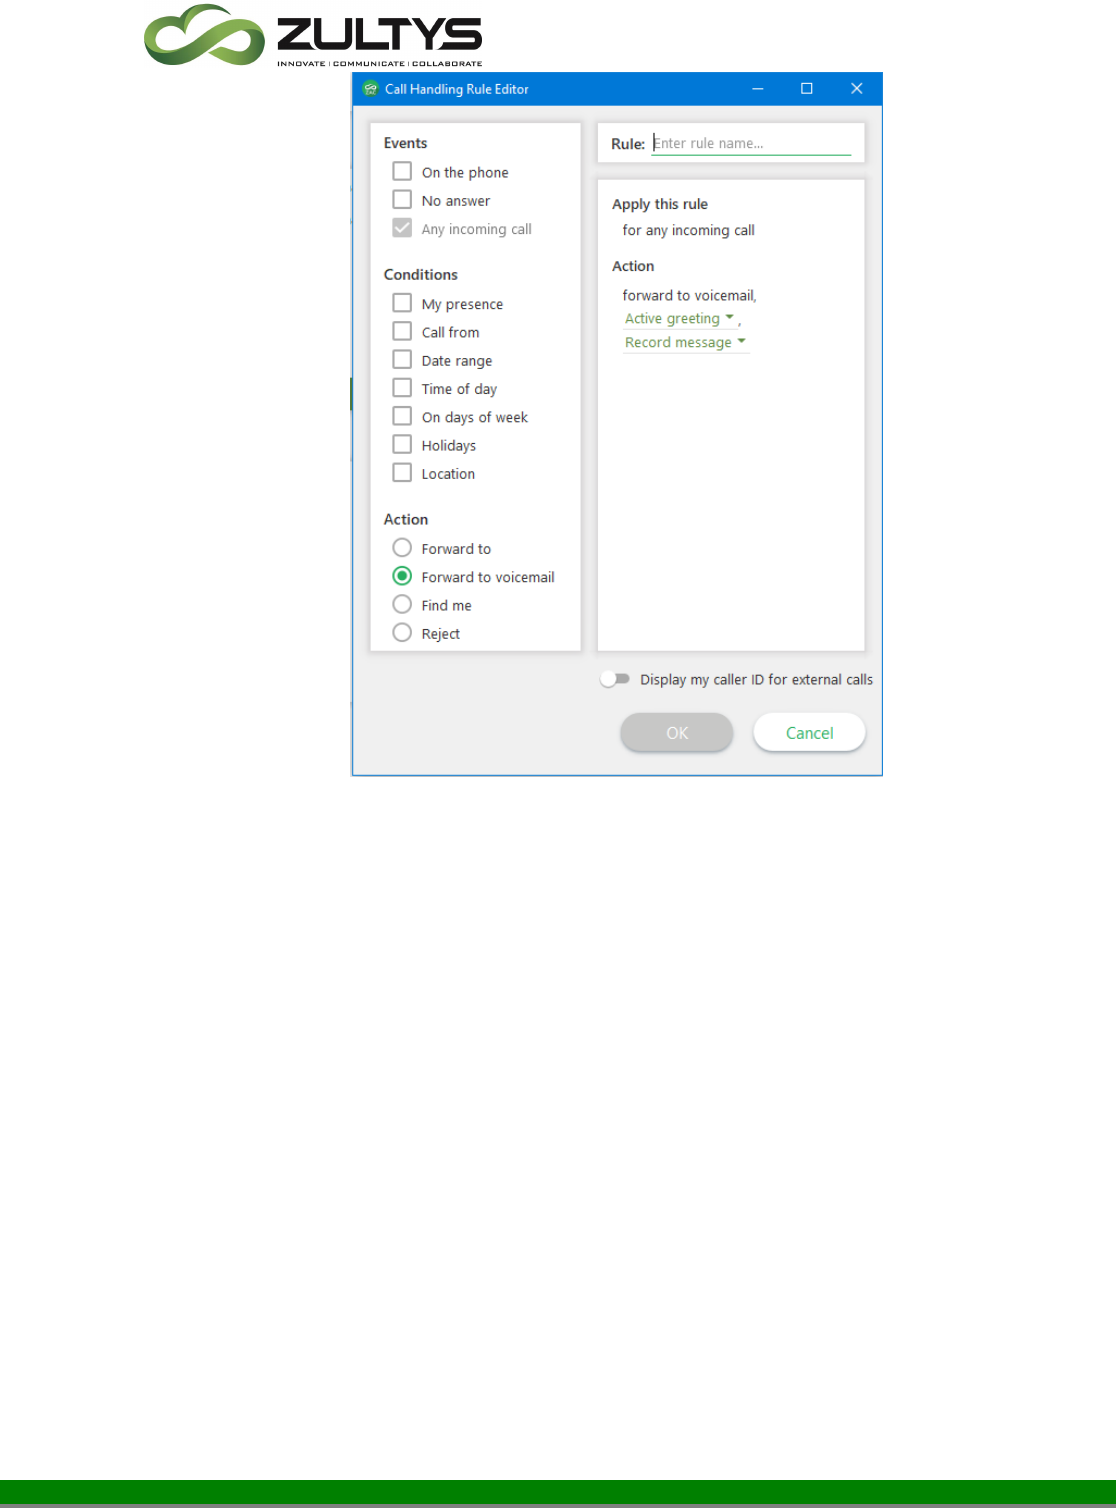
3.3.3 Call Handling:
This area allows you to setup individual call handling rules to control how
calls are handled under different conditions. Rules can be created, edited,
or deleted in this area. Call handling rules manage incoming calls that
you do not answer.
To add a new rule, click the icon at the bottom of the Rules area.
To delete an existing rule, highlight the rule and click the icon at the
bottom of the Rules area.
After creating a new rule or to edit a rule (double click the rule), the call
rule editor window will appear.
You may also enable/disable an existing rule by clicking the checkbox
next to the rule .
Adding or editing a call handling rule:
Zultys Advanced Communicator 6.0 User Manual March 27, 2020
© 2020 Zultys, Inc. No reproduction or distribution without permission
Page 28 of 110
Technical Publications
Rule – If you are adding a new rule, enter the rule name that you want
associated with the rule.
Events – Allows you to select which events can trigger the rule. On the
Phone, No answer, or any incoming call.
Conditions – Allows you to select specific conditions that can be
associated with the event. Options include, My presence, Call from, Date
range, Time of day, Days of week, Holidays, or Location(MX system) are
available.
Action – Allows you to select what action will be performed by the rule
based on the selected events and conditions programmed. Forward to,
forward to VM, find me, or reject the call area available actions.

Zultys Advanced Communicator 6.0 User Manual March 27, 2020
© 2020 Zultys, Inc. No reproduction or distribution without permission
Page 29 of 110
Technical Publications
3.3.4 Voicemail Notifications:
This area allows you to setup individual voice mail notification rules to
control how voice mail notifications are handled under different
conditions. Rules can be created, edited, or deleted in this area.
To add a new rule, click the icon at the bottom of the Rules area.
To delete an existing rule, highlight the rule and click the icon at
the bottom of the Rules area.
You may also enable/disable an existing rule by clicking the checkbox
next to the rule .
After creating a new rule or to edit a rule (double click the rule), the
notification rule editor window will appear.
Adding/editing a voicemail notification rule:

Zultys Advanced Communicator 6.0 User Manual March 27, 2020
© 2020 Zultys, Inc. No reproduction or distribution without permission
Page 30 of 110
Technical Publications
Rule - If adding a new rule, enter the desired name to be associated with
the rule.
Notify me – Allows you to select when notification occurs, with each new
message or at a specified/regular interval.
Conditions – Allows you to select specific conditions with the notification
that will trigger the rule. Media type, class, from, older than, time of day,
and days of week are available.
3.3.5 Softphone:
This area allows you to setup the parameters associated with the internal
softphone provided by the program. The softphone allows you to utilize
your PC audio to handle calls without requiring a desk phone.

Zultys Advanced Communicator 6.0 User Manual March 27, 2020
© 2020 Zultys, Inc. No reproduction or distribution without permission
Page 31 of 110
Technical Publications
Preferred Codec – Allows you to select which audio codec type to utilize.
Please consult with your administrator for proper setup.
Auto answer calls – Allows you to select if calls are automatically
answered when they ring your phone. Call types that can be selected are
internal/external or both.
SIP Registration – Defines the SIP registration information, ports, PIN, and
transport type. Please consult with your administrator for proper setup.
There is no need to set the PIN when running MX firmware 12.0.7 or
greater.
Audio devices – This area allows the selection of the audio devices the
softphone uses for receive audio, ringtone, and transmit audio.

Zultys Advanced Communicator 6.0 User Manual March 27, 2020
© 2020 Zultys, Inc. No reproduction or distribution without permission
Page 32 of 110
Technical Publications
3.3.6 Plantronics Headset Support
ZAC 3.2+ includes built in support for the most recent Plantronics SDK - HUB.
There is no Plantronics driver software required. This allows ZAC to integrate
with the most recent Plantronics headsets including the Bluetooth versions. All
versions of Windows that support Plantronics HUB software are compatible with
ZAC. On MAC OS, versions 10.13 + are supported with ZAC.
This support extends to call control of the Plantronics headset as well.
Answering and disconnecting calls can be performed by using the headset
answer/disconnect button.
Plantronics Savi 710/740 and Voyager Legend Pro have been tested with ZAC.
These headsets provide call control via the headset buttons.

Zultys Advanced Communicator 6.0 User Manual March 27, 2020
© 2020 Zultys, Inc. No reproduction or distribution without permission
Page 33 of 110
Technical Publications
3.4 Buddies Screen
This is the screen where the contacts you designate as buddies and buddy
groups are located.
You may click on a buddy to display the options that are available(some options
may not be available based on what contact information the user has entered):
Designate/undesignated the contact as a buddy
Start a message session
Call the user
In addition, the following actions are available :

Zultys Advanced Communicator 6.0 User Manual March 27, 2020
© 2020 Zultys, Inc. No reproduction or distribution without permission
Page 34 of 110
Technical Publications
Display recent files/images shared with this user
Display additional information of the buddy and set presence change
alert.
You may also right click on a buddy to present an option menu:
3.4.1 Buddy Groups
ZAC allows you to configure your buddies into groups for easy
identification. For example, you may group your buddies by department
Sales, Ops, Eng, etc.
Create a new group:
Click the Add button in the Buddies screen.

Zultys Advanced Communicator 6.0 User Manual March 27, 2020
© 2020 Zultys, Inc. No reproduction or distribution without permission
Page 35 of 110
Technical Publications
Click the Add group option.
Enter the desired name and click Done. You will see the newly created
group appear in your list
To add buddies/contacts to a group:
1) You may add existing buddies to a group simply by dragging the
desired buddy into the group.
2) You may right click on a buddy and use the Add to group.

Zultys Advanced Communicator 6.0 User Manual March 27, 2020
© 2020 Zultys, Inc. No reproduction or distribution without permission
Page 36 of 110
Technical Publications
3.4.2 Presence Change Alert:
This allows you to set an alert based on a users’ presence change. For
example, you may want to know when a user goes from not available to
available.
Right click on the desired buddy/contact and click Info. Click the Enable
Presence Alert to set an alert:
If you are in maximized mode with the contact selected, you may select the info
icon:

Zultys Advanced Communicator 6.0 User Manual March 27, 2020
© 2020 Zultys, Inc. No reproduction or distribution without permission
Page 37 of 110
Technical Publications
Click Enable Presence Alert or select Change presence alert
Select the desired presence and click OK
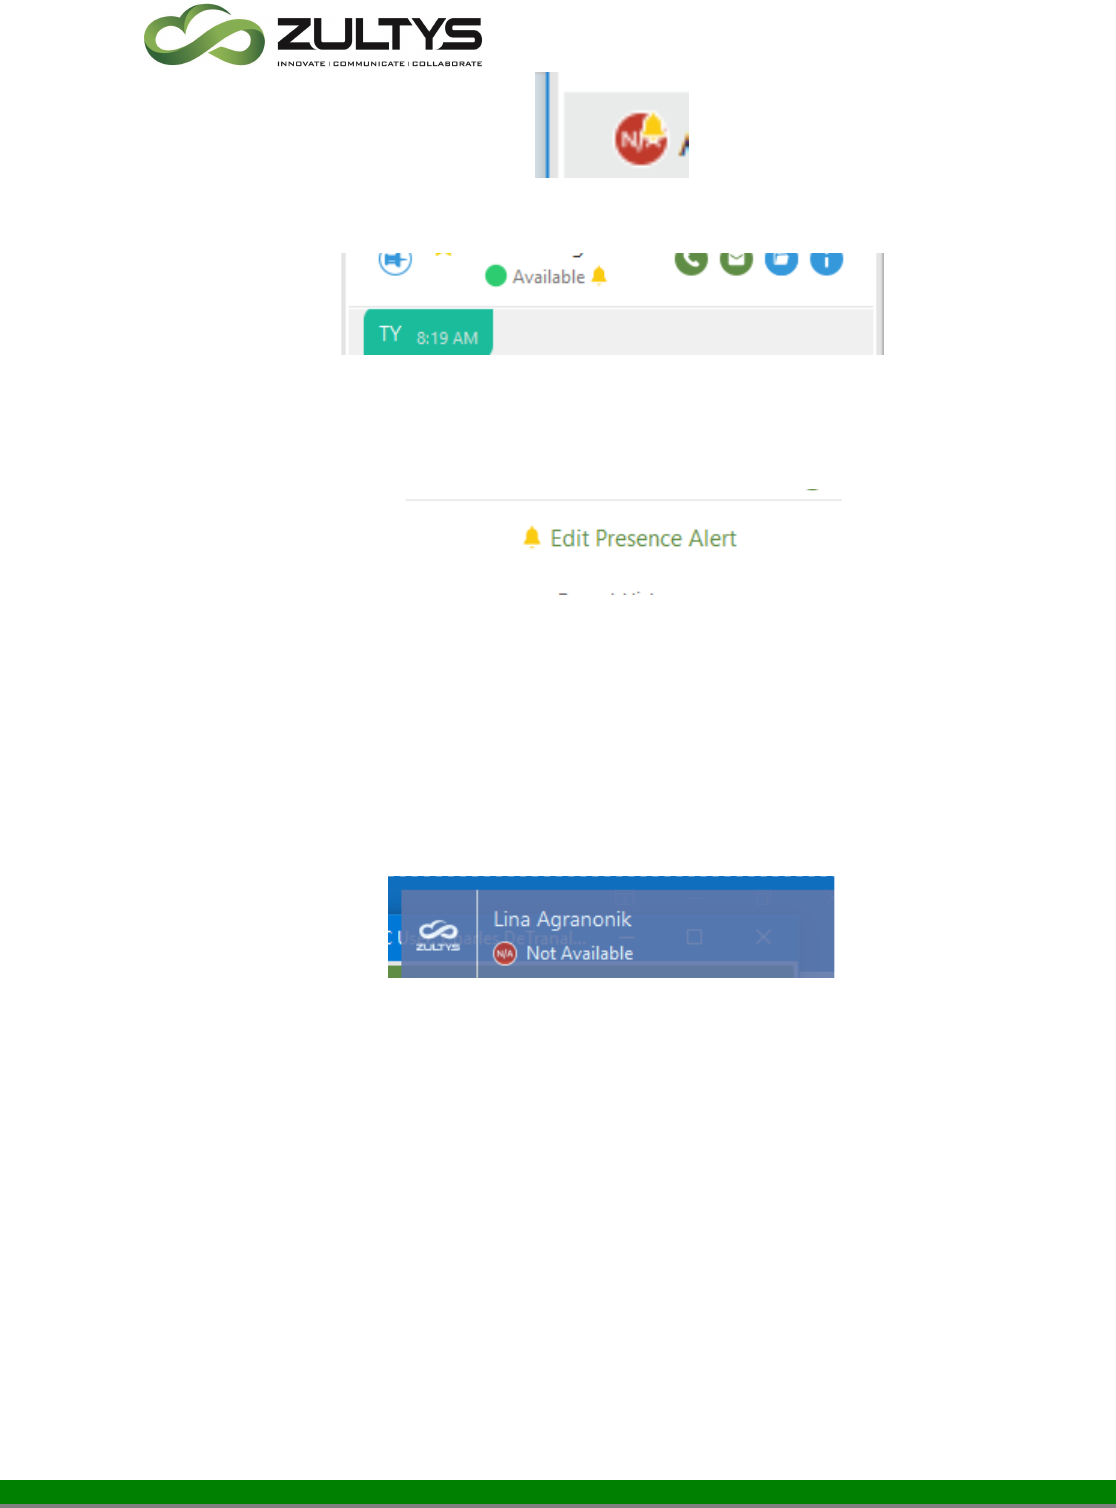
Once the alert is set, an alert icon will appear on the current presence state of
the user (minimized/maximized mode shown):
Zultys Advanced Communicator 6.0 User Manual March 27, 2020
© 2020 Zultys, Inc. No reproduction or distribution without permission
Page 38 of 110
Technical Publications
You can edit/delete the alerts by clicking Edit Presence Alert
You may select another presence state or uncheck the current one and click OK
to cancel the alert request.
You may also navigate to Settings>Alerts to manage your active presence
change alerts.
When the selected users’ presence changes, an alert notification will appear and
a sound will play.

Zultys Advanced Communicator 6.0 User Manual March 27, 2020
© 2020 Zultys, Inc. No reproduction or distribution without permission
Page 39 of 110
Technical Publications
3.4.3 My Contacts
In addition to Buddies, you may create your own local contact list.
Click the Add button in the Buddies screen.
Click Add contact.
Enter the desired contact information:
Click Done
Zultys Advanced Communicator 6.0 User Manual March 27, 2020
© 2020 Zultys, Inc. No reproduction or distribution without permission
Page 40 of 110
Technical Publications
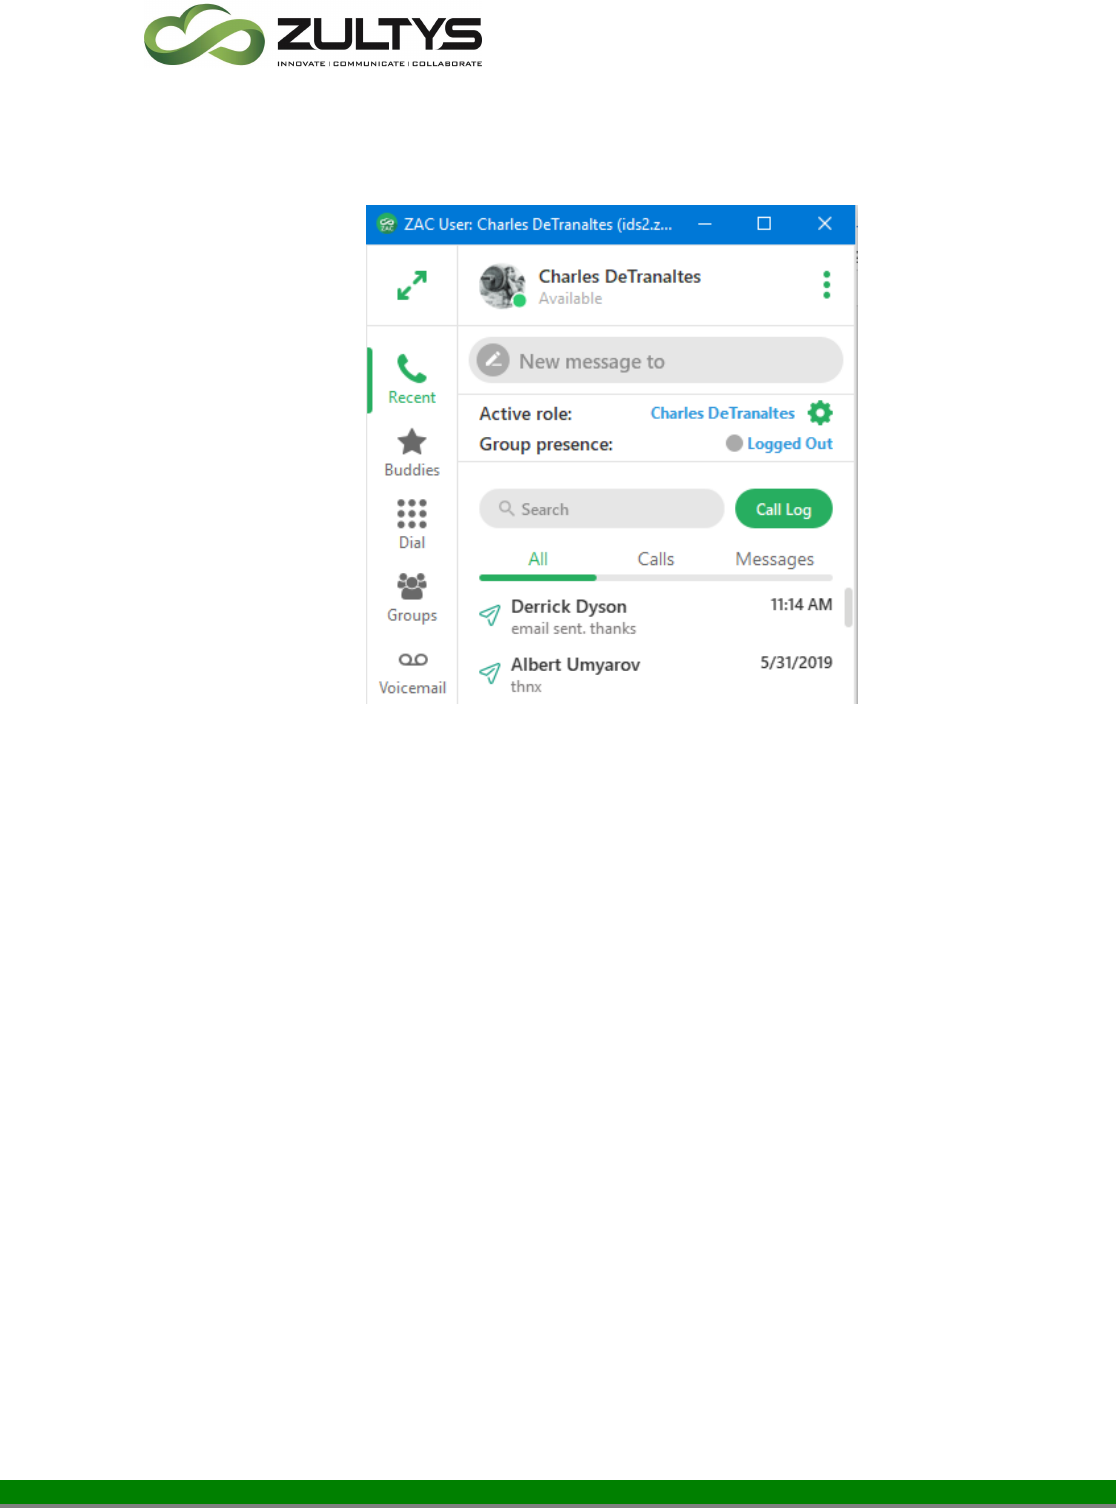
3.5 Recent Activities Screen
The recent activities screen displays a list of the most recent activity you have
had. In addition, the Call Log can be accessed from the Recent screen.
You may filter Recent activity by All, only Calls, or only Messages. All includes
both calls and messages. Simply select the All/Calls/Messages header items to
select that particular filter. Moving your mouse over the contact will display the
call and message options.
The history for that contact is also available by clicking the contact.

Zultys Advanced Communicator 6.0 User Manual March 27, 2020
© 2020 Zultys, Inc. No reproduction or distribution without permission
Page 41 of 110
Technical Publications
3.5.1 Call Log
You may access the Call Log from the Recent activity area by clicking on the
Call Log icon.
A list of calls will be displayed.
You may select a specific call log entry and click Call Back to call the party.
In maximized mode, the Call Log will display additional log information.

Zultys Advanced Communicator 6.0 User Manual March 27, 2020
© 2020 Zultys, Inc. No reproduction or distribution without permission
Page 42 of 110
Technical Publications
You may sort the entry order of columns by clicking on the column heading.
You can utilize the search function to locate a number, name, etc. The example
below shows a search for “mx” returns all MXconference items to the top.
You may also filter the Call Log by date and time:
• Click the filter by date icon
• Check the box and enter the desired From date/time
• Check the box and enter the desired To date/time
• Click Filter
The Call Log entries may be exported in a .csv file format.

Zultys Advanced Communicator 6.0 User Manual March 27, 2020
© 2020 Zultys, Inc. No reproduction or distribution without permission
Page 43 of 110
Technical Publications
• Click the Save to .cvs icon
• Navigate to the desired drive/folder
• Enter the desired filename
• Click Save
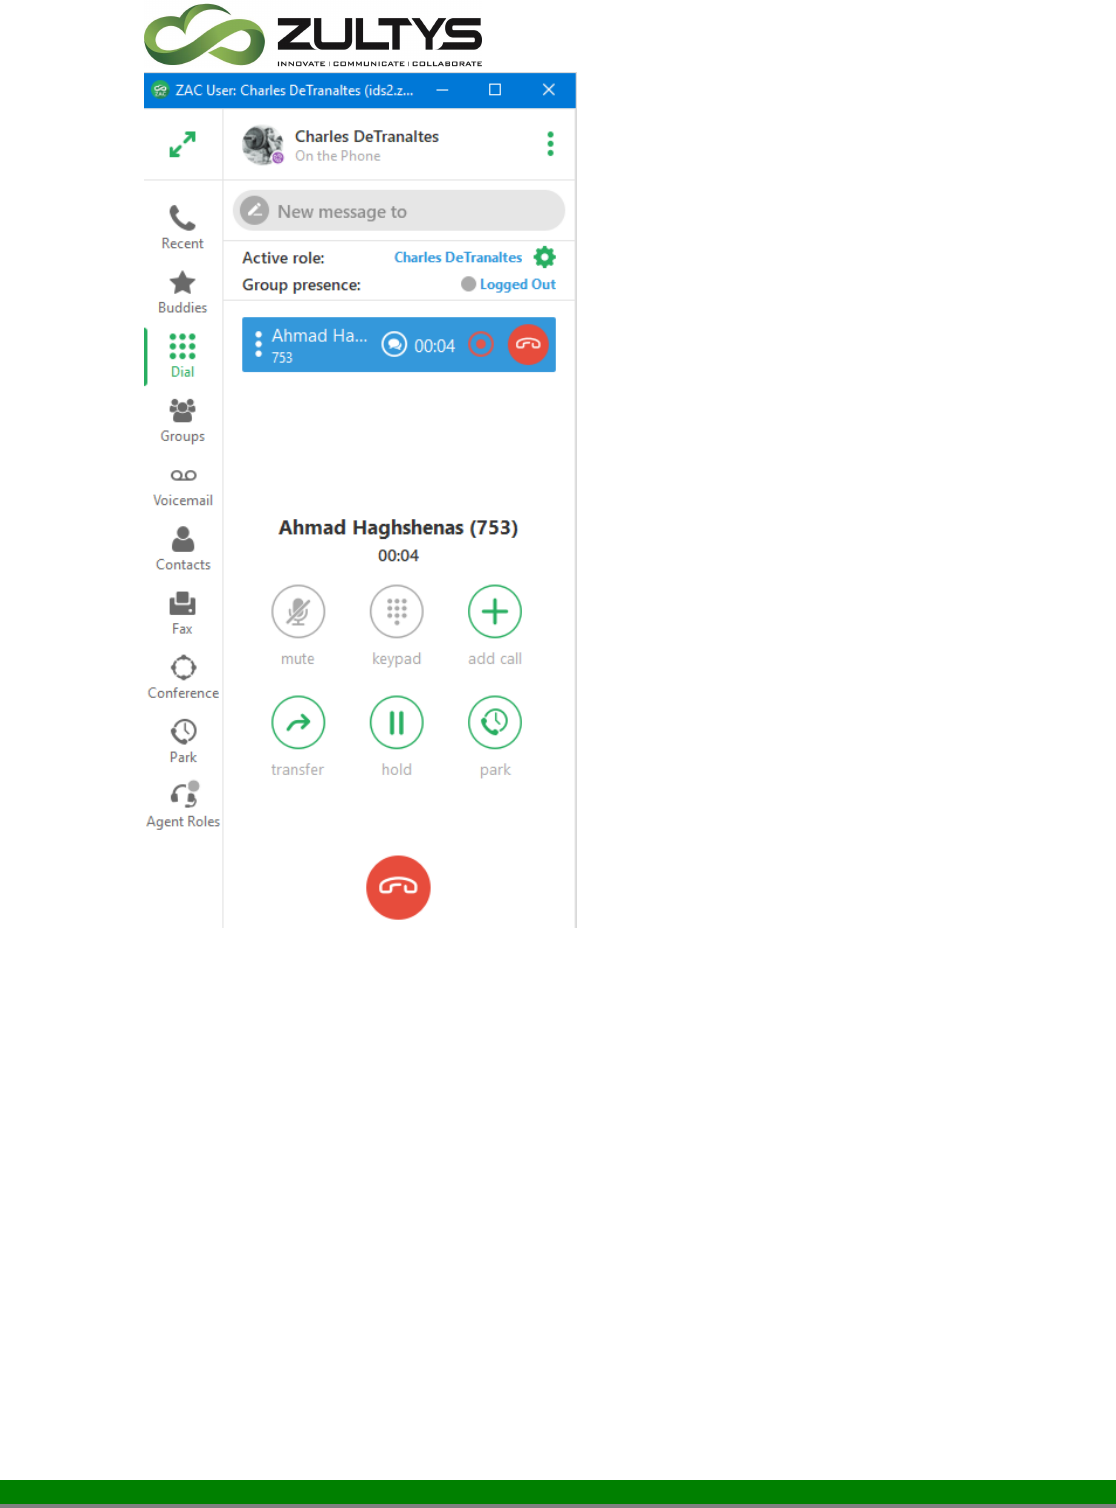
3.6 Dial Screen(minimized mode)
This is the screen in which you make and receive calls as well as manage active
calls while you are in minimized mode.
Incoming calls:
If you have popups enabled, a popup with call information and the ability to
answer/decline will be presented on your screen.
Clicking decline will allow you to end the call or send the call to voicemail.

Dial screen, ready to enter phone
number
Active call session, external call
Zultys Advanced Communicator 6.0 User Manual March 27, 2020
© 2020 Zultys, Inc. No reproduction or distribution without permission
Page 45 of 110
Technical Publications
Active call session, internal call
Note: The Mute and Keypad options
are only available when you are
bound to the internal Softphone. If
you are bound to a desk phone, you
utilize the mute/keypad of the desk
phone.

Single call session in maximized mode:
Multiple call sessions in maximized mode:
Switching between call sessions will display the corresponding tab associated
with the selected call session.
3.6.1 Drag and Drop Operations
ZAC allows many drag and drop operations to be performed to make call
processing operations simple.
• Attended transfer of calls by dropping one call onto another in the calls
area or to call tab.
• Add a call to a conference by dropping it into the conference call in the
calls area or conference tab.
• Blind transfer a call to a user/number by dragging it from the calls area
or call tab to one of the contact views (Recent/Contacts/Buddies)
• Blind transfer a call to a user/number by dragging the contact/number
from one of contact views (Recent/Contacts/Buddies) to a tab with a call
or call in the calls area on top.

Zultys Advanced Communicator 6.0 User Manual March 27, 2020
© 2020 Zultys, Inc. No reproduction or distribution without permission
Page 47 of 110
Technical Publications
• Auto opening an inactive view (to be able to drop on its contact) by
dragging a call over its button.
• When a drag and drop operation is available, the icon will change to
indicate the action to complete the drag and drop operation.
3.6.2 Blind Transfer
When performing a Blind Transfer, you do not speak with the party to whom
you are transferring the call, but simple send the call to the intended
transferee. This also may be referred to as unattended, or unsupervised
transfer.
Drag and drop the session block to the Contacts or buddy list contact that is to
receive the transferred call. Once the desired contact is found, drop the call
onto the contact. This may be done in minimized or maximized mode.
-or-
Press the Transfer icon in the dial screen. Start typing the desired contact. Once
found, click the transfer icon to complete the transfer.
3.6.3 Attended Transfer
In an attended transfer, you speak to the party to whom you are transferring
the call prior to the transfer. This may also be referred to as attended, or
supervised transfer.
Call the first party.
Place the first party on hold by pressing the hold button on ZAC or simply call
another user.
Call the second party
To transfer the call:
drag and drop the session control block to the recipient’s address book or
buddy list contact

Zultys Advanced Communicator 6.0 User Manual March 27, 2020
© 2020 Zultys, Inc. No reproduction or distribution without permission
Page 48 of 110
Technical Publications
3.6.4 Ad Hoc Conference
You may add a party to an existing conference using drag and drop operation.
Establish the MXconference session.
Call the desired party to add to the conference:
Place the called party on hold and return to the conference.
Drag the held party call session into the conference call session or the
conference tab and release:
The called party is now added to the conference.
3.7 Voicemail Screen
This screen is where your voice mail, on demand call recordings, and mailbox
greetings are accessed/managed.

Zultys Advanced Communicator 6.0 User Manual March 27, 2020
© 2020 Zultys, Inc. No reproduction or distribution without permission
Page 49 of 110
Technical Publications
You may choose to view your inbox or deleted box. A list of the voice messages
will be displayed in each. Selecting the Recordings item will display a list of on
demand call recordings you have.
When you click on a message or recording the options for the message will be
presented:
Add comment – Allows you to type a comment to be associated with the
voice message. This comment will follow the voice message if you choose
to forward the message.
Play/Replay/Pause – Allows you to listen or pause the message. You may
also click on the sound bar to jump to any point of the message.
Delete – Deletes the message from the current box. If you are deleting
from the delete box, you will be asked for a confirmation.
Delete multiple or all voicemails – You may delete multiple or all
voicemail messages at one time. To do this, perform the following:
At the voicemail screen, click the Delete icon:

Zultys Advanced Communicator 6.0 User Manual March 27, 2020
© 2020 Zultys, Inc. No reproduction or distribution without permission
Page 50 of 110
Technical Publications
Select the desired voicemail messages to delete.
Click the Delete Selected icon
To delete all voicemail messages select the Delete All icon.
Click Yes at the confirmation window.
Call – This allows you to place a call back to the party that left the
message.

Zultys Advanced Communicator 6.0 User Manual March 27, 2020
© 2020 Zultys, Inc. No reproduction or distribution without permission
Page 51 of 110
Technical Publications
Forward – This allows you to forward the message to another mailbox
user. You may optionally record a pre-amble message to the forwarded
message.
When you forward a message, you can start typing the intended forward
party in the To field. ZAC will display matching names in the directory as
you type.
Mark as unread – This allows to store the message in a unread/new state.
Reply – This allows you to reply to another mailbox user that left you the
message.
When you reply to a message, you can start typing the intended reply
party in the To field. ZAC will display matching names in the directory as
you type.
Play via Bound – This allows you to listen to the message on your desktop
phone instead of your PC if you desire.

Zultys Advanced Communicator 6.0 User Manual March 27, 2020
© 2020 Zultys, Inc. No reproduction or distribution without permission
Page 52 of 110
Technical Publications
NOTE: Once Play via Bound is selected the 1st time, there is no need to
select it again from the menu. All subsequent depressions of the
Play/Stop button will be redirected to the MX (instead of the local player)
automatically. The context/dots menu item can be used to switch back to
local playing if required and vice versa.
Save as – This allows you to download a copy of the voice message onto
your local PC.
3.7.1 Voicemail Greetings
This menu is accessed by clicking the Greetings in the Voicemail screen. This
screen is where you manage your greetings, name, and auto attendant greeting.
You may select your personal voicemail greeting or if you are part of a call
group you may select the call group greeting.

Zultys Advanced Communicator 6.0 User Manual March 27, 2020
© 2020 Zultys, Inc. No reproduction or distribution without permission
Page 53 of 110
Technical Publications
Recorded name – This allows you to import, record, or delete a user name
that is associated with your mailbox.
Greetings – This allows you to import, record, or delete a greeting that is
associated with your mailbox. You may have up to 4 unique greetings
associated with your mailbox. To make a greeting active, click the
checkbox next to the desired greeting.
Auto Attendant Greeting – This allows you to import, record, or delete an auto
attendant greeting that is associated with your mailbox.
The MX auto attendant routes calls to system users. Prior to routing a call to
your phone, the auto attendant can play your greeting, recorded name, or
extension to the caller. The auto attendant greeting is the greeting played by
the auto attendant to a caller prior to routing the caller to your extension.

Zultys Advanced Communicator 6.0 User Manual March 27, 2020
© 2020 Zultys, Inc. No reproduction or distribution without permission
Page 54 of 110
Technical Publications
3.8 Contacts Screen
This is the screen where all the MX system contacts are located. This includes
contacts in multiple locations if you are part of an MXnetwork.
You can filter the contacts by locations when in an MXnetwork by clicking the
Contacts Settings icon . Select the desired locations you want to display. All
the contacts from that location will be added to your contact list.

Zultys Advanced Communicator 6.0 User Manual March 27, 2020
© 2020 Zultys, Inc. No reproduction or distribution without permission
Page 55 of 110
Technical Publications
To add a contact as a buddy, highlight the desired contact and click the star
icon on the desired contact: . The icon will change to:
You may sort Contacts by first name, last name, or presence by clicking the sort
button:

Zultys Advanced Communicator 6.0 User Manual March 27, 2020
© 2020 Zultys, Inc. No reproduction or distribution without permission
Page 56 of 110
Technical Publications
Contact Notes:
ZAC introduces the approach of showing local contacts - both old MXIE buddies
and contacts created in ZAC are displayed in Contacts | Local screen. Only
contacts that are mentioned as buddies (same as for MX contacts) are displayed
in the Buddies screen. There is still the ability to un-buddy a contact from the
Contacts screen.
3.8.1 Adding Local Contacts
Select the Local tab and click the Add contact icon:
Enter the desired information and click Done when finished.
3.9 Parked Calls Screen
This is the screen where calls that are parked can be managed. This area allows
the users to place/retrieve calls that are in call park locations.
To park a call, click the park icon while on a call:

Zultys Advanced Communicator 6.0 User Manual March 27, 2020
© 2020 Zultys, Inc. No reproduction or distribution without permission
Page 57 of 110
Technical Publications
When a call is parked the screen will display:
ID – The park slot ID
Caller – The caller that was parked
Parked by – The user who parked the call
The screen will indicate the amount of time the call has been parked.

Zultys Advanced Communicator 6.0 User Manual March 27, 2020
© 2020 Zultys, Inc. No reproduction or distribution without permission
Page 58 of 110
Technical Publications
The Park notification area will also indicate that a call is parked.
To retreive a parked call:
Click the handset icon on the parked call.

Zultys Advanced Communicator 6.0 User Manual March 27, 2020
© 2020 Zultys, Inc. No reproduction or distribution without permission
Page 59 of 110
Technical Publications
3.10Team Messaging - Chat Groups
This is the screen where the Team Messaging (Chat Group) function is accessed
and managed. Team Messaging allow users to have group chat conversations
similar to a conference call. Group members will receive notifications and can
respond to any chats that come to the group. Any member of the group can
send a message and all other members in the group will receive the message.
Starting in ZAC 5.0+, group chat members can send files to other members as
well as create an audio conference with members.
You may filter Chat Groups by My, Private, Public.
Public groups allow any user to join the group without requiring approval.
Private groups require the owner of the group to add members to the private
group.
Zultys Advanced Communicator 6.0 User Manual March 27, 2020
© 2020 Zultys, Inc. No reproduction or distribution without permission
Page 60 of 110
Technical Publications
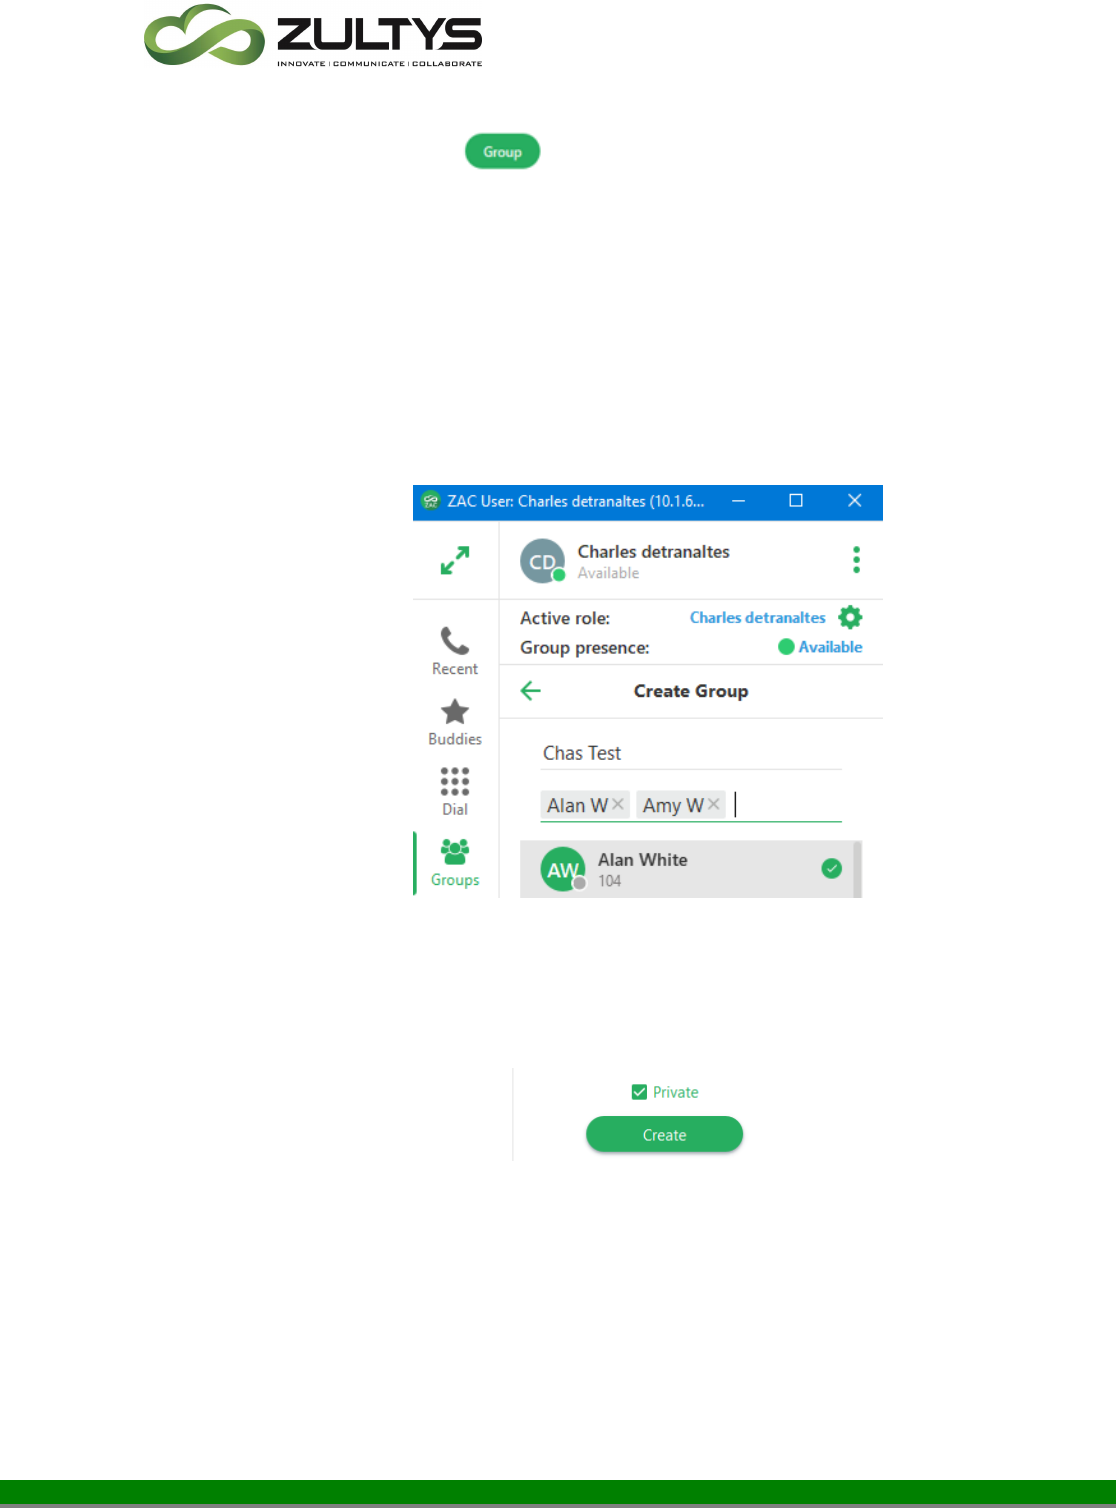
To create a new group:
Click the Group icon
Select Create Group.
Enter the desired name of the group.
Select the desired members by clicking on the member in the directory or
typing their name.
Once a member is added, you may remove them by clicking on the X next
to their name
Check the box if the Group is to be a Private type group. If this is not
selected, the group will be a public group for all users to view/join.
Click Create.

Zultys Advanced Communicator 6.0 User Manual March 27, 2020
© 2020 Zultys, Inc. No reproduction or distribution without permission
Page 61 of 110
Technical Publications
In maximized mode click the Create Group tab.
Enter the desired group name and select the users you want to be part of
the group. Each time you click a user, they will appear in the Members
area at the top of the screen. You may delete a member by clicking the X
next to their name.
Check the box if the Group is to be a Private type group. If this is not
selected, the group will be a public group for all users to view/join.
Click Create.
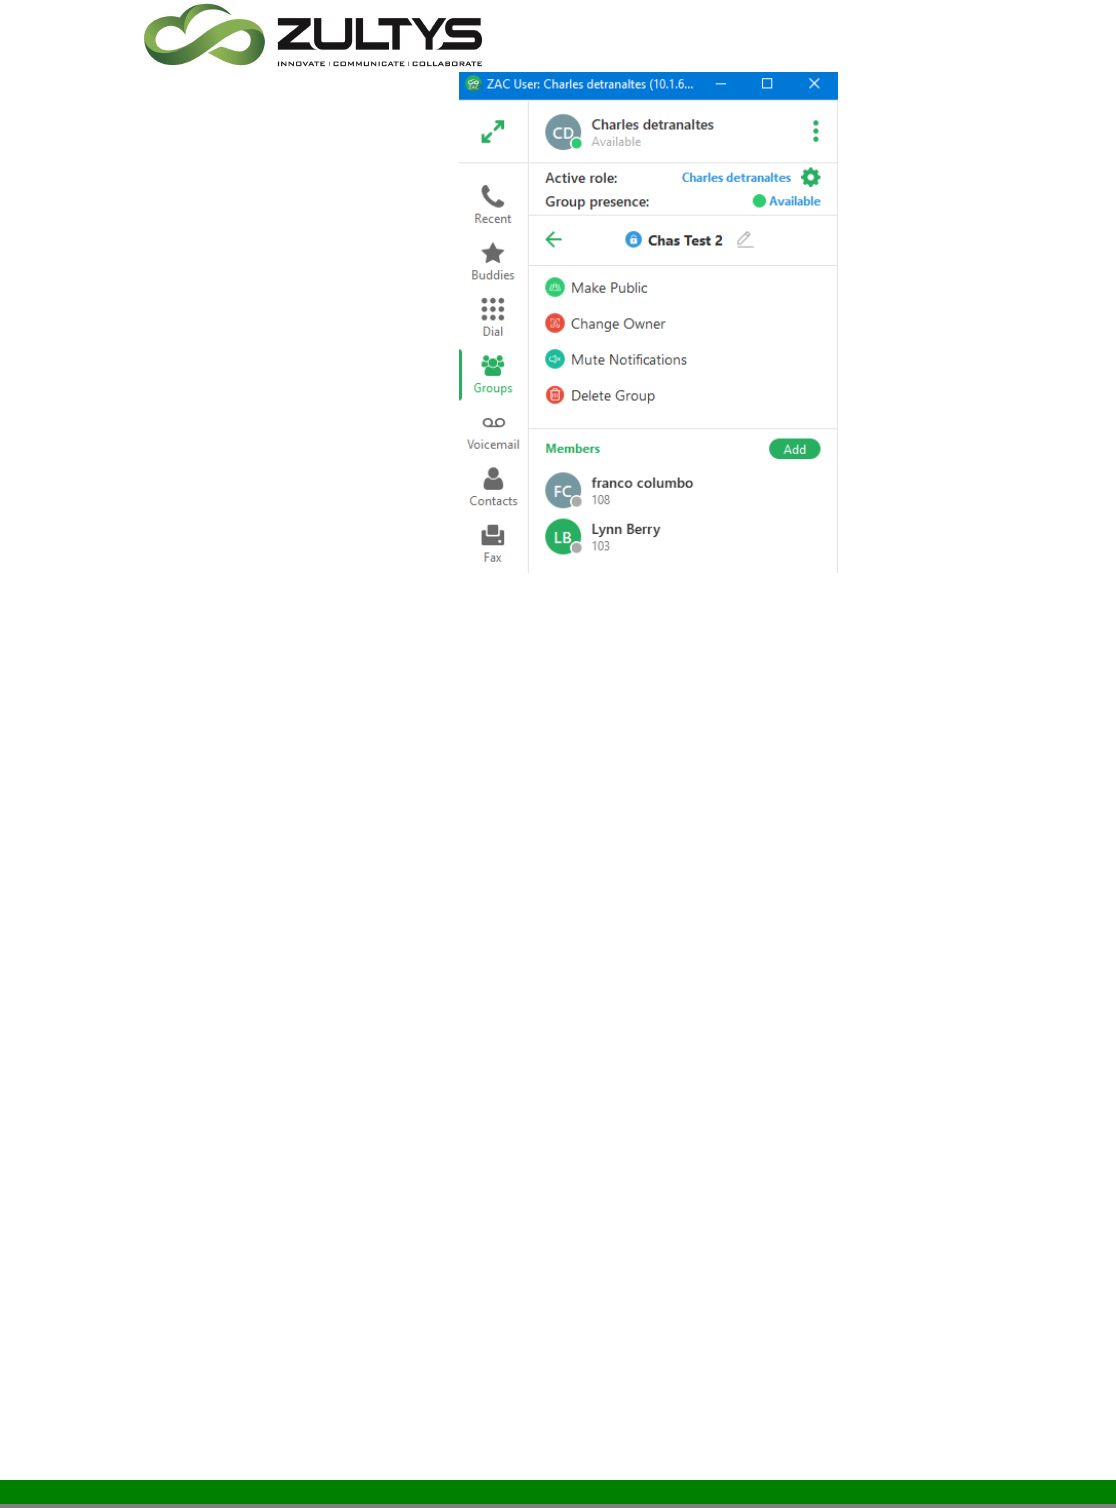
To edit a group:
Right click on the desired Chat group and select Info:
Zultys Advanced Communicator 6.0 User Manual March 27, 2020
© 2020 Zultys, Inc. No reproduction or distribution without permission
Page 62 of 110
Technical Publications
Select the desired option you wish to perform on the group.
Rename(pencil icon) – Allows you to rename the group
Make Public – Changes the group from a private type to a public type.
Change Owner – You may transfer the ownership of groups you created
to other users
Mute Notifications – This allows the user to mute popups and missed
activity indications in the navigation panel. This can be useful for
extremely active groups with a large number of messages exchanged.
Delete Group – This action will delete the existing group. You will be
prompted for a confirmation to delete.
Add Members – This action allows you to add additional members to the
group.

Zultys Advanced Communicator 6.0 User Manual March 27, 2020
© 2020 Zultys, Inc. No reproduction or distribution without permission
Page 63 of 110
Technical Publications
To view/converse the group chat:
Open the desired Chat group by clicking on the group. The group chat
screen will appear.
You will see the most recent message threads. Type your text in the text
box and press to send or press ENTER key on the keyboard.
In maximized mode, each group will open as a separate tab. You may pin
the tab to keep it on the screen and move from tab to tab. Group
notifications will appear in non-focused tabs so you are aware of activity.
To create an MXconference when in a group chat:
While in the desired group, select the start audio conference icon

Zultys Advanced Communicator 6.0 User Manual March 27, 2020
© 2020 Zultys, Inc. No reproduction or distribution without permission
Page 64 of 110
Technical Publications
A conference call will begin. Your audio device will ring indicating a conference
call. Answer the call to start the MXconference.
A group text will be sent stating the conference call has started. When the call
ends, a group text stating call ended is sent.
To create an MXconference by calling group participants first:
While in the desired group, select the call group participants icon
An MXconference is created and each participant is called by the MX system.
When they answer, they will hear “connecting now” and be placed into the
MXconference.
3.10.1 File Transfer
File transfer can be used in private(user to user) chat sessions. File transfer
allows you to send a file to another user. Users can download or view the file
after they accept the file from you.

Zultys Advanced Communicator 6.0 User Manual March 27, 2020
© 2020 Zultys, Inc. No reproduction or distribution without permission
Page 65 of 110
Technical Publications
While in a Chat session with another user, select the Attach file icon in the text
box window.
A file explorer window will open. Navigate to the desired file.
You may drag and drop the file to the chat window to send the file.

Zultys Advanced Communicator 6.0 User Manual March 27, 2020
© 2020 Zultys, Inc. No reproduction or distribution without permission
Page 66 of 110
Technical Publications
The user will receive the file.
The user can accept or decline the file.
If the user accepts the file:

Zultys Advanced Communicator 6.0 User Manual March 27, 2020
© 2020 Zultys, Inc. No reproduction or distribution without permission
Page 67 of 110
Technical Publications
If the user declines the file:
Sending user decline message:
Receiving user decline message:

Zultys Advanced Communicator 6.0 User Manual March 27, 2020
© 2020 Zultys, Inc. No reproduction or distribution without permission
Page 68 of 110
Technical Publications
Once the user accepts the file, they can view the file in the saved default
location, save the file on their local PC to a location of their choice, or delete
the file.
Right clicking on the file will display the options:
If there is more content/information in the chat window, a down arrow will
appear to allow you to display more conversations.
3.10.2 Screenshot
You may paste screenshots you captured to the clipboard into a user chat.
After you capture the desired screenshot and while in a user chat, press CTRL-
V(Windows) CMD-V(Macintosh) or right mouse click to display the context
menu and select Paste.

Zultys Advanced Communicator 6.0 User Manual March 27, 2020
© 2020 Zultys, Inc. No reproduction or distribution without permission
Page 69 of 110
Technical Publications
3.10.3 Recent Images/Files
When you view a Buddy or Contact, you may display images/files you have
shared with that contact.
Right click on the buddy/contact
Click Recent Files

Zultys Advanced Communicator 6.0 User Manual March 27, 2020
© 2020 Zultys, Inc. No reproduction or distribution without permission
Page 70 of 110
Technical Publications
A list of all shared files will appear. You may select to view either Images or
Files.
Note: File transfer size limits:
MX-SE, MX-E,MX-E+,MX-E++ 10Mb
MXvirtual 50Mb

Zultys Advanced Communicator 6.0 User Manual March 27, 2020
© 2020 Zultys, Inc. No reproduction or distribution without permission
Page 71 of 110
Technical Publications
3.10.4 Drag and Drop Operations(full screen mode)
You may create a private chat group by dragging the 1
st
user to the 2
nd
user’s
tab (group will have 3 members and default name).
You may add a member to the chat group by dragging a user to the chat group
tab.
You may add a member to a chat group by dragging the user to the Groups
view.

Zultys Advanced Communicator 6.0 User Manual March 27, 2020
© 2020 Zultys, Inc. No reproduction or distribution without permission
Page 72 of 110
Technical Publications
3.11Fax
This area allows you to send/view/manage the faxes you have.
Click the fax icon.
You may select your inbox/sent/deleted from the tab.
Click Send to create a new fax.
Enter the fax number to send to and press ENTER.
Attach the desired file and select the desired parameters. Note that files must
be an image type file(.jpg, .bmp, .tiff).

Zultys Advanced Communicator 6.0 User Manual March 27, 2020
© 2020 Zultys, Inc. No reproduction or distribution without permission
Page 73 of 110
Technical Publications
Click Send
You may also schedule a fax to be sent at a predetermined date/time.
Click the Schedule checkbox.
Enter the desired date/time and desired parameters.
Click Schedule.
3.11.1 Print to Fax (Windows only)
The Zultys Fax Driver will be used to install a printer on your Windows PC. The
Zultys Fax Driver will install a printer named Zultys Fax to your PC. This printer
will be available from your applications to be used to send the document to
ZAC as a properly formatted fax file. Before installing the Zultys Fax Driver, you
must download the software from the MX system through the MX browser
interface.
• Close ZAC completely prior to install the FAX driver in Windows.
• Open a browser on your PC (such as Firefox or Internet Explorer) and
enter the IP address/domain name of your MX system. This accesses the

Zultys Advanced Communicator 6.0 User Manual March 27, 2020
© 2020 Zultys, Inc. No reproduction or distribution without permission
Page 74 of 110
Technical Publications
MX landing page of the system (unless that access has been disabled by
the system administrator).
• Select the correct fax driver as shown below(32 or 64 bit). The browser
downloads the Zutlys Fax Driver software. You may the then install the
driver on your computer. Press the Next buttons until application is
installed. At the end of the installation press the OK button to complete
the installation of the Zultys Fax Driver.
After selecting the appropriate driver, in this example we will use the Windows
64bit driver, double click on the downloaded file:

Zultys Advanced Communicator 6.0 User Manual March 27, 2020
© 2020 Zultys, Inc. No reproduction or distribution without permission
Page 75 of 110
Technical Publications
Click Next
Choose a location, the default location is suggested, click Next

Zultys Advanced Communicator 6.0 User Manual March 27, 2020
© 2020 Zultys, Inc. No reproduction or distribution without permission
Page 76 of 110
Technical Publications
Click Next to confirm installation
After installation a confirmation screen is presented.

Zultys Advanced Communicator 6.0 User Manual March 27, 2020
© 2020 Zultys, Inc. No reproduction or distribution without permission
Page 77 of 110
Technical Publications
• After installation of the fax driver, you must re-open ZAC.
• To send a fax ZAC must be running.
• After the installation is completed, the Zultys Fax printer will be added to
your system printer as shown in below.
3.11.2 Sending a fax from the Fax Driver:
Ensure you have configured a MX interface to use the MX fax server to originate
and terminate faxes.
• The Zultys Fax will be available to all applications that support printing.
• To fax a document, select the Zultys Fax as shown using Microsoft Word
to fax a word document.

Zultys Advanced Communicator 6.0 User Manual March 27, 2020
© 2020 Zultys, Inc. No reproduction or distribution without permission
Page 78 of 110
Technical Publications
• After the document has been processed ZAC will notify you of additional
steps required to send the fax as shown below.
• The fax recipient, schedule, format, and confirmation steps to send the
fax are shown below. These steps are performed in sequence and are
required to send the fax.
Enter in the Fax number. You may type to locate contacts in the
address book.

Zultys Advanced Communicator 6.0 User Manual March 27, 2020
© 2020 Zultys, Inc. No reproduction or distribution without permission
Page 79 of 110
Technical Publications
3.12Conference
This area allows you to schedule an MXconference as well as launch the
MXmeeting application.

Zultys Advanced Communicator 6.0 User Manual March 27, 2020
© 2020 Zultys, Inc. No reproduction or distribution without permission
Page 80 of 110
Technical Publications
To create a conference:
1. Click the conference icon.
2. Click Schedule.
3. Enter the conference name, frequency, date, time, duration, and web
collaboration options.
4. Check if the conference is to end when the host leaves.
5. Click save and invite. An e-mail template with the conference
information will be presented. Enter the desired recipient’s and send
the e-mail.
6. Click Save to create the conference without sending invites.
Example of an Outlook calendar invite:

Zultys Advanced Communicator 6.0 User Manual March 27, 2020
© 2020 Zultys, Inc. No reproduction or distribution without permission
Page 81 of 110
Technical Publications
To start the conference:
1. Click the desired conference.
2. Click the start icon
3. The audio will be connected and MXmeeting will launch if
collaboration was selected.
You can mute or disconnect participants as the conference owner once the
conference is started.
Click the icon to display the Participants menu.
Click Participants
Once a conference is created, you are able to start, edit, invite users, or delete
the conference.

Zultys Advanced Communicator 6.0 User Manual March 27, 2020
© 2020 Zultys, Inc. No reproduction or distribution without permission
Page 82 of 110
Technical Publications
3.12.1 Web Conference
This feature allows you to start the MXmeeting application if it is configured.
Click Web Conference. The MXmeeting application will launch:
Refer to the MXmeeting user guide for MXmeeting operating instructions.

Zultys Advanced Communicator 6.0 User Manual March 27, 2020
© 2020 Zultys, Inc. No reproduction or distribution without permission
Page 83 of 110
Technical Publications
3.13Notifications
The notification area indicates new/current/missed activity in the specific areas
of the program. This provides an indication to the user that that area has had
activity.
If a specific area has activity, a notification will be presented indicating the total
amount of activity for that area. Clicking on that area will reset the activity
notification.
Activity notifications apply to the following areas in the program:
• Recents
• Dial
• Voicemail
• Groups
• Park
• Fax
• Conference

Zultys Advanced Communicator 6.0 User Manual March 27, 2020
© 2020 Zultys, Inc. No reproduction or distribution without permission
Page 84 of 110
Technical Publications
Notifications are displayed by the filter selected within an area. For example, in
Recents you can filter by All, Calls, Messages. If you have the Messages filter
selected, the notification screen will display notifications for messages. If the
Calls filter is selected, notification will display notifications for calls only.
This functionality applies to all areas where filters are provided.
Notifications may also appear when in maximized mode. If there is activity, the
tab associated with that activity will display a notification if it is not in focus at
the time of the notification event.

Zultys Advanced Communicator 6.0 User Manual March 27, 2020
© 2020 Zultys, Inc. No reproduction or distribution without permission
Page 85 of 110
Technical Publications
3.14System Tray and Taskbar Options:
A user may access certain features of the program directly from the System
Tray or taskbar. Features that can be accessed from the taskbar are:
• Presence state
• Presence note(System Tray only)
• Log out
• Open
• Exit
Right click on the ZAC icon in the system tray:
Windows
Presence state on System Tray icon:
Macintosh

Zultys Advanced Communicator 6.0 User Manual March 27, 2020
© 2020 Zultys, Inc. No reproduction or distribution without permission
Page 86 of 110
Technical Publications
4 Maximized Screen Mode
The Zultys Advanced Communicator provides a full screen (maximized) mode in
addition to the compact (minimized) mode.
To toggle between the two modes click the resize icon in the top-left corner
The full screen mode will be displayed.
When you click on a buddy/contact, the activity screen for that contact will
display in a tab in the work area.

Zultys Advanced Communicator 6.0 User Manual March 27, 2020
© 2020 Zultys, Inc. No reproduction or distribution without permission
Page 87 of 110
Technical Publications
Clicking another contact/buddy will display the activity screen for the selected
contact. The previous contact/buddy is replaced.
You may pin the activity screen so that it remains on the screen. To do this,
click the pin icon.
If you close the activity screen after pinning it, you will need to re-pin the
screen.
The pinned tab will remain on the screen and you may select the tab by clicking
on it.
When the activity tab is open, you have the following actions available:
• Call the contact
• Display the recent images/files shared with the contact
• Display the recent activity for this contact
You may e-mail from this screen, enable presence alert, call, as
well as view the recent history for that user.
Note: There may be other options based on what information the contact has
made available.

Zultys Advanced Communicator 6.0 User Manual March 27, 2020
© 2020 Zultys, Inc. No reproduction or distribution without permission
Page 88 of 110
Technical Publications
The recent activity screen will expand and display the recent history for the
selected contact. This will include calls as well as instant message activity.
You may close the recent activity screen by clicking the X next to the contact
name in the tab area.

Zultys Advanced Communicator 6.0 User Manual March 27, 2020
© 2020 Zultys, Inc. No reproduction or distribution without permission
Page 89 of 110
Technical Publications
5 Agent Roles/Call Group Operation
In addition to logging into ZAC through your user role, you can also log into
any of the ACD, ICC or Operator Groups to which you belong. ZAC opens a role
partition for each group to which you are a member of, and are logged into.
ZAC provides features for ACD, ICC agents and Operators that based on the call
group functionality, and may differ from those features that are available to
users. Call group operation operates in maximized mode.
5.1 Presence for Operators
The following conditions may trigger transitions between operator presence
states based on the user’s defined preferences:
• Available to On the Phone triggers when an ACD agent or operator
initiates or accepts a call. This rule cannot be removed or changed.
• On the Phone to Available triggers when an operator terminates a call.
• Available to Not Available triggers when the user changes to a state
specified by the ACD and Operator User Preferences window.
5.1.1 Emergency Notifications
In the event a user dials an emergency number, all members of any Operator
Group (and only Operator Groups, no other call group types will receive this IM).
For each and every emergency call that is dialed a new IM will be generated
providing the following information
• Location of the device making the emergency call
• The Device ID
• User Extension associated and/or bound to the device
• The User(s) DID assigned to the device
• Date and Time of the call

Zultys Advanced Communicator 6.0 User Manual March 27, 2020
© 2020 Zultys, Inc. No reproduction or distribution without permission
Page 90 of 110
Technical Publications
5.2 Presence for ACD Agents
The following conditions may trigger transitions between Agent presence states
based on the user’s defined preferences:
• Available to Active triggers when an ACD agent initiates or accepts a call.
This rule cannot be removed or changed.
• Active to Wrap up triggers when an agent terminates a call.
• Wrap up to Available triggers after remaining in the wrap up state for a
period specified by the ACD and Operator User Preferences window.
• Available to Not Available triggers when the user changes to a state
specified by the ACD and Operator User Preferences window.
You may select a Role(s) when logging into ZAC.
Click the “Apply to future login” to have role selection performed automatically
at each login.

Zultys Advanced Communicator 6.0 User Manual March 27, 2020
© 2020 Zultys, Inc. No reproduction or distribution without permission
Page 91 of 110
Technical Publications
You may also select a role after you are already logged in in the Agent Active
Role/Role Selection area.
You may also select an Active role prior to placing an outbound group call.
Click on the displayed Active Role
Check the desired role to make it active
Place the outbound call.
You can change your Group presence by selecting the desired presence state
from the list.

Zultys Advanced Communicator 6.0 User Manual March 27, 2020
© 2020 Zultys, Inc. No reproduction or distribution without permission
Page 92 of 110
Technical Publications
The presence state will change after selecting a presence.
5.2.1 Agent Roles
You may display the presence state of other Agents in the Call group. After
selecting all desired Roles, each group you selected for a Role will display. You
may expand or collapse each group to view the agent status of each by
selecting the Agent Roles area:

Zultys Advanced Communicator 6.0 User Manual March 27, 2020
© 2020 Zultys, Inc. No reproduction or distribution without permission
Page 93 of 110
Technical Publications
You may use Expand or Collapse all to view all agents for all groups.
Please note blue stars indicate that member is a supervisor of that ICC call
group. The star will indicate dark blue when the supervisor is logged in and
light blue when the supervisor is logged out.
5.2.2 Supervisor functions
A Supervisor of a an ICC group may access the Web Based SuperView program
directly from ZAC.
Click the SuperView icon:

Zultys Advanced Communicator 6.0 User Manual March 27, 2020
© 2020 Zultys, Inc. No reproduction or distribution without permission
Page 94 of 110
Technical Publications
Enter your username and password at the web application page and click login:

Zultys Advanced Communicator 6.0 User Manual March 27, 2020
© 2020 Zultys, Inc. No reproduction or distribution without permission
Page 95 of 110
Technical Publications
Click OPEN on the SuperView icon
Incoming group calls are identified in the call session area next to the callerID.
A history of the group calls is presented below the call session area.

Zultys Advanced Communicator 6.0 User Manual March 27, 2020
© 2020 Zultys, Inc. No reproduction or distribution without permission
Page 96 of 110
Technical Publications
You may place a call as an agent by dragging the desired party into the Call
Group History area. The screen will indicate place call as agent.
When you release the mouse button the call will be initiated to the desired user
with you calling as an agent.

Zultys Advanced Communicator 6.0 User Manual March 27, 2020
© 2020 Zultys, Inc. No reproduction or distribution without permission
Page 97 of 110
Technical Publications
6 SMS 2.0 Service
6.1 Description
Zultys SMS 2.0 option allows customers to initiate and receive SMS messages
using ZAC The ZAC interfaces has been designed to streamline and make
sending SMS messages easier and intuitive.
6.1.1 Requirements
• ZAC Version – Must be 5.0.0.37 (or greater)
• MX Version – Must be 15.0.3 (or greater)
• Voice DID – User must have a SMS enabled voice DID assigned.
The DID number format assigned in MX Administrator MUST BE 11 digits.
The 11 digits must be formatted as 1+10 digits. For example, a voice DID
number of 602-555-1212 would be configured as 16025551212 in MX
Administrator.
• If the user cell phone number is configured in the user area, users will
not receive a text if they attempt to text themselves.
6.1.2 Overview Process
• SMS is an optional service that Zultys Cloud Service customers may order
using part number 91-19301-V. This part number includes 1000
inbound/outbound SMS messages per month.
• All backend configuration is performed by Zultys personnel.
• Zultys Cloud Service customers who manage their customers system
must enter the DID numbers for each user as described above (11 digit
entry) In MX Administrator.
Backend configuration work in this scenario is still performed by Zultys
personnel.

Zultys Advanced Communicator 6.0 User Manual March 27, 2020
© 2020 Zultys, Inc. No reproduction or distribution without permission
Page 98 of 110
Technical Publications
6.2 Operation
6.2.1 Sending SMS Messages
1. From the minimized or maximized mode click the Chat by Number icon.
You may also start an SMS session from your buddy/contact history by select
the via icon:
2. Enter the desired SMS number in the “New message to” field. You may
click the X to cancel the operation.
3. Click the icon.

Zultys Advanced Communicator 6.0 User Manual March 27, 2020
© 2020 Zultys, Inc. No reproduction or distribution without permission
Page 99 of 110
Technical Publications
4. At the chat screen, enter your message and press .
5. You will see the response in the Chat area. Continue to enter/receive
responses in this area.
You may also start an SMS message with other MX users that have a
mobile phone configured in the system. When you select a user and bring
their history screen up, you will see an icon in the lower left corner. If you
mouse over the highlighted portion you will see:
Click the highlighted MX to select the desired message provider.

Zultys Advanced Communicator 6.0 User Manual March 27, 2020
© 2020 Zultys, Inc. No reproduction or distribution without permission
Page 100 of 110
Technical Publications
Select either the MX(internal) message or the SMS option to send to the
users’ mobile phone.
6.2.2 Receiving SMS Messages
A user may send and SMS message directly to your MX DID number.
1. When you receive an incoming SMS message, a popup will appear and the
Recent area will display a notification (if you are not in the Chat screen).
2. Click the popup window to present the chat area.
3. Click the recent area to display the SMS message in the list of activities.

Zultys Advanced Communicator 6.0 User Manual March 27, 2020
© 2020 Zultys, Inc. No reproduction or distribution without permission
Page 101 of 110
Technical Publications
4. Click the icon to enter the Chat area.
5. View responses and type your responses in the Chat area.

Zultys Advanced Communicator 6.0 User Manual March 27, 2020
© 2020 Zultys, Inc. No reproduction or distribution without permission
Page 102 of 110
Technical Publications
SMS service may also be started when the system

Zultys Advanced Communicator 6.0 User Manual March 27, 2020
© 2020 Zultys, Inc. No reproduction or distribution without permission
Page 103 of 110
Technical Publications
7 Microsoft Office Unified Communications
7.1 Description
This feature allows Windows based ZAC presence information to be shared with
Microsoft Outlook 2010+ versions. ZAC users’ presence status can be viewed
within the Outlook application without the need to view the ZAC application
itself.
In addition, actions such as call, Instant Message can be initiated from Outlook
as well.
7.2 Operation
Once the feature is enabled in ZAC Settings, operation is inherent. Presence
status is shown for all e-mail recipients in Outlook:
Presence Status is also shown in the People Pane of Outlook.

Zultys Advanced Communicator 6.0 User Manual March 27, 2020
© 2020 Zultys, Inc. No reproduction or distribution without permission
Page 104 of 110
Technical Publications
Moving your mouse over the presence area of a user will present the quick
action menu:
From the quick action menu you can:
• Initiate an IM session. ZAC IM window will appear. Depending on your
ZAC settings, ZAC may appear.
• Place a call to the user. ZAC will be invoked. Depending on your ZAC
settings, ZAC may appear.
• Send an e-mail using Outlook

Zultys Advanced Communicator 6.0 User Manual March 27, 2020
© 2020 Zultys, Inc. No reproduction or distribution without permission
Page 105 of 110
Technical Publications
MXIE Presence Status
Outlook Presence Status
Available
Available
Not Available
Do Not Disturb - Not Available
Busy
Busy
At Lunch
Away – At Lunch
In a Meeting
Busy – In a Meeting
Be Right Back
Away – Be Right Back

Zultys Advanced Communicator 6.0 User Manual March 27, 2020
© 2020 Zultys, Inc. No reproduction or distribution without permission
Page 106 of 110
Technical Publications
Appear Offline
Offline
7.3 Conditions
• Outlook 2010+ must be installed on the users’ PC.
• This feature operates independently of Zultys Outlook Communicator or
Microsoft Exchange Communicator (MSEC). Neither application is required
for this feature to be utilized.
• This feature does not require an Exchange Server to be present.
• This feature does not require any additional license to operate. The only
requirement is a valid user license and MXIE must be installed and
running on the MX system.
• The Microsoft Web based application SharePoint must be run in Internet
Explorer to view presence status. Firefox, Chrome, Safari web browsers
will not support the Unified Communications integration.
• Outlook supports one direct connection presence application from
external programs. If the user already has an external presence sharing
associated with Outlook, Skype for example, enabling the Zultys feature
will disable the Skype presence
• The e-mail address in Configure\Users in MX Administrator must be
programmed.
ZAC/Settings/Application
Enable the checkbox and click Apply.
• Microsoft .NET Framework 4+ must be installed/active on the users’ PC in
order for this feature to operate properly.

Zultys Advanced Communicator 6.0 User Manual March 27, 2020
© 2020 Zultys, Inc. No reproduction or distribution without permission
Page 107 of 110
Technical Publications
• This feature is only supported on Windows based Zultys Advanced
Communicator.

Zultys Advanced Communicator 6.0 User Manual March 27, 2020
© 2020 Zultys, Inc. No reproduction or distribution without permission
Page 108 of 110
Technical Publications
8 Command line parameters
8.1 Description
ZAC supports a number of command line parameters.
Upon installation of ZAC a default shortcut is automatically placed on the
Windows Desktop, as well as in the ‘Start Menu | Zultys folder. The simplest way
to apply command line parameters is to create a copy of the default ZAC
Shortcut and edit the target properties.
Steps to copy and edit shortcut:
1) Select Start | All Programs | Zultys – Right click on ZAC and select copy.
2) Paste the copied shortcut to the desired location and rename as required.
3) Right click new shortcut and select Properties, ensure that Shortcut tab is
selected

Zultys Advanced Communicator 6.0 User Manual March 27, 2020
© 2020 Zultys, Inc. No reproduction or distribution without permission
Page 109 of 110
Technical Publications
Type the required command line parameters at the end of the target field. For
example:
"C:\Program Files\Zultys\ZAC\Bin\zac.exe" new
Will start a new instance of ZAC
Available parameters:
Function
Syntax
Example
Login Screen Parameters
Login Name
n=[User Name]
n=john.doe - Login as the user
“john.doe”.
Password
p=[Password]
p=1234 - Login with the password
“1234”.

Zultys Advanced Communicator 6.0 User Manual March 27, 2020
© 2020 Zultys, Inc. No reproduction or distribution without permission
Page 110 of 110
Technical Publications
Function
Syntax
Example
MX IP Address/URL
u=[MX Address]
u=192.168.1.100 - Connect to the
MX at 192.168.1.100.
Exit
exit
Exits ZAC
New Instance
new
Starts a new instance of ZAC
Logout
logout
Logs out the current user and
presents the login screen
Roles
roles=[role_list]
• roles=all - Logs user into all
their roles.
• roles=Main_Operator,Sales -
Logs user into call groups named
“Main_Operator” and “Sales”.
Separate each call group with a “,”
(comma) and no spaces.
Note: that the Role screen cannot
be bypassed if multiple locations
are defined on the MX. Specified
roles will be checked, but the user
must click
OK
to continue. Call
Groups cannot be named “all” if
there is a call group with this name
the roles=all will not function
properly, as a workaround use
“all_roles” instead of “roles=all” or
rename the call group.
Call
(call=<number>)
Start ZAC and place call to
specified number
