
Base Handbook
Chapter 9
Macros

Copyright
This document is Copyright © 2013–2015 by the LibreOffice Documentation Team. Contributors
are listed below. You may distribute or modify it under the terms of either the GNU General Public
License (http://www.gnu.org/licenses/gpl.html), version 3 or later, or the Creative Commons
Attribution License (http://creativecommons.org/licenses/by/4.0/), version 4.0 or later.
All trademarks within this guide belong to their legitimate owners.
Contributors
Jochen Schiffers
Hazel Russman
Jean Hollis Weber
Robert Großkopf
Andrew Pitonyak
Jost Lange
Jürgen Thomas
Feedback
Please direct any comments or suggestions about this document to the Documentation Team’s
mailing list: [email protected]
Note: Everything you send to a mailing list, including your email address and any other personal
information that is written in the message, is publicly archived and cannot be deleted.
Acknowledgments
This chapter is based on an original German document and was translated by Hazel Russman.
Publication date and software version
Published 22 December 2015. Based on LibreOffice 5.0.
Note for Mac users
Some keystrokes and menu items are different on a Mac from those used in Windows and Linux.
The table below gives some common substitutions for the instructions in this chapter. For a more
detailed list, see the application Help.
Windows or Linux Mac equivalent Effect
Tools > Options menu
selection
LibreOffice > Preferences Access setup options
Right-click Control+click Open a context menu
Ctrl (Control) ⌘ (Command) Used with other keys
F5 Shift+⌘+F5 Open the Navigator
F11 ⌘+T Open the Styles and Formatting window
Documentation for LibreOffice is available at http://www.libreoffice.org/get-help/documentation

Contents
Copyright.............................................................................................................................. 2
Contributors................................................................................................................................. 2
Feedback..................................................................................................................................... 2
Acknowledgments........................................................................................................................ 2
Publication date and software version......................................................................................... 2
Note for Mac users...............................................................................................................2
General remarks on macros............................................................................................... 5
Macros in Base.....................................................................................................................6
Using macros............................................................................................................................... 6
Assigning macros........................................................................................................................ 6
Events that occur in a form when the window is opened or closed..........................................7
Events in a form in a open window.......................................................................................... 7
Events within a form................................................................................................................ 8
Components of macros................................................................................................................ 9
The “Framework” of a macro................................................................................................... 9
Defining variables.................................................................................................................... 9
Defining arrays...................................................................................................................... 10
Accessing forms.................................................................................................................... 11
Accessing form elements...................................................................................................... 11
Access to the database......................................................................................................... 12
Reading and using records................................................................................................... 14
Editing records – adding, modifying, deleting........................................................................ 16
Testing and changing controls............................................................................................... 18
English names in macros........................................................................................................... 18
Properties of forms and controls............................................................................................ 19
Methods for forms and controls............................................................................................. 25
Improving usability............................................................................................................ 29
Automatic updating of forms...................................................................................................... 29
Filtering records......................................................................................................................... 30
Preparing data from text fields to fit SQL conventions................................................................32
Calculating values in a form in advance..................................................................................... 33
Providing the current Office Version........................................................................................... 34
Returning the value of listfields.................................................................................................. 34
Limiting listboxes by entering initial letters................................................................................. 35
Converting dates from a form into a date variable......................................................................37
Searching data records.............................................................................................................. 37
Highlighting search terms in forms and results.......................................................................... 39
Checking spelling during data entry........................................................................................... 43
Comboboxes as listboxes with an entry option.......................................................................... 45
Text display in comboboxes.................................................................................................. 45
Transfering a foreign key value from a combobox to a numeric field..................................... 47
Function to measure the length of the combobox entry......................................................... 53
Generating database actions................................................................................................ 53
Navigation from one form to another.......................................................................................... 53
Hierarchical listboxes................................................................................................................. 54
Macros 3

Entering times with milliseconds................................................................................................ 58
One event – several implementations........................................................................................ 59
Saving with confirmation............................................................................................................ 59
Primary key from running number and year............................................................................... 60
Database tasks expanded using macros........................................................................ 61
Making a connection to a database........................................................................................... 61
Copying data from one database to another.............................................................................. 62
Access to queries...................................................................................................................... 63
Securing your database............................................................................................................. 63
Database compaction................................................................................................................ 67
Decreasing the table index for autovalue fields.......................................................................... 67
Printing from Base..................................................................................................................... 68
Printing a report from an internal form................................................................................... 68
Launching, formatting, directly printing and closing a report.................................................. 68
Printing reports from an external form................................................................................... 70
Doing a mail merge from Base.............................................................................................. 71
Printing via text fields............................................................................................................ 72
Calling applications to open files........................................................................................... 73
Calling a mail program with predefined content......................................................................... 73
Changing the mouse pointer when traversing a link...................................................................74
Showing forms without a toolbar................................................................................................ 75
Forms without a toolbar in the window.................................................................................. 75
Forms in full-screen mode..................................................................................................... 76
Launching forms directly from the opening of the database..................................................77
Accessing a MySQL database with macros....................................................................77
MySQL code in macros.............................................................................................................. 77
Temorary tables as individual intermediate storage................................................................... 78
Dialogs................................................................................................................................ 78
Launching and ending dialogs................................................................................................... 78
Simple dialog for entering new records...................................................................................... 79
Dialog for editing records in a table............................................................................................ 81
Using a dialog to clean up bad entries in tables......................................................................... 86
Accessing macros with Access2Base.............................................................................93
4 Macros

General remarks on macros
In principle a database in Base can manage without macros. At times, however, they may become
necessary for:
• More effective prevention of input errors.
• Simplifying certain processing tasks (changing from one form to another, updating data
after input into a form, and so on).
• Allowing certain SQL commands to be called up more easily than with the separate SQL
editor.
You must decide for yourself how intensively you wish to use macros in Base. Macros can improve
usability but are always associated with small reductions in the speed of the program, and
sometimes with larger ones (when coded poorly). It is always better to start off by fully utilizing the
possibilities of the database and the provisions for configuring forms before trying to provide
additional functionality with macros. Macros should always be tested on larger databases to
determine their effect on performance.
Macros are created using Tools > Macros > Organize macros > LibreOffice Basic. A window
appears which provides access to all macros. For Base, the important area corresponds to the
filename of the Base file.
The New button in the LibreOffice Basic Macros dialog opens the New Module dialog, which asks
for the module name (the folder in which the macro will be filed). The name can be altered later if
desired.
As soon as this is given, the macro editor appears. Its input area already contains the Start and the
End for a subroutine:
REM ***** BASIC *****
Sub Main
End Sub
If macros are to be usable, the following steps are necessary:
• Under Tools > Options > Security > Macro security the security level should be reduced
to Medium. If necessary you can additionally use the Trusted sources tab to set the path to
your own macro files to prevent later queries about the activation of macros.
• The database file must be closed and then reopened after the creation of the first macro
module.
General remarks on macros 5

Some basic principles for the use of Basic code in LibreOffice:
• Lines have no line numbers and must end with a hard return.
• Functions, reserved expressions, and similar elements are not case-sensitive. So "String" is
the same as "STRING" or "string" or any other combination of upper and lower case. Case
should be used only to improve legibility. Names for constants and enumerations, however,
are case sensitive the first time that they are seen by the macro compiler, so it is best to
always write those using the proper case.
• Actually one can distinguish between procedures (beginning with SUB) and functions
(beginning with FUNCTION). Procedures were oringinally program segments without a
return value, while functions return values that can be further processed. But this distinction
is increasingly becoming irrelevant. People nowadays use terms such as “method” or
“routine” whether there is a return value or not. A procedure can also have a return value
(apart from “Variant”).
SUB myProcedure AS INTEGER
END SUB
For further details see Chapter 13, Getting Started with Macros, in the Getting Started guide.
Note
Macros in the PDF and ODT versions of this chapter are colored according to the
rules of the LibreOffice macro editor:
Macro designation
Macro comment
Macro operator
Macro reserved expression
Macro number
Macro character string
Macros in Base
Using macros
The “direct way”, using Tools > Macros > Run macros is possible, but not usual for Base macros.
A macro is normally assigned to an event and launched when that event occurs. Macros are used
for:
• Handling events in forms
• Editing a data source inside a form
• Switching between form controls
• Reacting to what the user does inside a control
The “direct way” is not possible – not even for testing – when one of the objects thisComponent
(see the section on “Access to forms”) or oEvent (see the section on “Access to elements of a
form”) is to be used.
Assigning macros
If a macro is to be launched by an event, it must first be defined (see “General remarks on
macros“). Then it can be assigned to an event. Such events can be accessed through two
locations.
6 Macros

Events that occur in a form when the window is opened or closed
Actions that take place when a form is opened or closed are registered as follows:
• While designing the form, open the Events tab in Tools > Customize.
• Choose the appropriate event. Some macros can only be launched when the “View
created” event is chosen. Other macros, for example to create a full-screen form, should be
launched by “Open document”.
• Use the Macro button to find the macro you want and confirm your choice.
• Under
Save in, give the name of the form.
• Confirm with OK.
Events in a form in a open window
Once the window is opened to show the overall content of the form, individual elements of the form
can be accessed. This includes the elements you have assigned to the form.
The form elements can be accessed using the Form Navigator, as shown in the illustration above.
They can equally well be acessed by using the contextual menus of individual controls within the
form interface.
The events listed under Form Properties > Events all take place while the form window is open.
The can be set separately for each form or subform in the form window.
Macros in Base 7

Note
Unfortunately Base uses the word “form” both for a window that is opened for the
input of data, and for elements within this window that are bound to a specific data
source (table or query).
A single form window might well contain several forms with different data sources. In
the Form Navigator, you always see first the term “Forms”, which in the case of a
simple form contains only one subordinate entry.
Events within a form
All other macros are registered using the properties of subforms and controls through the Events
tab.
• Open the window for the properties of the control (if you have not already done so).
• Choose a suitable event in the Events tab.
• To edit the data source, use events that refer to Record or Update or Reset.
– For buttons, or the choices within list or option fields the event Execute action would
be the first port of call.
– All other events depend on the type of control and the desired action.
– Click the button to the right … to open the “Assign action” window.
• Click the Macro button to choose the macro defined for the action.
• Click OK to confirm the assignment.
8 Macros

Components of macros
This section explains some of the macro language that is commonly used in Base, especially
within forms. As far as is possible (and reasonable), examples are given in all the following
sections.
The “Framework” of a macro
The definition of a macro begins with its type – SUB or FUNCTION – and ends with END SUB or
END FUNCTION. A macro that is assigned to an event can receive arguments (values); the only
useful one is the oEvent argument. All other routines that might be called by such a macro can be
defined with or without a return value, depending on their purpose, and provided with arguments if
necessary.
SUB update_loan
END SUB
SUB from_Form_to_Form(oEvent AS OBJECT)
END SUB
FUNCTION confirm_delete(oEvent AS OBJECT) AS BOOLEAN
confirm_delete = FALSE
END FUNCTION
It is helpful to write out this framework immediately and ut in the content afterwards. Do not forget
to add comments to explain the macro, remembering the rule “As many as necessary, as few as
possible“. In addition, Basic does not distinguish between upper and lower case. Usually fixed
terms like SUB are written preferably in upper case, other concepts in mixed case.
Defining variables
In the next step, at the beginning of the routine, the DIM command is used to define the variables
that will occur within the routine, each with its appropriate data type. Basic itself does not require
this; it accepts any new variables that occur within the program. However the program code is
“safer” if the variables, especially their data types, are declared. Many programmers make this a
requirement, using Basic’s Explicit option when they begin to write a module. This means “Do not
recognize any old variable, but only those I have declared beforehand”.
Macros in Base 9

DIM oDoc AS OBJECT
DIM oDrawpage AS OBJECT
DIM oForm AS OBJECT
DIM sName AS STRING
DIM bOKEnabled AS BOOLEAN
DIM iCounter AS INTEGER
DIM dBirthday AS DATE
Only alphabetic characters (A-Z or a-z), numbers and the underline character ‘_’ may be used in
variable names. No special characters are allowed. Spaces are allowed under some conditions,
but are best avoided. The first character must be alphabetic.
It is common practice to specify the data type in the first character
1
. Then it can be recognised
wherever the variable occurs in the code. Also recommended are “expressive names”, so that the
meaning of the variable is obvious from its name.
A list of possible data types in Star Basic can be found in the appendix to this handbook. They
differ in various places from the types in the database and in the LibreOffice API. Such changes
are made clear in the examples.
Defining arrays
For databases in particular, the assembly of several variables into a record is important. If several
variables are stored together in a single common location, this is called an array. An array must be
defined before data can be written into it.
DIM arData()
creates an empty array.
arData = array("Lisa","Schmidt")
creates an array of a specific size (2 elements) and provides it with values..
Using
print arData(0), arData(1)
causes the two defined elements to be displayed onscreen. The element count begins with 0.
DIM arData(2)
arData(0) = "Lisa"
arData(1) = "Schmidt"
arData(2) = "Cologne"
This creates an array in which three elements of any type can be stored, for example a record for
"Lisa""Schmidt""Cologne". You cannot put more than three elements into this array. If you want to
store more elements, you must make the array larger. However if the size of an array is redefined
while a macro is running, the array is initially empty, just like a new array.
ReDIM Preserve arData(3)
arData(3) = "18.07.2003"
Adding Preserve keeps the preceding data so that the array is truly extended by the entry of the
date (here in the form of text).
The array shown above can store only one record. If you want to store several records, as a table
in a database does, you need to define a two-dimensional array.
DIM arData(2,1)
arData(0,0) = "Lisa"
arData(1,0) = "Schmidt"
arData(2,0) = "Cologne"
arData(0,1) = "Egon"
arData(1,1) = "Müller"
arData(2,1) = "Hamburg"
1 You should make this more specific where necessary, as only one letter does not allow you to distinguish
between the data types “Double” and “Date” or “Single” and “String”.
10 Macros

Here too it is possible to extend the previously defined array and preserve the existing contents by
using Preserve.
Accessing forms
The form lies in the currently active document. The region which is represented here is called
drawpage. The container in which all forms are kept is called forms; in the Form Navigator this
shows up as the primary heading with all the individual forms attached. The variables named
above receive their values like this:
oDoc = thisComponent
oDrawpage = oDoc.drawpage
oForm = oDrawpage.forms.getByName("Filter")
The form to be accessed is called Filter. This is the name that is visible in the top level of the Form
Navigator (by default the first form is called MainForm). Subforms lie in hierarchical order within the
main form and can be reached step by step:
DIM oSubForm AS OBJECT
DIM oSubSubForm AS OBJECT
oSubForm = oForm.getByName("Readerselect")
oSubSubForm = oSubForm.getByName("Readerdisplay")
Instead of using intermediate varables, you can go straight to a particular form. An intermediate
object, which can be used more than once, needs to be declared and assigned a separate value.
In the following example, oSubForm is no longer used.
oForm = thisComponent.drawpage.forms.getByName("Filter")
oSubSubForm = oForm.getByName("readerselect").getByName("readerdisplay")
Note
If a name consists solely of ascii letters and numbers with no spaces or special
characters, the name can be used directly in an assignment statement.
oForm = thisComponent.drawpage.forms.Filter
oSubSubForm = oForm.readerselect.readerdisplay
Contrary to normal Basic usage, such names must be written with the correct case.
A different mode of access to the form is provided by the event that triggers the macro.
If a macro is launched from a form event such as Form Properties > Before record action, the
form itself can be reached as follows:
SUB MacroexampleCalc(oEvent AS OBJECT)
oForm = oEvent.Source
...
END SUB
If the macro is launched from an event in a form control, such as Text box > When losing focus,
both the form and the field become accessible:
SUB MacroexampleCalc(oEvent AS OBJECT)
oField = oEvent.Source.Model
oForm = oField.Parent
...
END SUB
Access to events has the advantage that you need not bother about whether you are dealing with a
main form or a subform. Also the name of the form is of no importance to the functioning of the
macro.
Accessing form elements
Elements within forms are accessed in a similar way: declare a suitable variable as object and
search for the appropriate control within the form:
Macros in Base 11

DIM btnOK AS OBJECT ' Button »OK»
btnOK = oSubSubForm.getByName("button 1") ' from the form readerdisplay
This method always works when you know which element the macro is supposed to work with.
However when the first step is to determine which event launched the macro, the oEvent
method shown above becomes useful. The variable is declared within the macro “framework“ and
gets assigned a value when the macro is launched. The Source property always yields the
element that launched the macro, while the Model property describes the control in detail:
SUB confirm_choice(oEvent AS OBJECT)
DIM btnOK AS OBJECT
btnOK = oEvent.Source.Model
END
If you want, further actions can be carried out with the object obtained by this method.
Please note that subforms count as components of a form.
Access to the database
Normally access to the database is controlled by forms, queries, reports or the mailmerge function,
as described in previous chapters. If these possibilities prove insufficient, a macro can specifically
access the database in several ways.
Connecting to the database
The simplest method uses the same connection as the form. oForm is determined as shown
above.
DIM oConnection AS OBJECT
oConnection = oForm.activeConnection()
Or you can fetch the data source (i.e. the database) through the document and use its existing
connection for the macro::
DIM oDatasource AS OBJECT
DIM oConnection AS OBJECT
oDatasource = thisComponent.Parent.dataSource
oConnection = oDatasource.getConnection("","")
A further way allows the connection to the database to be created on the fly:
DIM oDatasource AS OBJECT
DIM oConnection AS OBJECT
oDatasource = thisComponent.Parent.CurrentController
IF NOT (oDatasource.isConnected()) THEN oDatasource.connect()
oConnection = oDatasource.ActiveConnection()
The IF condition controls only one line so END IF is not required.
If the macro is to be launched through the user interface and not from an event in a form, the
following variant is suitable:
DIM oDatasource AS OBJECT
DIM oConnection AS OBJECT
oDatasource = thisDatabaseDocument.CurrentController
IF NOT (oDatasource.isConnected()) THEN oDatasource.connect()
oConnection = oDatasource.ActiveConnection()
Access to databases outside the current database is possible as follows:
DIM oDatabaseContext AS OBJECT
DIM oDatasource AS OBJECT
DIM oConnection AS OBJECT
oDatabaseContext = createUnoService("com.sun.star.sdb.DatabaseContext")
oDatasource = oDatabaseContext.getByName("registered name of Database in LO")
oConnection = oDatasource.GetConnection("","")
12 Macros

Connections to databases not registered with LO are also possible. In such cases, instead of the
registered name, the path to the database must be given as file:///……/database.odb.
Expanded instructions on database connections are given in “Making a connection to a database”.
SQL commands
You work with the database using SQL commands. These need to be created and sent to the
database; the result is determined according to the type of command and the results can be further
processed. The createStatement directive creates a suitable object for this purpose.
DIM oSQL_Statement AS OBJECT ' the objectthat will carry out the SQL-command
DIM stSql AS STRING ' Text of the actual SQL-command
DIM oResult AS OBJECT ' result of executeQuery
DIM iResult AS INTEGER ' result of executeUpdate
oSQL_Statement = oConnection.createStatement()
To query data, you call the executeQuery method; the result is then evaluated. Table and field
names are usually double-quoted. The macro must mask these with additional double quotes to
ensure that they appear in the command.
stSql = "SELECT * FROM ""Table1"""
oResult = oSQL_Statement.executeQuery(stSql)
To modify data – that is to INSERT, UPDATE or DELETE – or to influence the database structure,
you call the executeUpdate method. Depending on the command and the database, this yields
either nothing useful (a zero) or the number of records modified.
stSql = "DROP TABLE ""Suchtmp"" IF EXISTS"
iResult = oSQL_Statement.executeUpdate(stSql)
For the sake of completeness, there is one more special case to be mentioned: if the
oSQL_Statement is to be used in different ways for SELECT or for other purposes, there is
another method available, namely execute. We will not be using it here. For further information,
see the API Reference.
Pre-prepared SQL commands with parameters
In all cases where manual entry by a user needs to be transferred into a SQL statement, it is easier
and safer not to create the command as a long character string but to prepare it in advance and
use it with parameters. This makes the formatting of numbers, dates and strings easier (the
constant double quotes disappear) and prevents malicious input from causing data loss.
To use this method, the object for a particular SQL command is created and prepared:
DIM oSQL_Statement AS OBJECT ' the object, that executes the SQL-command
DIM stSql AS STRING ' Text of the actual SQL-command
stSql = "UPDATE author " _
& "SET lastname = ?, firstname = ?" _
& "WHERE ID = ?"
oSQL_Statement = oConnection.prepareStatement(stSql)
The object is created with prepareStatement so that the SQL command is known in advance.
Each question mark indicates a position which later – before the command is executed – will
receive an actual value. Because the command is prepared in advance, the database knows what
type of entry – in this case two strings and a number – is expected.The various positions are
distinguished by number (counting from 1).
Then the the values are transferred with suitable statements and the SQL command is carried out.
Here the values are taken from form controls, but they could also originate from other macros or be
given as plain text:
oSQL_Statement.setString(1, oTextfeld1.Text) ' Text for the surname
oSQL_Statement.setString(2, oTextfeld2.Text) ' Text for the first name
oSQL_Statement.setLong(3, oZahlenfeld1.Value) ' value for the appropriate ID
iResult = oSQL_Statement.executeUpdate
The complete list of assignments is in “Parameters for prepared SQL commands".
Macros in Base 13

For further information on the advantages of this method, see below (external links):
• SQL-Injection (Wikipedia)
• Why use PreparedStatement (Java JDBC)
• SQL-commands (Introduction to SQL)
Reading and using records
There are several ways, depending on requirements, to transfer information out of a database into
a macro so that it can be processed further.
Please note: references to a “form“ include subforms. What is intended is that form or part of a
form that is bound to a particular data source.
Using forms
The current record and its data are always available through the form that shows the relevant data
(table, query, SELECT). There are several getdata_ type methods, such as:
DIM ID AS LONG
DIM sName AS STRING
DIM dValue AS CURRENCY
DIM dEntry AS NEW com.sun.star.util.Date
ID = oForm.getLong(1)
sName = oForm.getString(2)
dValue = oForm.getDouble(4)
dEntry = oForm.getDate(7)
All these methods require a column number from the data source; the count starts at 1.
Note
For all methods that work with databases, counting starts at 1. This applies to both
columns and rows.
If you prefer to use column names instead of column numbers to work with the underlying data
source (table, query, view), the column number can be determined using findColumn. Here is an
example for finding the column called “Name“.
DIM sName AS STRING
nName = oForm.findColumn("Name")
sName = oForm.getString(nName)
The type of value returned always matches the method type, but the following special cases should
be noted:
• There are no methods for data of the types Decimal, Currency etc. which are used for
commercially exact calculations. As Basic automatically carries out the appropriate
conversion, you can use getDouble.
• When using getBoolean, you must take account of the way “TRUE“ and “FALSE“ are
defined in the database. The “usual“ definitions (logical values, 1 as “TRUE“) are processed
correctly.
• Date values can be defined not only with the data type DATE, but also (as above) as
util.Date. This makes it easier to read and modify year, month and day.
• With whole numbers, beware of different data types. The above example uses getLong;
the Basic variable ID must also have the data type Long, as this matches the Integer
type in the database.
The complete list of these methods is to be found in “Editing rows of data".
14 Macros

Tip
If values from a form are to be used directly for further processing in SQL (for
example for input into another table), it is much simpler not to have to query the field
type.
The following macro, which is bound to Properties: Button > Events > Execute
action reads the first field in the form independently of the type necessary for future
processing in Basic.
SUB ReadValues(oEvent AS OBJECT)
DIM oForm AS OBJECT
DIM stFeld1 AS STRING
oForm = oEvent.Source.Model.Parent
stFeld1 = oForm.getString(1)
END SUB
If fields are read using getString(), all formatting necessary for further SQL
processing is preserved. A date that is displayed as ‘08.03.15’ is read out in the
format ‘2015-03-08’ and can be used directly in SQL.
Reading out in a format corresponding to the type is only mandatory if the value is to
be further processed within the macro, for example in a calculation.
Result of a query
The set of results from a query can be used in the same way. In the section “SQL commands“, you
will find the variable oResult for this result set, which is usually read out something like this:
WHILE oResult.next ' one record after anotherr
rem transfer the result into variables
stVar = oResult.getString(1)
inVar = oResult.getLong(2)
boVar = oResult.getBoolean(3)
rem do something with these values
WEND
According to the type of SQL command, the expected result and its purpose, the WHILE loop can
be shortened or dropped altogether. But basically a result set can always evaluated in this way.
If only the first record is to be evaluated
oResult.next
accesses the row for this record and with
stVar = oResult.getString(1)
reads the content of the first field. The loop ends here.
The query for the above example has text in the first column, an integer number in the second
(Integer in the database corresponds to Long in Basic), and a Yes/No field in the third. The fields
are accessed through a field index which, unlike an array index, starts from ‘1’.
Navigation through such a result is not possible . Only single steps to the next record are allowed.
To navigate within the record, the ResultSetType must be known when the query is created.
This is accessed using
oSQL_Result.ResultSetType = 1004
or
oSQL_Result.ResultSetType = 1005
Type 1004 - SCROLL_INTENSIVE allows you to navigate freely but does not pick up changes in
the original data. Type 1005 – SCROLL_SENSITIVE recognizes changes in the original data
which might affect the query result.
The total number of rows in the result set can be determined only after a numeric type for the result
has been specified. It is carried out as follows:
DIM iResult AS LONG
Macros in Base 15

IF oResult.last ' go to the last record if possible
iResult = oResult.getRow ' the running number is the sumELSE
iResult = 0
END IF
Using a control
If a control is bound to a data source, the value can be read out directly, as described in the next
section. However this can lead to problems. It is safer to use the procedure described in “Using
forms” or else the following method, which is shown for several different types of control:
sValue = oTextField.BoundField.Text ' example for a Text field
nValue = oNumericField.BoundField.Value ' example for a numeric field
dValue = oDateField.BoundField.Date ' example for a date field
BoundField represents the link between the visible control and the actual content of the data
set.
Navigating in a data set
In the last but one example the Next method was used to move from one row of the result set to
the next. There are further similar methods and tests that can be used both for the data in a form –
represented by the variable oForm – and for a result set. For example, using the method
described in “Automatic updating of forms”, the previous record can be selected again:
DIM loRow AS LONG
loRow = oForm.getRow() ' save the current row number
oForm.reload() ' reload the record set
oForm.absolute(loRow) ' go back to the same rowthe
The section “Automatic updating of forms” shows all the methods that are suitable for this.
Note
Unfortunately, from the beginning of LO, there has been a bug (carried over from
OpenOffice) which affects forms. It sets the current row number when data is altered
within a form to ‘0’. See https://bugs.documentfoundation.org/show_bug.cgi?
id=82591. To get the correct current row number, bind the following macro to the
event Form > Properties > Events > After record change.
GLOBAL loRow AS LONG
SUB RowCounter(oEvent AS OBJECT)
loRow = oEvent.Source.Row
END SUB
The new row number is read out and assigned to the global variable loRow. This
variable is to be placed at the start of all modules and will retain its content until you
exit Base or change the value by calling RowCounter again.
Editing records – adding, modifying, deleting
In order to edit records, several things have to work together:
• Information must be entered by the user into a control, via the keyboard.
• The data set “behind” the form must be informed about the change. This happens when
you move out of the field into a new one.
• The database itself must be modified. This happens when you move from one record to
another.
When you are doing this through a macro, these partial steps must all be considered. If any one of
them is lacking or is carried out wrongly, changes will be lost and will not end up in the database.
First of all the change must not be in the control’s displayed value but in the data set itself. This
makes it pointless to change the Text property of a control.
16 Macros

Please note that tables are the only data sets that can be altered without causing problems. For
other data sets, editing is possible only under special circumstances.
Changing the content of a control
If you wish to change only a single value, the BoundField property of the control can be used
with an appropriate method. Then the change must be transmitted to the database. Here is an
example for a date field into which the actual date is to be entered:
DIM unoDate AS NEW com.sun.star.util.Date
unoDate.Year = Year(Date)
unoDate.Month = Month(Date)
unoDate.Day = Day(Date)
oDateField.BoundField.updateDate( unoDate )
oForm.updateRow() ' the change is transmitted to the databse
For BoundField you use the updateXxx method that matches the data type of the field. In this
example the field is a Date field. The new value is passed as the argument – in this case the
current date, converted into the format which the macro requires.
Altering rows in a data set
The previous method is unsuitable when several values in a row need to be changed, For one
thing, a control would have to exist on the form for every field, which is often not desired and not
useful. Also, an object must be “fetched“ for each field. The simple and direct way uses the form
like this:
DIM unoDate AS NEW com.sun.star.util.Date
unoDate.Year = Year(Date)
unoDate.Month = Month(Date)
unoDate.Day = Day(Date)
oForm.updateDate(3, unoDate )
oForm.updateString(4, "ein Text")
oForm.updateDouble(6, 3.14)
oForm.updateInt(7, 16)
oForm.updateRow()
For each column in the data set, the updateXxx method appropriate to its type is called. The
arguments are the column number (counting from 1) and the desired value. Then the alterations
are passed on to the database.
Creating, modifying, and deleting rows
The named changes refer to the current row of the data set underlying the form. Under some
circumstances it is necessary to call a method from “Navigating in a data set”. The following steps
are necessary:
1) Choose the current record.
2) Change the values as described in the previous section.
3) Confirm the change with the following command:
oForm.updateRow()
4) In special cases it is possible to cancel and return to the previous state:
oForm.cancelRowUpdates()
For a new record there is a special method, comparable with changing to a new row in a table
control. This is done as follows:
1) Prepare for a new record:
oForm.moveToInsertRow()
2) Enter all wanted/required values. This is done using the updateXxx methods as shown in
the previous section.
3) Confirm the new data with the following command:
oForm.insertRow()
Macros in Base 17

4) The new entry cannot be easily reversed. Instead you will have to delete the new record.
There is a simple command to delete a record; proceed as follows:
1) Choose the desired record and make it current, as for a modification.
2) Use the following command to delete it:
oForm.deleteRow()
Tip
To ensure that changes are carried over into the database, they must be confirmed
explicitly with updateRow or insertRow as appropriate. While pressing the save
button will automatically use the appropriate function, with a macro you must
determine before saving if the record is new (Insert) or a modification of an
existing one (Update).
IF oForm.isNew THEN
oForm.insertRow()
ELSE
oForm.updateRow()
END IF
Testing and changing controls
Apart from the content of the data set, a lot more information can be read out of a control, edited
and modified. This is particularly true of properties, as described in Chapter 4, Forms.
Several examples in the “Improving usability” section use the additional information in the field:
DIM stTag AS STRING
stTag = oEvent.Source.Model.Tag
As mentioned in the previous section, the Text property can only be modified usefully if the control
is not bound to a data set. However there are other properties which are determined as part of the
form definition but can be adapted at run time. For example, a label could be given a different text
color if it represented a warning rather than information:
SUB showWarning(oField AS OBJECT, iType AS INTEGER)
SELECT CASE iType
CASE 1
oField.TextColor = RGB(0,0,255) ' 1 = blue
CASE 2
oField.TextColor = RGB(255,0,0) ' 2 = red
CASE ELSE
oField.TextColor = RGB(0,255,0) ' 0 = green (neither 1 nor 2)
END SELECT
END SUB
English names in macros
Whereas the designer of a form can use native language designations for properties and data
access, only English names can be used in Basic. These are set out in the following synopsis.
Properties that are normally only set in the form definition are not included here. Nor are methods
(functions and/or procedures) which are only rarely used or only required for more complex
declarations.
The synopsis includes the following:
• Name Name to be used for the property in macro code
• Data type A Basic data type. For functions, the return type. Not included for procedures.
• R/W Indicates how you can use the value:
R read only
W write (modify) only
(R) Reading possible, not suitable for editing
18 Macros

(W) Writing possible but not useful
R+W suitable for reading and writing
Further information can be found in the API Reference by searching for the English name of the
control. There is a useful tool called Xray for finding out which properties and methods are
available for an element.
SUB Main(oEvent)
Xray(oEvent)
END SUB
This launches the Xray extension for the argument.
Properties of forms and controls
The “model” of a control describes its properties. According to the situation, the value of a property
can be accessed read-only or write-only. The order follows that in the lists of “Properties of Control
Fields” in Chapter 4, Forms.
Font
In every control that shows text, the font properties can be customized.
Name Data type L/S Property
FontName string L+S Name of the font
FontHeight single L+S Size of the font
FontWeight single L+S Whether bold or normal
FontSlant integer L+S Whether italic or roman
FontUnderline integer L+S Whether underlined
FontStrikeout integer L+S Whether struck through
Formula
English term: Form
Name Data type L/S Property
ApplyFilter boolean L+S Filter applied
Filter string L+S Current filter for the record.
FetchSize long L+S Number of records loaded “at once”
Row long L Current row number
RowCount long L Number of records
These properties apply to all controls
Control – see also FormComponent
Name Data type L/S Property
Name string L+(S) Name of the field
Enabled boolean L+S Active: Field can be selected
EnableVisible boolean L+S Field is displayed
ReadOnly boolean L+S Field content cannot be changed
TabStop boolean L+S Field can be reached through the Tab key
Macros in Base 19

Name Data type L/S Property
Align integer L+S Horizontal alignment:
0 = left, 1 = centered, 2 = right
BackgroundColor long L+S Background color
Tag string L+S Additional information
HelpText string L+S Help text as a Tooltip
These apply to many types of control
Name Data type L/S Property
Text string (L+S) Displayed content of the field. In text fields, this can be
read and further processed, but that does not usually
work for other types.
Spin boolean L+S Spinbox incorporated in a formatted field.
TextColor long L+S Text (foreground) color.
DataField string L Name of the field in the Data set.
BoundField object L Object representing the connection to the data set and
providing access to the field content.
Text field – further properties (TextField)
Name Data type L/S Property
String string L+S Displayed field content.
MaxTextLen integer L+S Maximum text length.
DefaultText string L+S Default text.
MultiLine boolean L+S Indicates if there is more than one line.
EchoChar (integer) L+S Character displayed during password entry.
Numeric Field (NumericField)
Name Data type L/S Property
ValueMin double L+S Minimum acceptable input value
ValueMax double L+S Maximum acceptable input value
Value double L+(S) Current value
(Do not use for values from the data set).
ValueStep double L+S Interval corresponding to one click for the
mouse wheel or spinbox.
DefaultValue double L+S Default value.
DecimalAccuracy integer L+S Number of decimal places.
ShowThousandsSeparator boolean L+S Show the locale separator for thousands.
Date field (DateField)
Date values are defined by the data type long and are displayed in ISO format: YYYYMMDD, for
example 20120304 for 04.03.2012. To use this type with getDate and updateDate, and with the
type com.sun.star.util.Date, see the examples.
20 Macros

Name Data
type
Datatype
since LO
4.1.1
L/S Property
DateMin long com.sun.star
.util.Date
L+S Minimum acceptable entry date.
DateMax long com.sun.star
.util.Date
L+S Maximum acceptable entry date.
Date long com.sun.star
.util.Date
L+(S) Current value
(Do not use for values from the data set).
DateFormat integer L+S OS-specific date format:
0 = short Date (simple)
1 = short Date dd.mm.yy (2-digit year)
2 = short Datedd.mm.yyyy (4-digit year)
3 = long Date (includes day of the week and
month name)
Further possibilities can be found in the form
definition or in the API reference.
DefaultDate long com.sun.star
.util.Date
L+S Default value.
DropDown boolean L+S Show a drop-down monthly calendar.
Time field (TimeField)
Time values are also of the type long.
Name Data
type
Data type
from LO
4.1.1
L/S Property
TimeMin long com.sun.star
.util.Time
L+S Minimum acceptable entry value.
TimeMax long com.sun.star
.util.Time
L+S Maximum acceptable entry value.
Time long com.sun.star
.util.Time
L+(S) Current value
(Do not use for values from the data set).
TimeFormat integer L+S Time format:
0 = short as hh:mm (hours, minutes, 24 hour
clock)
1 = long as hh:mm:ss (same thing with
Seconds, 24 hour clock)
2 = short as hh:mm (12 hour clock with
AM/PM)
3 = long as hh:mm:ss (12 hour clock with
AM/PM)
4 = short entry for a time duration
5 = long entry for a time duration
DefaultTime long com.sun.star
.util.Time
L+S Default value.
Macros in Base 21

Currency field (CurrencyField)
A currency field is a numeric field with the following additional possibilities
Name Datatype L/S Property
CurrencySymbol string L+S Currency symbol for display only .
PrependCurrencySymbol boolean L+S Symbol is displayed before the number.
Formated Field (FormattedControl)
A formatted control can be used as desired for numbers, currency or date/time. Very many of the
properties already described apply here to but with different names.
Name Data type L/S Property
CurrentValue variant L Current value of the contents. The actual data
type depends on the contents and format.
EffectiveValue L+(S)
EffectiveMin double L+S Minimum acceptable entry value.
EffectiveMax double L+S Maximum acceptable entry value.
EffectiveDefault variant L+S Default value.
FormatKey long L+(S) Format for display and entry. There is no easy
way to alter this using a macro.
EnforceFormat boolean L+S Format is tested during entry. Only certain
characters and combinations are allowed.
Listbox (ListBox)
Read and write access to the value lying behind the selected line is somewhat complicated but
possible.
Name Data type L/S Property
ListSource array of string L+S Data source: Source of the list contents or name of
the data set that provides the visible entry.
ListSourceType integer L+S Type of data source:
0 = Value list
1 = Table
2 = Query
3 = Ergebnismenge eines SQL-BefehlsResult set
from a SQL command
4 = rgebnis eines Datenbank-BefehlsResult of a
database command
5 = Fi eld names from a database-table
StringItemList array of string L List entries available for selection.
ItemCount integer L Number of available list entries
ValueItemList array of string L List of values to be passed from the form to the table.
DropDown boolean L+S Drop-down list.
LineCount integer L+S Total displayed lines when fully dropped down.
MultiSelection boolean L+S Multiple selection intended.
SelectedItems array of integer L+S List of selected entries as a list of positions in the
overall entrylist.
22 Macros

The first selected element from the list field is obtained like this:
oControl = oForm.getByName("Name of the Listbox")
sEintrag = oControl.ValueItemList( oControl.SelectedItems(0) )
Note
Since LibreOffice 4.1, the value passed to the database can be determined directly.
oControl = oForm.getByName("Name of the Listbox")
iD = oControl.getCurrentValue()
getCurrentValue() returns the value that will be stored in the database table. In
listboxes this depends on the field to which they are bound ( BoundField ).
Up to and including LO 4.0, this function returned the displayed content, not the
underlying value in the table.
To be exchanged for the restriction of choice, the query for a list box, as is to be noted that it is the
entry to an "array of string" is:
SUB Listenfeldfilter
DIM stSql(0) AS STRING
DIM oDoc AS OBJECT
DIM oDrawpage AS OBJECT
DIM oForm AS OBJECT
DIM oFeld AS OBJECT
oDoc = thisComponent
oDrawpage = oDoc.drawpage
oForm = oDrawpage.forms.getByName("MainForm")
oFeld = oForm.getByname("Listenfeld")
stSql(0) = "SELECT ""Name"", ""ID"" FROM ""Filter_Name"" ORDER BY ""Name"""
oFeld.ListSource = stSql
oFeld.refresh
END SUB
Combo boxes (ComboBox)
In spite of having similar functionality as listboxes, the properties of comboboxes are somewhat
different. See the example “Comboboxes as listboxes with an entry option“.
Name Data type L/S Property
Autocomplete boolean L+S Fill automatically.
StringItemList array of string L+S List entries available for use.
ItemCount integer L Number of available list entries.
DropDown boolean L+S Drop-down list.
LineCount integer L+S Number of rows shown when dropped down.
Text string L+S Aktuell angezeigter Text. Current displayed text.
DefaultText string L+S Default entry.
ListSource string L+S Name of the data source that provides the list
entries.
ListSourceType integer L+S Type of data source. Same possibilities as for
listboxes (only the choice of “Value list” is ignored
Checkboxes (CheckBox) and radio buttons (RadioButton)
”Option Buttons” can also be used.
Name Data type L/S Property
Label string L+S Title (label)
Macros in Base 23

Name Data type L/S Property
State short L+S Status
0 = not selected
1 = selected
2 = undefined
MultiLine boolean L+S line breaks for long text).
Pattern Field (PatternField)
In addition to the properties for “simple text”, the following are of interest:
Name Data type L/S Property
EditMask string L+S Input mask.
LiteralMask string L+S Character mask.
StrictFormat boolean L+S Format testing during input.
Table control (GridControl)
Name Data type L/S Property
Count long L Number of columns.
ElementNames array of string L List of column names.
HasNavigationBar boolean L+S Navigation bar available.
RowHeight long L+S Row height.
FixedText – also called Label
Name Data type L/S Property
Label string L+S Text displayed.
MultiLine boolean L+S Line breaks for long text.
Group Boxes (GroupBox)
There are no properties for group boxes that are normally processed using macros. It is the status
of the individual option fields that matters.
Buttons
CommandButton or ImageButton
Name Data type L/S Property
Label string L+S Title – Label text.
State short L+S Default state “selected” for toggling.
MultiLine boolean L+S Line breaks for long text.
DefaultButton boolean L+S Whether this is a default button.
Navigation bar (NavigationBar)
Further properties and methods associated with navigation – for example filters and changing the
record pointer – are controlled using the form.
24 Macros

Name Data type L/S Eigenschaft
IconSize short L+S Size of icons.
ShowPosition boolean L+S Position can be entered and is displayed.
ShowNavigation boolean L+S Allows navigation.
ShowRecordActions boolean L+S Allows record actions.
ShowFilterSort boolean L+S Allows filter sorting.
Methods for forms and controls
The data type of the parameter is indicated by an abbreviation:
• column number for the desired field in the data set, counting from 1
• numerical value – could be either an integer or a decimal number
• s String; maximum length depends on the table definition.
• b boolean (logical ) – true or false d Date value
Navigating in a data set
These methods work both in forms and in the results set from a query.
“Cursor” in the description means the record pointer.
Name Data type Description
Testing for the position of the cursor
isBeforeFirst boolean The cursor is before the first record. This is the case if it has not
yet been reset after entry.
isFirst boolean Shows if the cursor is on the first entry.
isLast boolean Shows if the cursor is on the last entry.
isAfterLast boolean The cursor is after the last row when it is moved on with next.
getRow long Current row number.
Setting the cursor
For boolean data types, “True” means that the navigation was successful.
beforeFirst – Moves before the first row.
first boolean Moves to the first row.
previous boolean Goes back one row.
next boolean Goes forward one row.
last boolean Goes to the last record.
afterLast – Goes after the last record.
absolute(n) boolean Goes to the row with the given row number.
relative(n) boolean Goes backwards or forwards by the given amount: forwards for
positive and backwards for negative arguments.
Methods affecting the current record status
refreshRow – Reads the original values for the row back in.
rowInserted boolean Indicates if this is a new row.
Macros in Base 25

Name Data type Description
rowUpdated boolean Indicates if the current row has been altered.
rowDeleted boolean Indicates if the current row has been deleted.
Editing rows of data
The methods used for reading are available for any form or data set. Methods for alteration and
storage can be used only for editable data sets (usually tables, not queries).
Name Data type Description
Methods for the whole row
insertRow – Saves a new row.
updateRow – Confirms alteration of the current row.
deleteRow – Deletes the current row.
cancelRowUpdates – Reverses changes in the current row.
moveToInsertRow – Moves the cursor into a row corresponding to a new
record.
moveToCurrentRow – After the entry of a new record, returns the cursor to its
previous position.
Reading values
getString(c) string Gives the content of the column as a character string.
getBoolean(c) boolean Gives the content of the column as a boolean value.
getByte(c) byte Gives the content of the column as a single byte.
getShort(c) short Gives the content of the column as an integer.
getInt(c) integer
getLong(c) long
getFloat(c) float Gives the content of the column as a single precision
decimal number.
getDouble(c) double Gives the content of the column as a double precision
decimal number. The automatic conversions carried out
by Basic makes this a suitable type for decimal and
currency fields.
getBytes(c) array of bytes Gives the content of the column as an array of single
bytes.
getDate(c) Date Gives the content of the column as a date.
getTime(c) Time Gives the content of the column as a time value.
getTimestamp(c) DateTime Gives the content of the column as a timestamp (date
and time).
In Basic itself, date and time values are both given the type DATE. To access dates in data sets,
various types are available: com.sun.star.util.Date for a date, com.sun.star.util.Time for a time, and
com.sun.star.util.DateTime for a timestamp.
26 Macros

Name Data type Description
wasNull boolean Indicates if the value of the most recently read column
was NULL.
Werte speichern
updateNull(c) – Sets the column content to NULL.
updateBoolean(c,b) – Changes the content of column c to the logical value b.
updateByte(c,x) – Stores byte x in column c.
updateShort(c,n) – Stores the integer n in column c.
updateInt(c,n) –
updateLong(c,n) –
updateFloat(c,n) – Stores the decimal number n in column c.
updateDouble(c,n) –
updateString(c,s) – Stores the string s in column c.
updateBytes(c,x) – Stores the byte array x in column c.
updateDate(c,d) – Stores the date d in column c.
updateTime(c,d) – Stores the time d in column c.
updateTimestamp(c,d) – Stores the timestamp d in column c.
Editing individual values
This method uses the BoundField property of a control to read or modify the content of the
corresponding column. It corresponds almost exactly to the method described in the previous
section, except that the column number is not given.
Name Data type Description
Reading values
getString string Gives the content of the field as a character string.
getBoolean boolean Gives the content of the field as a logical value.
getByte byte Gives the content of the field as a single byte.
getShort short Gives the content of the field as an integer.
getInt integer
getLong long
getFloat float Gives the content of the field as a single-precision
decimal value.
getDouble double Gives the content of the field as a double-precision
decimal number. The automatic conversions carried out
by Basic makes this a suitable type for decimal and
currency fields.
getBytes array of bytes Gives the content of the field as an array of bytes.
getDate Date Gives the content of the field as a date.
getTime Time Gives the content of the field as a time.
Macros in Base 27

Name Data type Description
getTimestamp DateTime Gives the content of the field as a timestamp.
In Basic itself, date and time values are both given the type DATE. To access dates in data sets,
various types are available: com.sun.star.util.Date for a date, com.sun.star.util.Time for a time, and
com.sun.star.util.DateTime for a timestamp.
wasNull boolean Indicates if the value of the most recently read column
was NULL.
Storing values
updateNull – Sets the content of the column to NULL.
updateBoolean(b) – Sets the content of the column to the logical value b.
updateByte(x) – Stores the byte x in the column.
updateShort(n) – Stores the integer n in the column.
updateInt(n) –
updateLong(n) –
updateFloat(n) – Stores the decimal number n in the column.
updateDouble(n) –
updateString(s) – Stores the character string s in the column.
updateBytes(x) – Stores the byte array x in the column.
updateDate(d) – Stores the date d in the column.
updateTime(d) – Stores the time d in the column.
updateTimestamp(d) – Stores the timestamp d in the column.
Parameters for prepared SQL commands
The methods which transfer the value of a pre-prepared SQL command (see “Pre-prepared SQL
commands with parameters”) are similar to those in the previous section. The first parameter
(denoted by I) is a numbered position within the SQL command.
Name Data type Description
setNull(i, n) – Sets the content of the column to NULL. N is the SQL data
type as given in the API Reference.
setBoolean(i, b) – Puts the given logical value b into the SQL command.
setByte(i, x) – Puts the given byte x into the SQL command.
setShort(i, n) – Puts the given integer n into the SQL command.
setInt(i, n)
setLong(i, n)
setFloat(i, n) – Puts the given decimal number into the SQL command.
setDouble(i, n)
setString(i, s) – Puts the given character string into the SQL command.
setBytes(i, x) – Puts the given byte array x into the SQL command.
28 Macros
Name Data type Description
setDate(i, d) – Puts the given date d into the SQL command.
setTime(i, d) – Puts the given time d into the SQL command.
setTimestamp(i, d) – Puts the given timestamp d into the SQL command.
clearParameters – Removes the previous values of all parameters from a SQL
command.
Improving usability
For this first category of macro use, we show various possibilities for improving the usability of
Base forms.
Automatic updating of forms
Often something is altered in a form and this alteration is required to appear in a second form on
the same page. The following code snippet calls the reload method on the second form, causing it
to refresh.
SUB Update
First the macro is named. The default designation for a macro is SUB. This may be written in upper
or lower case. SUB allows a subroutine to run without returning a value. Further down by contrast a
function is described, which does return a value.
The macro has the name Update. You do not need to declare variables because LibreOffice Basic
automatically creates variables when they are used. Unfortunately, if you misspell a variable,
LibreOffice Basic silently creates a new variable without complaint. Use Option Explicit To
prevent LibreoOffice Basic from automatically creating variables; this is recommended by most
programmers.
Therefore we usually start by declaring variables. All the variables declared here are objects (not
numbers or text), so we add AS OBJECT to the end of the declaration. To remind us later of the
type of the variables, we preface their names with an "o". In principle, though, you can choose
almost any variable names you like.
DIM oDoc AS OBJECT
DIM oDrawpage AS OBJECT
DIM oForm AS OBJECT
The form lies in the currently active document. The container, in which all forms are stored, is
named drawpage. In the form navigator this is the top-level concept, to which all the forms are
subsidiary.
In this example, the form to be accessed is named Display. Display is the name visible in the form
navigator. So, for example, the first form by default is called Form1.
oDoc = thisComponent
oDrawpage = oDoc.drawpage
oForm = oDrawpage.forms.getByName("Display")
Since the form has now been made accessible and the point at which it can be accessed is saved
in the variable oForm, it is now reloaded (refreshed) with the reload() command.
oForm.reload()
END SUB
The subroutine begins with SUB so it must end with END SUB.
Improving usability 29

This macro can now be selected to run when another form is saved. For example, on a cash
register (till), if the total number of items sold and their stock numbers (read by a barcode scanner)
are entered into one form, another form in the same open window can show the names of all the
items, and the total cost, as soon as the form is saved.
Filtering records
The filter itself can function perfectly well in the form described in Chapter 8, Database Tasks. The
variant shown below replaces the Save button and reads the listboxes again, so that a chosen filter
from one listbox can restrict the choices available in the other listbox.
1
SUB Filter
DIM oDoc AS OBJECT
DIM oDrawpage AS OBJECT
DIM oForm1 AS OBJECT
DIM oForm2 AS OBJECT
DIM oFieldList1 AS OBJECT
DIM oFieldList2 AS OBJECT
oDoc = thisComponent
oDrawpage = oDoc.drawpage
First the variables are defined and set to access the set of forms. This set comprises the two forms
"Filter" and "Display". The listboxes are in the "Filter" form and have the names "List_1" and
"List_2".
oForm1 = oDrawpage.forms.getByName("filter")
oForm2 = oDrawpage.forms.getByName("display")
oFieldList1 = oForm1.getByName("listbox1")
oFieldList2 = oForm1.getByName("listbox2")
First the contents of the listboxes are transferred to the underlying form using commit(). The
transfer is necessary, because otherwise the change in a listbox will not be recognized when
saving. The commit() instruction need only be applied to the listbox that has just been accessed.
After that the record is saved using updateRow(). In principle, our filter table contains only one
record, which is written once at the beginning. This record is therefore overwritten continuously
using an update command.
oFieldList1.commit()
oFieldList2.commit()
oForm1.updateRow()
The listboxes are meant to influence each other. For example, if one listbox is used to restrict
displayed media to CDs, the other listbox should not include all the writers of books in its list of
authors. A selection in the second listbox would then all too often result in an empty filter. That is
why the listboxes must be read again. Strictly speaking, the refresh() command only needs to
be carried out on the listbox that has not been accessed.
After this, form2, which should display the filtered content, is read in again.
oFieldList1.refresh()
oFieldList2.refresh()
oForm2.reload()
END SUB
Listboxes that are to be influenced using this method can be supplied with content using various
queries.
The simplest variant is to have the listbox take its content from the filter results. Then a single filter
determines which data content will be further filtered.
1 See also the database Example_Search_and_Filter.odb associated with this handbook.
30 Macros

SELECT "Field_1" || ' - ' || "Count" AS "Display", "Field_1"
FROM ( SELECT COUNT( "ID" ) AS "Count", "Field_1" FROM "searchtable"
GROUP BY "Field_1" )
ORDER BY "Field_1"
The field content and the number of hits is displayed. To get the number of hits, a sub-query is
used. This is necessary as otherwise only the number of hits, without further information from the
field, will be shown in the listbox.
The macro creates listboxes quite quickly by this action; they are filled with only one value. If a
listbox is not NULL, it is taken into account by the filtering. After activation of the second listbox,
only the empty fields and one displayed value are available to both listboxes. That may seem
practical for a limited search. But what if a library catalog shows clearly the classification for an
item, but does not show uniquely if this is a book, a CD or a DVD? If the classification is chosen
first and the second listbox is then set to "CD", it must be reset to NULL in order to carry out a
subsequent search that includes books. It would be more practical if the second listbox showed
directly the various media types available, with the corresponding hit counts.
To achieve this aim, the following query is constructed, which is no longer fed directly from the filter
results. The number of hits must be obtained in a different way.
SELECT
IFNULL( "Field_1" || ' - ' || "Count", 'empty - ' || "Count" ) AS
"Display",
"Field_1"
FROM
( SELECT COUNT( "ID" ) AS "Count", "Field_1" FROM "Table"
WHERE "ID" IN
( SELECT "Table"."ID" FROM "Filter", "Table"
WHERE "Table"."Field_2" = IFNULL( "Filter"."Filter_2",
"Table"."Field_2" ) )
GROUP BY "Field_1" )
ORDER BY "Field_1"
This very complex query can be broken down. In practice it is common to use a VIEW for the sub-
query. The listbox receives its content from a query relating to this VIEW.
The query in detail: The query presents two columns. The first column contains the view seen by a
person who has the form open. This view shows the content of the field and, separated by a
hyphen, the hits for this field content. The second column transfers its content to the underlying
table of the form. Here we have only the content of the field. The listboxes thus draw their content
from the query, which is presented as the filter result in the form. Only these fields are available for
further filtering.
The table from which this information is drawn is actually a query. In this query the primary key
fields are counted (SELECT COUNT( "ID" ) AS "Count"). This is then grouped by the search
term in the field (GROUP BY "Field_1"). This query presents the term in the field itself as the
second column. This query in turn is based on a further sub-query:
SELECT "Table"."ID" FROM "Filter", "Table"
WHERE "Table"."Field_2" =
IFNULL( "Filter"."Filter_2", "Table"."Field_2" )
This sub-query deals with the other field to be filtered. In principle, this other field must also match
the primary key. If there are further filters, this query can be extended:
SELECT "Table"."ID" FROM "Filter", "Table" WHERE
"Table"."Field_2" = IFNULL( "Filter"."Filter_2", "Table"."Field_2" )
AND
"Table"."Field_3" = IFNULL( "Filter"."Filter_3", "Table"."Field_3" )
Improving usability 31

This allows any further fields that are to be filtered to control what finally appears in the listbox of
the first field, "Field_1".
Finally the whole query is sorted by the underlying field.
What the final query underlying the displayed form, actually looks like, can be seen from Chapter 8,
Database Tasks.
The following macro can control through a listbox which listboxes must be saved and which must
be read in again.
The following subroutine assumes that the “Additional information” property for each listbox
contains a comma-separated list of all listbox names with no spaces. The first name in the list must
be the name of that listbox.
SUB Filter_more_info(oEvent AS OBJECT)
DIM oDoc AS OBJECT
DIM oDrawpage AS OBJECT
DIM oForm1 AS OBJECT
DIM oForm2 AS OBJECT
DIM sTag AS String
sTag = oEvent.Source.Model.Tag
An array (a collection of data accessible via an index number) is established and filled with the field
names of the listboxes. The first name in the list is the name of the listbox linked to the event.
aList() = Split(sTag, ",")
oDoc = thisComponent
oDrawpage = oDoc.drawpage
oForm1 = oDrawpage.forms.getByName("filter")
oForm2 = oDrawpage.forms.getByName("display")
The array is run through from its lower bound ('Lbound()') to its upper bound ('Ubound()') in
a single loop. All values which were separated by commas in the additional information, are now
transferred successively.
FOR i = LBound(aList()) TO UBound(aList())
IF i = 0 THEN
The listbox that triggered the macro must be saved. It is found in the variable aList(0). First the
information for the listbox is carried across to the underlying table, and then the record is saved.
oForm1.getByName(aList(i)).commit()
oForm1.updateRow()
ELSE
The other listboxes must be refreshed, as they now contain different values depending on the first
listbox.
oForm1.getByName(aList(i)).refresh()
END IF
NEXT
oForm2.reload()
END SUB
The queries for this more usable macro are naturally the same as those already presented in the
previous section.
Preparing data from text fields to fit SQL conventions
When data is stored in a SQL command, apostrophes in names such as “O’Connor” can cause
problems. This is because single quotes ('') are used to enclose text that is to be entered into
records. In such cases, we need an intermediate function to prepare the data appropriately.
FUNCTION String_to_SQL(st AS STRING)
IF InStr(st,"'") THEN
32 Macros

st = Join(Split(st,"'"),"''")
END IF
String_to_SQL = st
END FUNCTION
Note that this is a function, not a sub. A function takes a value as argument and then returns a
value.
The text to be transferred is first searched to see if it contains an apostrophe. If this is the case, the
text is split at this point – the apostrophe itself is the delimiter for the split – and joined together
again with two apostrophes. This masks the SQL code. The function yields its result through the
following call:
stTextnew = String_to_SQL(stTextold)
This simply means that the variable stTextold is reworked and the result stored in stTextnew. The
two variables do not actually need to have different names. The call can be done with:
stText = String_to_SQL(stText)
This function is used repeatedly in the following macros so that apostrophes can also be stored
using SQL commands.
Calculating values in a form in advance
Values which can be calculated using database functions are not stored separately in the
database. The calculation takes place not during the entry into the form but after the record has
been saved. If the form consists only of a single table control, this makes little difference. The
calculated value can be read out immediately after data entry. But when forms have a set of
different individual fields, the previous record may not be visible. In such cases it makes sense for
the values that are otherwise calculated inside the database to be shown in the appropriate fields
3
The following three macros show how such a thing can be done in principle. Both macros are
linked to the exit from the particular field. This also allows for the fact that the value in an existing
field might subsequently be changed.
SUB Calculation_without_Tax(oEvent AS OBJECT)
DIM oForm AS OBJECT
DIM oField AS OBJECT
DIM oField2 AS OBJECT
oField = oEvent.Source.Model
oForm = oField.Parent
oField2 = oForm.getByName("price_without_tax")
oField2.BoundField.UpdateDouble(oField.getCurrentValue / 1.19)
IF NOT IsEmpty(oForm.getByName("quantity").getCurrentValue()) THEN
total_calc2(oForm.getByName("quantity"))
END IF
END SUB
If a value is entered into the “price” field, the macro is launched on leaving that field. In the same
form as the “price” field is a field called “price_without_tax”. For this field
BoundField.UpdateDouble is used to calculate the price without VAT. The data field is derived
from a query which in principle carries out the same calculation but using saved data, In this way
the calculated value is visible during data entry and also later during navigation through the record
without being stored.
If the “quantity” field contains a value, a further calculation is carried out for the fields bound to it.
SUB Calculation_Total(oEvent AS OBJECT)
oField = oEvent.Source.Model
Calculation_Total2(oField)
END SUB
This short procedure serves only to transmit the solution of the following procedure when leaving
the “quantity” field on the form.
3 See the database Example_direct_Calculation_Form.odb associated with this handbook.
Improving usability 33

SUB Calculation_Total2(oFeld AS OBJECT)
DIM oForm AS OBJECT
DIM oField2 AS OBJECT
DIM oField3 AS OBJECT
DIM oField4 AS OBJECT
oForm = oFeld.Parent
oField2 = oForm.getByName("price")
oField3 = oForm.getByName("total")
oField4 = oForm.getByName("tax_total")
oField3.BoundField.UpdateDouble(oField.getCurrentValue * oField2.getCurrentValue)
oField4.BoundField.UpdateDouble(oField.getCurrentValue * oField2.getCurrentValue -
oField.getCurrentValue * oField2.getCurrentValue / 1.19)
END SUB
This procedure is merely a way of affecting several fields at once. The procedure is launched from
one field “quantity”, which contains the number of items bought. Using this field and the “price”
field, the “total” and “tax_total” are calculated and transferred to the appropriate fields.
These procedures and queries have one shortcoming: the rate of VAT is effectively hard-coded into
the program. It would be better to use an argument for this, related to the price, since VAT might
vary and not be the same for all products. In such cases the appropriate value for VAT would need
to read out of a form field.
Providing the current LibreOffice version
LibreOffice version 4.1 brought some changes to listfields and date values that make it necessary
to determine the current version when executing macros in these areas. The following code serves
this purpose:
FUNCTION OfficeVersion()
DIM aSettings, aConfigProvider
DIM aParams2(0) AS NEW com.sun.star.beans.PropertyValue
DIM sProvider$, sAccess$
sProvider = "com.sun.star.configuration.ConfigurationProvider"
sAccess = "com.sun.star.configuration.ConfigurationAccess"
aConfigProvider = createUnoService(sProvider)
aParams2(0).Name = "nodepath"
aParams2(0).Value = "/org.openoffice.Setup/Product"
aSettings = aConfigProvider.createInstanceWithArguments(sAccess, aParams2())
OfficeVersion() = array(aSettings.ooName,aSettings.ooSetupVersionAboutBox)
END FUNCTION
This function returns an array in which the first element is “LibreOffice” and the second is the full
version number, for example “4.1.5.2”.
Returning the value of listfields
Since LibreOffice 4.1, the value returned by a listbox to the database is stored in CurrentValue.
This was not the case in previous versions, nor in OpenOffice or AOO. The following function will
do the calculation. The LO version must be checked to see if it is later than LO 4.0.
FUNCTION ID_Determination(oField AS OBJECT) AS INTEGER
a() = OfficeVersion()
IF a(0) = "LibreOffice" AND (LEFT(a(1),1) = 4 AND RIGHT(LEFT(a(1),3),1) > 0) OR
LEFT(a(1),1) > 4 THEN
stContent = oField.currentValue
ELSE
Before LO 4.1, the value that was passed on was read out of the listbox’s value list. The visibly
chosen record is SelectedItems(0). '0' because several additional values could be selected in a
listbox.
stContent = oField.ValueItemList(oField.SelectedItems(0))
END IF
IF IsEmpty(stContent) THEN
34 Macros

-1 is a value that is not used as an AutoValue and therefore will not exist in most tables as a foreign
key.
ID_Determination = -1
ELSE
ID_Determination = Cint(stContent)
Convert to integer
END IF
END FUNCTION
The function transmits the value as an integer. Most primary keys are automatically incrementing
integers. When a foreign key does not satisfy this criterion, the return value must be adjusted to the
appropriate type.
The displayed value of a listfield can be further determined using the field’s view property.
SUB Listfielddisplay
DIM oDoc AS OBJECT
DIM oForm AS OBJECT
DIM oListbox AS OBJECT
DIM oController AS OBJECT
DIM oView AS OBJECT
oDoc = thisComponent
oForm = oDoc.Drawpage.Forms(0)
oListbox = oForm.getByName("Listbox")
oController = oDoc.getCurrentController()
oView = oController.getControl(oListbox)
print "Displayed content: " & oView.SelectedItem
END SUB
The controller is used to access the view of the form. This determines what appears in the visual
interface. The selected value is SelectedItem.
Limiting listboxes by entering initial letters
It can sometimes happen that the content of listboxes grows too big to handle. To make searching
faster in such cases, it is useful to limit the content of the listbox to the values indicated by entering
one or more initial characters. The listbox itself is provided with a SQL command that serves as a
placeholder. This could be:
SELECT "Name", "ID" FROM "Table" ORDER BY "Name" LIMIT 5
This prevents Base from having to read a huge list of values when the form is opened.
The following macro is linked to Properties: Listbox > Events > Key released.
GLOBAL stListStart AS STRING
GLOBAL lTime AS LONG
First global variables are created. These variables are necessary to enable searching not only for a
single letter but also, after further keys have been pressed, for combinations of letters.
The letters entered are stored sequentially in the global variable stListStart.
The global variable lTime is used to store the current time in seconds. If there is a long pause
between keystrokes, the stListStart variable should be reset. For this reason, the time
difference between successive entries is queried.
SUB ListFilter(oEvent AS OBJECT)
oField = oEvent.Source.Model
IF oEvent.KeyCode < 538 THEN
The macro is launched by a keystroke. Within the API, each key has a numeric code which can be
looked up under com>sun>star>awt>Key. Special characters like "ä", "ö" and "ü" have the
KeyCode 0. All other letters and numbers have a KeyCode less than 538.
Improving usability 35

It is important to check the KeyCode because hitting the tab key to move to another field will
naturally also launch the macro. The KeyCode for the tab key is 1282, so any further code in the
macro will not be executed.
DIM stSql(0) AS STRING
The SQL code for the listbox is stored in an array. However SQL commands count as single data
elements, so the array is dimensioned as stSql(0).
When reading SQL code out of the listbox, please note that the SQL code is not directly accessible
as text. Instead the code is available as a single array element: oField.ListSource(0).
After declaring variables for future use, the SQL command is split up. To get the field which is to be
filtered, we split the code at the first comma. The field must therefore be placed first in the
command. Then this code is split again at the first double quote character, which introduces the
fieldname. Here this is done using simple arrays. The stField variable needs to have the
quotation marks put back at the beginning. In addition Rtrim is used to prevent any space from
occurring at the end of the expression.
DIM stText AS STRING
DIM stField AS STRING
DIM stQuery AS STRING
DIM ar0()
DIM ar1()
ar0() = Split(oField.ListSource(0),",", 2)
ar1() = Split(ar0(0),"""", 2)
stFeld = """" & Rtrim(ar1(1))
A sort instruction is expected next in the SQL code. However commands in SQL can be in upper,
lower or mixed case, so the inStr function is used instead of Split to find the “ORDER”
character string. The last parameter for this function is “1”, indicating that the search should be
case-insensitive. Everything to the left of the “ORDER” string is to be used for constructing the new
SQL code. This ensures that the code can also serve listfields which come from different tables or
have been defined in SQL code using further conditions.
stQuery = Left(oField.ListSource(0), inStr(1,oField.ListSource(0), "ORDER",1)-1)
IF inStr(stQuery, "LOWER") > 0 THEN
stQuery = Left(stQuery, inStr(stQuery, "LOWER")-1)
ELSEIF inStr(1,stQuery, "WHERE",1) > 0 THEN
stQuery = stQuery & " AND "
ELSE
stQuery = stQuery & " WHERE "
END IF
If the query contains the term “LOWER”, it means that it was created using this ListFilter
procedure. Therefore in constructing the new query, we need go only as far as this position.
If this is not the case, and the query already contains the term “WHERE” (in upper or lower case),
any further conditions to the query need to be prepended with AND.
If neither condition is fulfilled, a WHERE is attached to the existing code.
IF lTime > 0 AND Timer() - lTime < 5 THEN
stListStart = stListStart & oEvent.KeyChar
ELSE
stListStart = oEvent.KeyChar
END IF
lTime = Timer()
If a time value has been stored in the global variable, and the difference between this and the
current time is less than 5 seconds, the entered letter is joined onto the previous one. Otherwise
the letter is treated as a new single-letter entry. The listfield will then be re-filtered according to this
entry. After this, the current time is stored in lTime. stText = LCase( stListStart & "%")
stSql(0) = stQuery + "LOWER("+stField+") LIKE '"+stText+"' ORDER BY
"+stField+""
oFeld.ListSource = stSql
36 Macros

oField.refresh
END IF
END SUB
The SQL code is finally put together. The lower-case version of the field content is compared with
the lower-case version of the entered letter(s). The code is inserted into the listbox and the field
updated so that only the filtered content can be looked up.
Converting dates from a form into a date variable
FUNCTION DateValue(oField AS OBJECT) AS DATE
a() = OfficeVersion()
IF a(0) = "LibreOffice" AND (LEFT(a(1),1) = 4 AND RIGHT(LEFT(a(1),3),1) > 0)
OR LEFT(a(1),1) > 4 THEN
Here all versions from 4.1 onward are intercepted. For this purpose, the version number is split into
its individual elements, and the major and minor release numbers are checked. This willl work up
to LO 9.
DIM stMonth AS STRING
DIM stDay AS STRING
stMonth = Right(Str(0) & Str(oField.CurrentValue.Month),2)
stDay = Right(Str(0) & Str(oField.CurrentValue.Day),2)
Datumswert = CDateFromIso(oField.CurrentValue.Year & stMonth & stDay)
ELSE
DateValue = CDateFromIso(oField.CurrentValue)
END IF
END FUNCTION
Since LO 4.1.2, dates have been stored as arrays within form controls. This means that the current
value of the control cannot be used to access the date itself. The date needs to be recreated from
the day, month and year if it is to be used further in macros.
Searching data records
You can search database records without using a macro. However, the corresponding query that
must be set up can be very complicated. A macro can solve this problem with a loop.
The following subroutine reads the fields in a table, creates a query internally, and finally writes a
list of primary key numbers of records in the table that are retrieved by this search term. In the
following description, there is a table called Searchtmp, which consists of an auto-incrementing
primary key field (ID) and a field called Nr. that contains all the primary keys retrieved from the
table being searched. The table name is supplied initially to the subroutine as a variable.
To get a correct result, the table must contain the content you are searching for as text and not as
foreign keys. If necessary, you can create a VIEW for the macro to use.
2
SUB Searching(stTable AS STRING)
DIM oDataSource AS OBJECT
DIM oConnection AS OBJECT
DIM oSQL_Command AS OBJECT
DIM stSql AS STRING
DIM oResult AS OBJECT
DIM oDoc AS OBJECT
DIM oDrawpage AS OBJECT
DIM oForm AS OBJECT
DIM oForm2 AS OBJECT
DIM oField AS OBJECT
DIM stContent AS STRING
DIM arContent() AS STRING
DIM inI AS INTEGER
DIM inK AS INTEGER
2 See the database Example_Search_and_Filter.odb associated with this handbook.
Improving usability 37

oDoc = thisComponent
oDrawpage = oDoc.drawpage
oForm = oDrawpage.forms.getByName("searchform")
oField = oForm.getByName("searchtext")
stContent = oField.getCurrentValue()
stContent = LCase(stContent)
The content of the search text field is initially converted into lower case so that the subsequent
search function need only compare lower case spellings.
oDataSource = ThisComponent.Parent.DataSource
oConnection = oDataSource.GetConnection("","")
oSQL_Command = oConnection.createStatement()
First it must be determined if a search term has actually been entered. If the field is empty, it will be
assumed that no search is required. All records will be displayed without further searching.
If a search term has been entered, the column names are read from the table being searched, so
that the query can access the fields.
IF stContent <> "" THEN
stSql = "SELECT ""COLUMN_NAME"" FROM
""INFORMATION_SCHEMA"".""SYSTEM_COLUMNS"" WHERE ""TABLE_NAME"" = '" + stTable
+ "' ORDER BY ""ORDINAL_POSITION"""
oResult = oSQL_Statement.executeQuery(stSql)
Note
SQL formulas in macros must first be placed in double quotes like normal character
strings. Field names and table names are already in double quotes inside the SQL
formula. To create final code that transmits the double quotes properly, field names
and table names must be given two sets of these quotes.
stSql = "SELECT ""Name"" FROM ""Table"";"
becomes, when displayed with the command msgbox stSql,
SELECT "Name" FROM "Table";
The index of the array, in which the field names are written is initially set to 0. Then the query
begins to be read out. As the size of the array is unknown, it must be adjusted continuously. That is
why the loop begins with 'ReDim Preserve arContent(inI)' to set the size of the array and
at the same time to preserve its existing contents. Next the fields are read and the array index
incremented by 1. Then the array is dimensioned again and a further value can be stored.
InI = 0
WHILE oResult.next
ReDim Preserve arContent(inI)
arContent(inI) = oResult.getString(1)
inI = inI + 1
WEND
stSql = "DROP TABLE ""searchtmp"" IF EXISTS"
oSQL_Command.executeUpdate (stSql)
Now the query is put together within a loop and subsequently applied to the table defined at the
beginning. All case combinations are allowed for, since the content of the field in the query is
converted to lower case.
The query is constructed such that the results end up in the "searchtmp" table. It is assumed that
the primary key is the first field in the table (arContent(0)).
stSql = "SELECT """+arContent(0)+""" INTO ""searchtmp"" FROM """ + stTable
+ """ WHERE "
FOR inK = 0 TO (inI - 1)
stSql = stSql+"LCase("""+arContent(inK)+""") LIKE '%"+stContent+"%'"
IF inK < (inI - 1) THEN
stSql = stSql+" OR "
38 Macros

END IF
NEXT
oSQL_Command.executeQuery(stSql)
ELSE
stSql = "DELETE FROM ""searchtmp"""
oSQL_Command.executeUpdate (stSql)
END IF
The display form must be reloaded. Its data source is a query, in this example Searchquery.
oForm2 = oDrawpage.forms.getByName("display")
oForm2.reload()
End Sub
This creates a table that is to be evaluated by the query. As far as possible, the query should be
constructed so that it can subsequently be edited. A sample query is shown:
SELECT * FROM "searchtable" WHERE "Nr." IN ( SELECT "Nr." FROM
"searchtmp" ) OR "Nr." = CASE WHEN ( SELECT COUNT( "Nr." ) FROM
"searchtmp" ) > 0 THEN '0' ELSE "Nr." END
All elements of the searchtable are included, including the primary key. No other table appears
in the direct query; therefore no primary key from another table is needed and the query result
remains editable.
The primary key is saved in this example under the name Nr. The macro reads precisely this field.
There is an initial check to see if the content of the Nr. field appears in the searchtmp table. The
IN operator is compatible with multiple values. The sub-query can also yield several records.
For larger amounts of data, value matching by using the IN operator quickly slows down.
Therefore it is not a good idea to use an empty search field simply to transfer all primary key fields
from searchtable into the searchtmp table and then view the data in the same way. Instead an
empty search field creates an empty searchtmp table, so that no records are available. This is the
purpose of the second half of the condition:
OR "Nr." = CASE WHEN ( SELECT COUNT( "Nr." ) FROM "searchtmp" ) > 0
THEN '-1' ELSE "Nr." END
If a record is found in the Searchtmp table, it means that the result of the first query is greater than
0. In this case: "Nr." = '-1' (here we need a number which cannot occur as a primary key, so
'-1'is a good value). If the query yields precisely 0 (which will be the case if no records are
present), then "Nr." = "Nr.". This will list every record which has a Nr. As Nr. is the primary
key, this means all records.
Highlighting search terms in forms and results
With a large text field, it is often unclear where matches to a search term occur. It would be nice if
the form could highlight the matches. It should look something like this:
Improving usability 39

To get a form to work like this, we need a couple of extra items in our box of tricks.
3
The operation of a search field like this has already been explained. A filter table is created and a
form is used to write the current values of a single record into this table. The main form is provided
with its content using a query which looks like this:
SELECT "ID", "memo"
FROM "table"
WHERE LOWER ( "memo" ) LIKE '%' || LOWER (
( SELECT "searchtext" FROM "filter" WHERE "ID" = TRUE ) ) || '%'
When search text is entered, all records in the table “Table” that have the search text in the “memo”
field are displayed. The search is not case-sensitive.
If no search text is entered, all the records in the table are displayed. As the primary key of this
table is included in the query, the latter can be edited.
3 See the database Example_Autotext_Searchmarkin_Spelling.odb associated with this
handbook.
40 Macros

In the form, in addition to the ID field for the primary key, there is a field called MemoFormat which
has been configured (using Properties > General > Text type > Multi-line with formating) to
show colored as well as black text. Careful consideration of the properties of the text field reveals
that the Data tab has now disappeared. This is because data cannot be entered into a field that
has additional formatting which the database itself cannot store. Nevertheless, it is still possible to
get text into this field, to mark it up, and to transfer it out after an update by using a macro.
The ContentRead procedure serves to transfer the content of the database field “memo” into the
formatted text field MemoFormat, and to format it so that any text corresponding to that in the
search field will be highlighted.
The procedure is bound to Form > Events > After record change.
Sub ContentRead(oEvent AS OBJECT)
DIM inMemo AS INTEGER
DIM oField AS OBJECT
DIM stSearchtext AS STRING
DIM oCursor AS OBJECT
DIM inSearch AS INTEGER
DIM inSearchOld AS INTEGER
DIM inLen AS INTEGER
oForm = oEvent.Source
inMemo = oForm.findColumn("memo")
oField = oForm.getByName("MemoFormat")
oField.Text = oForm.getString(inMemo)
First the variables are defined. Then the table field “memo” is searched from the form and the
getString() function is used to read the text from the numbered column. This is transferred into
the field which can be formatted but which has no link to the database: MemoFormat.
Initial tests showed that the form opened but the form toolbar at the bottom was no longer created.
Therefore a very short wait of 5/1000 seconds was built in. After this the displayed content is read
out of the FormFilter (which is parallel to the Form in the forms hierarchy).
Wait 5
stSearchtext = oForm.Parent.getByName("FormFilter").getByName("Search").Text
To be able to format text, an (invisible) TextCursor must be created in the field that contains the
text. The default display of the text uses a 12-point serif font which may not occur in other parts of
the form and cannot be directly customized using the form control properties. In this procedure, the
text is set to the desired appearance right at the beginning. If this is not done, differences in
formatting can cause the upper boundary of the text in the field to be cut off. In early tests, only 2/3
of the first line was legible.
In order for the invisible cursor to mark the text, It is set initially to the beginning of the field and
then to the end. The argument in both cases is true. Next come the specifications for font size,
font face, color, and weight. Then the cursor is set back to the beginning again.
oCursor = oField.createTextCursor()
oCursor.gotoStart(true)
oCursor.gotoEnd(true)
oCursor.CharHeight = 10
oCursor.CharFontName = "Arial, Helvetica, Tahoma"
oCursor.CharColor = RGB(0,0,0)
oCursor.CharWeight = 100.000000 'com::sun::star::awt::FontWeight
oCursor.gotoStart(false)
If there is text in the field and an entry has been made requesting a search, this text is now
searched to find the search string. The outer loop asks first if these conditions are met; the inner
one establishes if the search string is really in the text in the MemoFormat field. These settings
could actually be omitted, since the query on which the form is based only displays text that fulfills
these conditions.
IF oField.Text <> "" AND stSearchtext <> "" THEN
IF inStr(oField.Text, stSearchtext) THEN
inSearch = 1
Improving usability 41

inSearchOld = 0
inLen = Len(stSearchtext)
The text is searched for the search string. This takes place in a loop which ends when no further
matches are displayed. InStr() returns the location of the first character of the search string in the
specified display format, independent of case. The loop is controlled by the requirement that at the
end of each cycle, the start of inSearch has been incremented by 1 (-1 in the first line of the loop
and +2 in the last line). For each cycle, the cursor is moved to the initial position without marking
using oCursor.goRight(Position, false), and then to the right with marking by the length
of the search string. Then the desired formatting (blue and somewhat bolder) is applied and the
cursor moved back to its next starting point for the next run.
DO WHILE inStr(inSearch, oField.Text, stSearchtext) > 0
inSearch = inStr(inSearch, oField.Text, stSearchtext) - 1
oCursor.goRight(inSearch-inSearchOld,false)
oCursor.goRight(inLen,true)
oCursor.CharColor = RGB(102,102,255)
oCursor.CharWeight = 110.000000
oCursor.goLeft(inLen,false)
inSearchOld = inSearch
inSearch = inSearch + 2
LOOP
END IF
END IF
End Sub
The ContentWrite procedure serves to transfer the content of the formattable text field
MemoFormat into the database. This proceeds independently of whether any alteration takes
place.
The procedure is bound to Form > Events > Before record change.
Sub ContentWrite(oEvent AS OBJECT)
DIM oForm AS OBJECT
DIM inMemo AS INTEGER
DIM loID AS LONG
DIM oField AS OBJECT
DIM stMemo AS STRING
oForm = oEvent.Source
IF InStr(oForm.ImplementationName, "ODatabaseForm") THEN
The trigger event is implemented twice. Only the implementation name which ends with
“OdatabaseForm” gives the correct access to the record (implementations are explained on page
59).
IF NOT oForm.isBeforeFirst() AND NOT oForm.isAfterLast() THEN
When the form is read or reloaded, the cursor stands before the current record. Then if an attempt
is made, you get the message “Invalid cursor status”.
inMemo = oForm.findColumn("memo")
loID = oForm.findColumn("ID")
oField = oForm.getByName("MemoFormat")
stMemo = oField.Text
IF stMemo <> "" THEN
oForm.updateString(inMemo,stMemo)
END IF
IF stMemo <> "" AND oForm.getString(loID) <> "" THEN
oForm.UpdateRow()
END IF
END IF
END IF
End Sub
The “memo” table field is located from the data source of the form, along with that for “ID”. If the
field MemoFormat contains text, it is transferred into the “Memo” field of the data source using
oForm.updateString(). Only if there is an entry in the “ID” field (in other words a primary key
42 Macros

has been set) does an update follow. Otherwise a new record is inserted through the normal
working of the form; the form recognizes the change and stores it independently.
Checking spelling during data entry
This macro can be used for multi-line formatted text fields. As in the previous chapter, the
content of each record must first be written and then the new record can be loaded into the form
control. The procedures TransferContent and WriteContent differ only in the point at which the
search function can be bracketed out.
The spelling checker is launched in the above form whenever a space or a return is hit within the
form control. In other words, it runs at the end of each word. It could also be linked to the control
losing focus to ensure that the last word is checked.
The procedure is bound to Form > Events > Key released.
SUB MarkWrongWordsDirect(oEvent AS OBJECT)
GlobalScope.BasicLibraries.LoadLibrary("Tools")
The RTrimStr function is used to remove any punctuation mark at the end of the string.
Otherwise all words which ended with a comma, full stop or other punctuation mark would show up
as spelling mistakes. In addition, LTrimChar is used to remove brackets at the beginning of
words.
DIM aProp() AS NEW com.sun.star.beans.PropertyValue
DIM oLinuSvcMgr AS OBJECT
DIM oSpellChk AS OBJECT
DIM oField AS OBJECT
DIM arText()
DIM stWord AS STRING
DIM inlenWord AS INTEGER
DIM ink AS INTEGER
DIM i AS INTEGER
DIM oCursor AS OBJECT
DIM stText AS OBJECT
oLinguSvcMgr = createUnoService("com.sun.star.linguistic2.LinguServiceManager")
IF NOT IsNull(oLinguSvcMgr) THEN
oSpellChk = oLinguSvcMgr.getSpellChecker()
END IF
First all variables are declared. Then the Basic spell-checking module SpellChecker is
accessed. It will be this module that will actually check individual words for correctness.
oField = oEvent.Source.Model
ink = 0
IF oEvent.KeyCode = 1280 OR oEvent.KeyCode = 1284 THEN
Improving usability 43

The event that launches the macro is a keystroke. This event includes a code, the KeyCode, for
each individual key. The KeyCode for the Return key is 1280, the one for the space is 1284. Like
many other pieces of information, these items are retrieved through the “Xray” tool. If space or
return is pressed, the spelling is checked. It is launched, in other words, at the end of each word.
Only the test for the last word does not occur automatically.
Each time the macro runs, all words in the text are checked. Checking individual words might also
be possible but would take a lot more work.
The text is split up into single words. The delimiter is the space character. Before that, words split
by line breaks must be joined together again, or the pieces might be mistaken for complete words.
stText = Join(Split(oField.Text,CHR(10))," ")
stText = Join(Split(stText,CHR(13))," ")
arText = Split(RTrim(stText)," ")
FOR i = LBound(arText) TO Ubound(arText)
stWord = arText(i)
inlenWord = len(stWord)
stWord = Trim( RtrimStr( RtrimStr( RtrimStr( RtrimStr( RtrimStr(
RtrimStr(stWord,","), "."),"?"),"!"),"."),")"))
stWord = LTrimChar(stWord,"(")
The individual words are read out. Their untrimmed length is needed for the following editing step.
Only so can the position of the word within the whole text (which is necessary for the specific
highlighting of spelling mistakes) be determined.
Trim is used to remove spaces, while RTrimStr removes commas and full stops at the end of the
text and LTrimChar any punctuation marks at the beginning.
IF stWord <> "" THEN
oCursor = oField.createTextCursor()
oCursor.gotoStart(false)
oCursor.goRight(ink,false)
oCursor.goRight(inLenWord,true)
If Not oSpellChk.isValid(stWord, "en", aProp()) Then
oCursor.CharUnderline = 9
oCursor.CharUnderlineHasColor = True
oCursor.CharUnderlineColor = RGB(255,51,51)
ELSE
oCursor.CharUnderline = 0
END IF
END IF
ink = ink + inLenWord + 1
NEXT
END IF
END SUB
If the word is not null, a text cursor is created. This cursor is moved without highlighting to the
beginning of the text in the entry field. Then it jumps forward to the right, still without highlighting, to
the term stored in the variable ink. This variable starts as 0, but after the first loop has run, it is
equal to the length of the word (+1 for the following space). Then the cursor is moved to the right
by the length of the current word. The font properties are modified to create the highlighted region.
The spellchecker is launched. It requires the word and the country code as arguments; without
a country code everything counts as correct. The array argument is usually empty.
If the word is not in the dictionary, it is marked with a red wavy line. This type of underlining is
represented here by '9'. If the word is found, there is no underline ('0'). This step is necessary
because otherwise a word recognised as false and then corrected would continue to be shown with
the red wavy line. It would never be removed because no conflicting format was given.
44 Macros

Comboboxes as listboxes with an entry option
A table with a single record can be directly created by using comboboxes and invisible numeric
fields and the corresponding primary key entered into another table.
4
The Combobox control treats form fields for combined entry and choice of values (comboboxes) as
listboxes with an entry option. For this purpose, in addition to the comboboxes in the form, the key
field values which are to be transferred to the underlying table are stored in separate numeric
fields. These fields, prior to OpenOffice.org 3.3, had to have the ‘invisible’ switch set, as the
function was not accessible from form design. This is no longer necessary in LibreOffice and
OpenOffice.org 3.3. Fields can now be declared as invisible. The keys from these fields are read in
when the form is loaded and the combobox is set to show the corresponding content. If the content
of the combobox is changed, it is saved and the new primary key is transferred into the
corresponding numeric field to be stored in the main table.
If editable queries are used instead of tables, the text to be displayed in the combination fields can
be directly determined from the query. A macro is then not required for this step.
An assumption for the functioning of the macro is that the primary key of the table which is the data
source for the combination field is an automatically incrementing integer. It is also assumed that
the field name for the primary key is “ID”.
Text display in comboboxes
This subroutine is to show text in the combobox according to the value of the invisible foreign key
fields from the main form. It can also be used for listboxes which refer to two different tables. This
might happen if, for example, the postcode in a postal address is stored separately from the town.
In that case the postcode might be read from a table that contains only a foreign key for the town.
The listbox should show postcode and town together.
SUB ShowText(oEvent AS OBJECT)
This macro should be bound to the following form event: 'After record change'.
The macro is called directly from the form. The trigger event is the source for all the variables the
macro needs. Some variables have already been declared globally in a separate module and are
not declared here again.
DIM oForm AS OBJECT
DIM oFieldList AS OBJECT
DIM stFieldValue AS STRING
DIM inCom AS INTEGER
DIM stQuery AS STRING
oForm = oEvent.Source
In the form there is a hidden control from which the names of all the different comboboxes can be
obtained. One by one, these comboboxes are processed by the macro.
aComboboxes() = Split(oForm.getByName("combofields").Tag,",")
FOR inCom = LBound(aComboboxes) TO Ubound(aComboboxes)
...
NEXT inCom
The additional information (“Tag“) attached to the hidden control contains this list of combobox
names, separated by commas The names are written into an array and then processed within a
loop. The loop ends with the NEXT term.
The combobox, which has replaced a listbox, is called oFieldList. To get the foreign key, we
need the correct column in the table that underlies the form. This is accessible using the name of
the table field, which is stored in the combobox’s additional information.
4 For the use of combo boxes instead of list boxes, see the database
Example_Combobox_Listfield.odb associated with this handbook.
Improving usability 45

oFieldList = oForm.getByName(Trim(aComboboxes(inCom)))
stFieldID = oForm.getString(oForm.findColumn(oFieldList.Tag))
oFieldList.Refresh()
The combobox is read in again using Refresh()in case the content of the field has been
changed by the entry of new data.
The query needed to provide the visible content of the combobox is based on the field underlying
the control and the value determined for the foreign key. To make the SQL code usable, any sort
operation that might be present is removed. Then a check is made for any relationship definitions
(which will begin with the word WHERE). By default the InStr() function does not distinguish
between upper and lower case, so all case combinations are covered. If there is a relationship, it
means that the query contains fields from two different tables. We need to find the table that
provides the foreign key for the link. The macro depends here on the fact that the primary key in
every table is called ID.
If there is no relationship defined, the query accesses only one table. The table information can be
discarded and the condition formulated directly using the foreign key value.
IF stFieldID <> "" THEN
stQuery = oFieldList.ListSource
IF InStr(stQuery,"order by") > 0 THEN
stSql = Left(stQuery, InStr(stQuery,"order by")-1)
ELSE
stSql = stQuery
END IF
IF InStr(stSql,"where") THEN
st = Right(stSql, Len(stSql)-InStr(stSql,"where")-4)
IF InStr(Left(st, InStr(st,"=")),".""ID""") THEN
a() = Split(Right(st, Len(st)-InStr(st,"=")-1),".")
ELSE
a() = Split(Left(st, InStr(st,"=")-1),".")
END IF
stSql = stSql + "AND "+a(0)+".""ID"" = "+stFieldID
ELSE
stSql = stSql + "WHERE ""ID"" = "+stFieldID
END IF
Each field and table name must be entered into the SQL command with two sets of quotation
marks. Quotation marks are normally interpreted by Basic as text string delimiters, so they no
longer appear when the code is passed on to SQL. Doubling the quotation marks ensures that one
set are passed on. ""ID"" signifies that the field "ID" will be accessed in the query, with the
single set of quotes that SQL requires.
The query stored in the stSql variable is now carried out and its result saved in oResult.
oDatasource = ThisComponent.Parent.CurrentController
IF NOT (oDatasource.isConnected()) Then
oDatasource.connect()
End IF
oConnection = oDatasource.ActiveConnection()
oSQL_Command = oConnection.createStatement()
oResult = oSQL_Command.executeQuery(stSql)
The result of the query is read in a loop. As with a query in the GUI, several fields and records
could be shown. But the construction of this query requires only one result, which will be found in
the first column (1) of the query result set. It is the record which provides the displayed content of
the combobox. The content is text (getString()), hence the command
oResult.getString(1).
WHILE oResult.next
stFieldValue = oResult.getString(1)
WEND
The combobox must now be set to the text value retrieved by the query.
46 Macros

oFieldList.Text = stFieldValue
ELSE
If there is no value in the field for the foreign key oField, the query has failed and the combobox
is set to an empty string.
oFieldList.Text = ""
END IF
NEXT inCom
END SUB
This procedure manages the contact between the combobox and the foreign key available in a
field of the form’s data source. This should be enough to show the correct values in comboboxes.
Storage of new values would require a further procedure.
Transfering a foreign key value from a combobox to a numeric field
If a new value is entered into the combobox (and this after all is the purpose for which this macro
was constructed), the corresponding primary key must be entered into the form's underlying table
as a Foreign key.
SUB TextSelectionSaveValue(oEvent AS OBJECT)
This macro should be bound to the following form event: 'Before record action'.
After the variables have been declared (not shown here), we must first determine exactly which
event should launch the macro. Before record action, two implementations are called in
succession. It is important for the macro itself to retrieve the form object. This can be done in both
implementations but in different ways. Here the implementation called “OdatabaseForm” is filtered
out.
IF InStr(oEvent.Source.ImplementationName,"ODatabaseForm") THEN
...
END IF
END SUB
This loop builds in the same start as the Display_text procedure:
oForm = oEvent.Source
aComboboxes() = Split(oForm.getByName("combofields").Tag,",")
FOR inCom = LBound(aComboboxes) TO Ubound(aComboboxes)
...
NEXT inCom
The field oFieldList shows the text. It might lie inside a table control, in which case it is not
possible to access it directly from the form. In such cases, the additional information for the hidden
control “comboboxes“ should contain the path to the field using “tablecontrol” combobox. Splitting
this entry up will reveal how the combobox is to be accessed.
a() = Split(Trim(aComboboxen(inCom)),">")
IF Ubound(a) > 0 THEN
oFieldList = oForm.getByName(a(0)).getByName(a(1))
ELSE
oFieldList = oForm.getByName(a(0))
END IF
Next the query is read from the combobox and split up into its individual parts. For simle
comboboxes, the necessary items of information are the field name and table name:
SELECT "Field" FROM "Table"
This could in some cases be augmented by a sort instruction. Whenever two fields are to be put
together in the combobox, more work will be required to separate them.
SELECT "Field1"||' '||"Field2" FROM "Table"
This query puts two fields together with a space between them. As the separator is a space, the
macro will search for it and split the text into two parts accordingly. Naturally this will only work
reliably if “Field1“ does not already contain text in which spaces are permitted. Otherwise, if the
Improving usability 47

first name is “Anne Marie” and the surname “Müller”, the macro will treat “Anne” as the first name
and “Marie Müller” as the surname. In such cases a more suitable separator should be used, which
can then be found by the macro. In the case of names, this could be “Surname, Given name”.
Things get even more complicated if the two fields come from different tables:
SELECT "Table1"."Field1"||' > '||"Table2"."Field2"
FROM "Table1", "Table2"
WHERE "Table1"."ID" = "Table2"."ForeignID"
ORDER BY "Table1"."Field1"||' > '||"Table2"."Field2" ASC
Here the fields must be separated from one another, the table to which each field belongs must be
established and the corresponding foreign keys determined.
stQuery = oFieldList.ListSource
aFields() = Split(stQuery, """")
stContent = ""
FOR i=LBound(aFields)+1 TO UBound(aFields)
The content of the query is stripped of unnecessary ballast. The parts are reassembled into an
array with an unusual character combination as separator. FROM separates the visible field
display from the table names. WHERE separates the condition from the table names. Joins are not
supported.
IF Trim(UCASE(aFields(i))) = "ORDER BY" THEN
EXIT FOR
ELSEIF Trim(UCASE(aFields(i))) = "FROM" THEN
stContent = stcontent+" §§ "
ELSEIF Trim(UCASE(aFields(i))) = "WHERE" THEN
stContent = stcontent+" §§ "
ELSE
stContent = stContent+Trim(aFields(i))
END IF
NEXT i
aContent() = Split(stContent, " §§ ")
In some cases the content of the visible field display comes from different fields:
aFirst() = Split(aContent(0),"||")
IF UBound(aFirst) > 0 THEN
IF UBound(aContent) > 1 THEN
The first part contains at least two fields. The fields begin with a table name. The second part
contains two table names, which can be determined from the first part. The third part contains a
relationship with a foreign key, separated by “=“:
aTest() = Split(aFirst(0),".")
NameTable1 = aTest(0)
NameTableField1 = aTest(1)
Erase aTest
stFieldSeperator = Join(Split(aFirst(1),"'"),"")
aTest() = Split(aFirst(2),".")
NameTable2 = aTest(0)
NameTableField2 = aTest(1)
Erase aTest
aTest() = Split(aContent(2),"=")
aTest1() = Split(aTest(0),".")
IF aTest1(1) <> "ID" THEN
NameTab12ID = aTest1(1)
IF aTest1(0) = NameTable1 THEN
Position = 2
ELSE
Position = 1
END IF
ELSE
Erase aTest1
aTest1() = Split(aTest(1),".")
NameTab12ID = aTest1(1)
IF aTest1(0) = NameTable1 THEN
48 Macros

Position = 2
ELSE
Position = 1
END IF
END IF
ELSE
The first part contains two field names without table names, possibly with separators. The second
part contains the table names. There is no third part:
IF UBound(aFirst) > 1 THEN
NameTableField1 = aFirst(0)
stFieldSeperator = Join(Split(aFirst(1),"'"),"")
NameTableField2 = aFirst(2)
ELSE
NameTableField1 = aFirst(0)
NameTableField2 = aFirst(1)
END IF
NameTable1 = aContent(1)
END IF
ELSE
There is only one field from one table:
NameTableField1 = aFirst(0)
NameTable1 = aContent(1)
END IF
The maximum character length that an entry can have is given by the ColumnSize function. The
combobox cannot be used to limit the size as it may need to contain two fields at the same time.
LengthField1 = ColumnSize(NameTable1,NameTableField1)
IF NameTableField2 <> "" THEN
IF NameTable2 <> "" THEN
LengthField2 = ColumnSize(NameTable2,NameTableField2)
ELSE
LengthField2 = ColumnSize(NameTable1,NameTableField2)
END IF
ELSE
LengthField2 = 0
END IF
The content of the combobox is read out:
stContent = oFieldList.getCurrentValue()
Leading and trailing spaces and non-printing characters are removed if necessary.
stContent = Trim(stContent)
IF stContent <> "" THEN
IF NameTableField2 <> "" THEN
If a second table field exists, the content of the combobox must be split. To determine where the
split is to occur, we use the field separator provided to the function as an argument.
a_stParts = Split(stContent, FieldSeparator, 2)
The last parameter signifies that the maximum number of parts is 2.
Depending on which entry corresponds to field 1 and which to field 2, the content of the combobox
is now allocated to the individual variables. "Position = 2" serves here as a sign that the second
part of the content stands for Field 2.
IF Position = 2 THEN
stContent = Trim(a_stParts(0))
IF UBound(a_stParts()) > 0 THEN
stContentField2 = Trim(a_stParts(1))
ELSE
stContentField2 = ""
END IF
stContentField2 = Trim(a_stParts(1))
Improving usability 49

ELSE
stContentField2 = Trim(a_stParts(0))
IF UBound(a_stParts()) > 0 THEN
stContent = Trim(a_stParts(1))
ELSE
stContent = ""
END IF
stContent = Trim(a_stParts(1))
END IF
END IF
It can happen that with two separable contents, the installed size of the combobox (text length)
does not fit the table fields to be saved. For comboboxes that represent a single field, this is
normally handled by suitably configuring the form control. Here by contrast, we need some way of
catching such errors. The maximum permissible length of the relevant field is checked.
IF (LengthField1 > 0 AND Len(stContent) > LengthField1) OR (LengthField2 > 0 AND
Len(stContentField2) > LengthField2) THEN
If the field length of the first or second part is too big, a default string is stored in one of the
variables. The character CHR(13) is used to put in a line break .
stmsgbox1 = "The field " + NameTableField1 + " must not exceed " +
Field1Length + "characters in length." + CHR(13)
stmsgbox2 = "The field " + NameTableField2 + " must not exceed " +
Field2Length + "characters in length." + CHR(13)
If both field contents are too long, both texts are displayed.
IF (LengthField1 > 0 AND Len(stContent) > LengthField1) AND (LengthField2 > 0
AND Len(stContentField2) > LengthField2) THEN
msgbox ("The entered text is too long." + CHR(13) + stmsgbox1 + stmsgbox2
+ "Please shorten it.",64,"Invalid entry")
The display uses the msgbox() function. This expects as its first argument a text string, then
optionally a number (which determines the type of message box displayed), and finally an optional
text string as a title for the window. The window will therefore have the title "Invalid entry" and the
number '64' provides a box containing the Information symbol.
The following code covers any further cases of excessively long text that might arise.
ELSEIF (Field1Length > 0 AND Len(stContent) > Field1Length) THEN
msgbox ("The entered text is too long." + CHR(13) + stmsgbox1 + "Please
shorten it.",64,"Invalid entry")
ELSE
msgbox ("The entered text is too long." + CHR(13) + stmsgbox2 + "Please
shorten it.",64,"Invalid entry")
END IF
ELSE
If there is no excessively long text, the function can proceed. Otherwise it exits here.
Now the entries are masked so that any quotes that may be present will not generate an error.
stContent = String_to_SQL(stContent)
IF stContentField2 <> "" THEN
stContentField2 = String_to_SQL(stContentField2)
END IF
First variables are preallocated which can subsequently be altered by the query. The variables
inID1 and inID2 store the content of the primary key fields of the two tables. If a query yields no
results, Basic assigns these integer variable a value of 0. However this value could also indicate a
successful query returning a primary key value of 0; therefore the variable is preset to -1. HSQLDB
cannot set this value for an autovalue field.
Next the database connection is set up, if it does not already exist.
inID1 = -1
50 Macros

inID2 = -1
oDatasource = ThisComponent.Parent.CurrentController
If NOT (oDatasource.isConnected()) Then
oDatasource.connect()
End If
oConnection = oDatasource.ActiveConnection()
oSQL_Command = oConnection.createStatement()
IF NameTableField2 <> "" AND NOT IsEmpty(stContentField2) AND NameTable2 <> ""
THEN
If a second table field exists, a second dependency must first be declared.
stSql = "SELECT ""ID"" FROM """ + NameTable2 + """ WHERE """ +
NameTableField2 + """='" + stContentField2 + "'"
oResult = oSQL_Command.executeQuery(stSql)
WHILE oResult.next
inID2 = oResult.getInt(1)
WEND
IF inID2 = -1 THEN
stSql = "INSERT INTO """ + NameTable2 + """ (""" + NameTableField2 +
""") VALUES ('" + stContentField2 + "') "
oSQL_Command.executeUpdate(stSql)
stSql = "CALL IDENTITY()"
If the content within the combobox is not present in the corresponding table, it is inserted there.
The primary key value which results is then read. If it is present, the existing primary key is read in
the same way. The function uses the automatically generated primary key fields (IDENTITY).
oResult = oSQL_Command.executeQuery(stSql)
WHILE oResult.next
inID2 = oResult.getInt(1)
WEND
END IF
The primary key for the second value is temporarily stored in the variable inID2 and then written
as a foreign key into the table corresponding to the first value. According to whether the record
from the first table was already available, the content is freshly saved (INSERT) or altered
(UPDATE):
IF inID1 = -1 THEN
stSql = "INSERT INTO """ + NameTable1 + """ (""" + NameTableField1 +
""",""" + NameTab12ID + """) VALUES ('" + stContent + "','" + inID2 + "') "
oSQL_Command.executeUpdate(stSql)
And the corresponding ID directly read out:
stSql = "CALL IDENTITY()"
oResult = oSQL_Command.executeQuery(stSql)
WHILE oResult.next
inID1 = oResult.getInt(1)
WEND
The primary key for the first table must finally be read again so that it can be transferred to the
form's underlying table.
ELSE
stSql = "UPDATE """ + NameTable1 + """ SET """ + NameTab12ID + """='" +
inID2 + "' WHERE """ + NameTableField1 + """ = '" + stContent + "'"
oSQL_Command.executeUpdate(stSql)
END IF
END IF
In the case where both the fields underlying the combobox are in the same table (for example
Surname and Firstname in the Name table), a different query is needed:
IF NameTableField2 <> "" AND NameTable2 = "" THEN
stSql = "SELECT ""ID"" FROM """ + NameTable1 + """ WHERE """ +
NameTableField1 + """='" + stContent + "' AND """ + NameTableField2 + """='" +
stContentField2 + "'"
Improving usability 51

oResult = oSQL_Command.executeQuery(stSql)
WHILE oResult.next
inID1 = oResult.getInt(1)
WEND
IF inID1 = -1 THEN
... and a second table does not exist:
stSql = "INSERT INTO """ + NameTable1 + """ (""" + NameTableField1 +
""",""" + NameTableField2 + """) VALUES ('" + stContent + "','" + stContentField2 +
"') "
oSQL_Command.executeUpdate(stSql)
Then the primary key is read again.
stSql = "CALL IDENTITY()"
oResult = oSQL_Command.executeQuery(stSql)
WHILE oResult.next
inID1 = oResult.getInt(1)
WEND
END IF
END IF
IF NameTableField2 = "" THEN
Now we consider the simplest case: The second table field does not exist and the entry is not yet
present in the table. In other words, a single new value has been entered into the combobox.
stSql = "SELECT ""ID"" FROM """ + NameTable1 + """ WHERE """ + NameTableField1
+ """='" + stContent + "'"
oResult = oSQL_Command.executeQuery(stSql)
WHILE oResult.next
inID1 = oResult.getInt(1)
WEND
IF inID1 = -1 THEN
If there is no second field, the content of the box is inserted as a new record.
stSql = "INSERT INTO """ + NameTable1 + """ (""" + NameTableField1 +
""") VALUES ('" + stContent + "') "
oSQL_Command.executeUpdate(stSql)
… and the resulting ID directly read out.
stSql = "CALL IDENTITY()"
oResult = oSQL_Command.executeQuery(stSql)
WHILE oResult.next
inID1 = oResult.getInt(1)
WEND
END IF
END IF
The value of the primary key field must be determined, so that it can be transferred to the main part
of the form.
Next the primary key value that has resulted from all these loops is transferred to the invisible field
in the main table and the underlying database. The table field linked to the form field is reached by
using 'BoundField'. 'updateInt' places an integer (see under numerical type definitions) in
this field.
oForm.updateLong(oForm.findColumn(oFeldList.Tag),inID1)
END IF
ELSE
If no primary key is to be entered, because there was no entry in the combobox or that entry was
deleted, the content of the invisible field must also be deleted. updateNull() is used to fill the
field with the database-specific expression for an empty field, NULL.
oForm.updateNULL(oForm.findColumn(oFeldList.Tag),NULL)
END IF
52 Macros

NEXT inCom
END IF
END SUB
Function to measure the length of the combobox entry
The following function gives the number of characters in the respective table column, so that
entries that are too long do not just get truncated. A FUNCTION is chosen here to provide return
values. A SUB has no return value that can be passed on and processed elsewhere.
FUNCTION ColumnSize(Tablename AS STRING, Fieldname AS STRING) AS INTEGER
oDatasource = ThisComponent.Parent.CurrentController
If NOT (oDatasource.isConnected()) Then
oDatasource.connect()
End If
oConnection = oDataSource.ActiveConnection()
oSQL_Command = oConnection.createStatement()
stSql = "SELECT ""COLUMN_SIZE"" FROM
""INFORMATION_SCHEMA"".""SYSTEM_COLUMNS"" WHERE ""TABLE_NAME"" = '" +
Tablename + "' AND ""COLUMN_NAME"" = '" + Fieldname + "'"
oResult = oSQL_Command.executeQuery(stSql)
WHILE oResult.next
i = oResult.getInt(1)
WEND
ColumnSize = i
END FUNCTION
Generating database actions
SUB GenerateRecordAction(oEvent AS OBJECT)
This macro should be bound to the “When receiving focus” event of the listbox. It is necessary that
in all cases where the listbox is changed, the change is stored. Without this macro, there would be
no change in the actual table that Base could recognize, since the combobox is not bound to the
form.
This macro directly alters the form properties:
DIM oForm AS OBJECT
oForm = oEvent.Source.Model.Parent
oForm.IsModified = TRUE
END SUB
This macro is not necessary for forms that use queries for the content of comboboxes. Changes in
comboboxes are registered directly.
Navigation from one form to another
A form is to be opened when a particular event occurs.
In the form control properties, on the line "Additional information" (tag), enter the name of the form.
Further information can also be entered here, and subsequently separated out by using the
Split() function.
SUB From_form_to_form(oEvent AS OBJECT)
DIM stTag AS String
stTag = oEvent.Source.Model.Tag
aForm() = Split(stTag, ",")
The array is declared and filled with the form names, first the form to be opened and secondly the
current form, which will be closed after the other has been opened.
ThisDatabaseDocument.FormDocuments.getByName( Trim(aForm(0)) ).open
ThisDatabaseDocument.FormDocuments.getByName( Trim(aForm(1)) ).close
Improving usability 53

END SUB
If instead, the other form is only to be opened when the current one is closed, for example where a
main form exists and all other forms are controlled from it using buttons, the following macro
should be bound to the form with Tools > Customize > Events > Document closed:
SUB Mainform_open
ThisDatabaseDocument.FormDocuments.getByName( "Mainform" ).open
END SUB
If the form documents are sorted within the ODB file into directories, the macro for changing the
form needs to be more extensive:
SUB From_form_to_form_with_folders(oEvent AS OBJECT)
REM The form to be opened is given first.
REM If a form is in a folder, use "/" to define the relationship
REM so that the subfolder can be found.
DIM stTag AS STRING
stTag = oEvent.Source.Model.Tag 'Tag is entered in the additional
information
aForms() = Split(stTag, ",") 'Here the form name for the new form comes
first, then the one for the old form
aForms1() = Split(aForms(0),"/")
aForms2() = Split(aForms(1),"/")
IF UBound(aForms1()) = 0 THEN
ThisDatabaseDocument.FormDocuments.getByName( Trim(aForms1(0)) ).open
ELSE
ThisDatabaseDocument.FormDocuments.getByName(
Trim(aForms1(0)) ).getByName( Trim(aForms1(1)) ).open
END IF
IF UBound(aForms2()) = 0 THEN
ThisDatabaseDocument.FormDocuments.getByName( Trim(aForms2(0)) ).close
ELSE
ThisDatabaseDocument.FormDocuments.getByName(
Trim(aForms2(0)) ).getByName( Trim(aForms2(1)) ).close
END IF
END SUB
Form documents that lie in a directory are entered into the Additional Information field as
directory/form. This must be converted to:
...getByName("Directory").getByName("Form").
Hierarchical listboxes
Settings in one listfield are intended to influence directly the settings of another. For simple cases,
this has already been described above in the section on record filtering. But supposing that the first
listbox is meant to affect the content of the second listbox, which then affects the content of a third
listbox, etc.
54 Macros

Example listfields for a hierarchical ordering of listfields
In this example the first listbox (Jahrgang = Years) contains all school years. The Klasse (Classes)
in each year are represented by letters. The Names are those of the class members.
Under normal circumstances, the Years listbox would show all 13 years, the Classes listbox all
class letters and the Names listbox all pupils at the school.
If these are to be hierarchical listboxes, the choice of classes is restricted once a year has been
selected. Only those class letters are shown that are actually present in that year. This might vary
because, if pupil numbers are increasing, the number of classes in a year might also increase. The
last listbox, Names, is very restricted. Instead of more than 1000 pupils, it would show only 30.
At the beginning, only the year can be selected. Once this has been done, the (restricted) list of
classes is made available. Only at the end is the list of names given.
If the Years listbox is altered, the sequence must start again. If only the Classes listbox is altered,
the year number for the last listbox remains valid
To create such a function, the form must be able to store an intermediate variable. This takes place
in a hidden control.
The macro is bound to a change in the content of a listbox: Properties Listbox > Events >
Changed. The necessary variables are stored in the additional information of the listbox.
Here is an example of the additional information provided:
MainForm,Year,hidden control,Listbox_2
The form is called “MainForm”. The current listbox is called “Listbox1”. This listbox shows the
content of the table field “Year” and the following listboxes must be filtered according to this entry.
The hidden control is designated by “hidden_control” and the existence of a second listbox
“Listbox_2” is passed on to the filtering procedure.
SUB Hierarchical_control(oEvent AS OBJECT)
DIM oDoc AS OBJECT
DIM oDrawpage AS OBJECT
DIM oForm AS OBJECT
DIM oFieldHidden AS OBJECT
DIM oField AS OBJECT
DIM oField1 AS OBJECT
DIM stSql AS STRING
Improving usability 55
Jahrgang
1
2
3
4
5
6
7
8
9
10
11
12
13
Klasse
a
b
c
d
e
f
g
Name
Karl Müller
Evelyn Maier
Maria Gott
Eduard Abgefahren
Kurt Drechsler
Kunigunde Schimmel

DIM acontent()
DIM stTag AS STRING
oField = oEvent.Source.Model
stTag = oField.Tag
oForm = oField.Parent
REM Tag goes into the Additional information field
REM It contains:
einstellt.
REM 0. Field name of field to be filtered in the table
REM 1. Field name of the hidden control that will store the filtered value
REM 2. Possible further listbox
REM The tag is read from the element that launches the macro. The variable is
passed to the procedure, and if necessary to all further listboxes
aFilter() = Split(stTag, ",")
stFilter = ""
After the vartiables have been declared, the content of the tag is passed to an array, so that
individual elements can be accessed. Then the access to the various fields in the form is declared.
The listbox that called the macro is determined and its value read. Only if this value is not NULL
will it be combined with the name of the field to be filtered, in our example “Year”, to make a SQL
command. Otherwise the filter will stay empty. If the listboxes are meant for filtering a form, no
hidden control is available. In this case, the filter value is stored directly in the form.
IF Trim(aFilter(1)) = "" THEN
IF oField.getCurrentValue <> "" THEN
stFilter = """"+Trim(aFilter(0))+"""='"+oField.getCurrentValue()+"'"
If a filter already exists (for example one dealing with Listbox 2, which is now being accessed), the
new content is attached to the previous content stored in the hidden control.
IF oForm.Filter <> ""
This must only happen when the same field has not yet been filtered. For example, if we are
filtering for “Year”, a repetition of the filter will find no additional records for the “Name” listbox. A
person can only be found in one year. We must therefore exclude the possibility that the filter name
has already been used.
AND InStr(oForm.Filter, """"+Trim(aFilter(0))+"""='") = 0 THEN
stFilter = oForm.Filter + " AND " + stFilter
If a filter exists and the field that will be used for filtering is already present in the filter, the previous
filtering on this fieldname must be deleted and a new filter created.
ELSEIF oForm.Filter <> "" THEN
stFilter = Left(oForm.Filter,
InStr(oForm.Filter, """"+Trim(aFilter(0))+"""='")-1) + stFilter
END IF
END IF
Then the filter is entered into the form. This filter can also be empty if the first listbox was selected
and has no content.
oForm.Filter = stFilter
oForm.reload()
The same procedure will run if the form does not need to be filtered immediately. In this case, the
filter value is stored in the mean time in a hidden control.
ELSE
oFieldHidden = oForm.getByName(Trim(aFilter(1)))
IF oField.getCurrentValue <>"" THEN
stFilter = """"+Trim(aFilter(0))+"""='"+oField.getCurrentValue()+"'"
IF oFieldHidden.HiddenValue <> ""
AND InStr(oFieldHidden.HiddenValue, """"+Trim(aFilter(0))+"""='") = 0 THEN
stFilter = oFieldHidden.HiddenValue + " AND " + stFilter
ELSEIF oFieldHidden.HiddenValue <> "" THEN
stFilter = Left(oFieldHidden.HiddenValue,
56 Macros

InStr(oFieldHidden.HiddenValue, """"+Trim(aFilter(0))+"""='")-1) +
stFilter
END IF
END IF
oFieldHidden.HiddenValue = stFilter
END IF
If the Additional information has an entry numbered 4 (numbering begins at 0!), the following listbox
must be set to the corresponding entry from the caller listbox.
IF UBound(aFilter()) > 1 THEN
oField1 = oForm.getByName(Trim(aFilter(2)))
aFilter1() = Split(oField1.Tag,",")
The necessary data for the filtering is read from the Additional information (“Tag”) in the
corresponding listbox. Unfortunately it is not possible to write only the fresh SQL code into the
listbox and then to read the listbox values. Instead the values corresponding to the query must be
written into the listbox directly.
The creation of the code starts from the fact that the table to which the form refers is the same one
to which the listboxes refer. Such a listbox is not designed to transfer foreign keys to the table.
IF oField.getCurrentValue <> "" THEN
stSql = "SELECT DISTINCT """+Trim(aFilter1(0))+""" FROM """+oForm.Command+
""" WHERE "+stFilter+" ORDER BY """+Trim(aFilter1(0))+""""
oDatasource = ThisComponent.Parent.CurrentController
If NOT (oDatasource.isConnected()) THEN
oDatasource.connect()
END IF
oConnection = oDatasource.ActiveConnection()
oSQL_Statement = oConnection.createStatement()
oQuery_result = oSQL_Statement.executeQuery(stSql)
The values are read into an array. The array is transferred directly into the listbox. The
corresponding indices for the array are incremented within a loop.
inIndex = 0
WHILE oQuery_result.next
ReDim Preserve aContent(inIndex)
acontent(inIndex) = oQuery_result.getString(1)
inIndex = inIndex+1
WEND
ELSE
aContent(0) = ""
END IF
oField1.StringItemList = aContent()
The content of the listbox has been created afresh. Now it must be read in again. Then, using the
Additional information property of the listbox that has been refreshed, each of the dependent
listboxes that follows is emptied, launching a loop for all following listboxes until one is reached that
has no fourth term in its Additional information.
oField1.refresh()
WHILE UBound(aFilter1()) > 1
DIM aLeer()
oField2 = oForm.getByName(Trim(aFilter1(2)))
DIM aFilter1()
aFilter1() = Split(oField2.Tag,",")
oField2.StringItemList = aEmpty()
oField2.refresh()
WEND
END IF
END SUB
The visible content of the listboxes are stored in oField1.StringItemList. If any additional value
needs to be stored for transmission to the underlying table as a foreign key, as is usual for
listboxes in forms, this value must be passed to the query separately and then stored with
oField1.ValueItemList.
Improving usability 57

Such an extension requires additional variables such as, in addition to the table in which the values
of the form are to be stored, the table from which the listbox contents are drawn.
Besondere Aufmerksamkeit ist dabei der Formulierung des Filters zu widmen.
Special care must be given to formulating the filter query.
stFilter = """"+Trim(aFilter(1))+"""='"+oField.getCurrentValue()+"'"
will work only if the underlying LO version is 4.1 or later, since it is the value which is to be stored
that is given as CurrentValue(), and not the value that is displayed. To ensure that it works in
different versions, set Property: Listbox > Data > Bound Field > '0'.
Entering times with milliseconds
To store times to millisecond precision requires a timestamp field in the table, separately adapted
by SQL for the purpose (see “Table creation”). Such a field can be represented on a form by a
formatted field with the format MM:SS,00. However on the first attempt to write to it, record entry
will fail. This can be corrected with the following macro, which should be bound to the form’s
“Before record action” property:
SUB Timestamp
DIM unoStmp AS NEW com.sun.star.util.DateTime
DIM oDoc AS OBJECT
DIM oDrawpage AS OBJECT
DIM oForm AS OBJECT
DIM oFeld AS OBJECT
DIM stZeit AS STRING
DIM ar()
DIM arMandS()
DIM loNano AS LONG
DIM inSecond AS INTEGER
DIM inMinute AS INTEGER
oDoc = thisComponent
oDrawpage = oDoc.Drawpage
oForm = oDrawpage.Forms.getByName("MainForm")
oField = oForm.getByName("Time")
stTime = oField.Text
The variables are declared first. The rest of the code is executed only when the “Time” field has
something in it. Otherwise the internal mechanism of the form will act to set the field to NULL.
IF stTime <> "" THEN
ar() = Split(stTime,".")
loNano = CLng(ar(1)&"0000000")
arMandS() = Split(ar(0),":")
inSecond = CInt(arMandS(1))
inMinute = Cint(arMandS(0))
The entry in the “Time” field is broken down into its elements.
First the decimal part is separated out and right-padded with null characters to a total of nine digits.
Such a high number can only be stored in a long variable.
Then the rest of the time is split into minutes and seconds, using the colon as a separator, and
these are converted into integers.
WITH unoStmp
.NanoSeconds = loNano
.Seconds = inSecond
.Minutes = inMinute
.Hours = 0
.Day = 30
.Month = 12
.Year = 1899
END WITH
58 Macros

The timestamp values are assigned to the standard LibreOffice date of 30.12.1899. Of course the
actual current date can be stored alongside it.
Note
Getting and storing the current date:
DIM now AS DATE
now = Now()
WITH unoStmp
.NanoSeconds = loNano
.Seconds = inSecond
.Minutes = inMinute
.Hours = Hour(now)
.Day = Day(now)
.Month = Month(now)
.Year = Year(now)
END WITH
oField.BoundField.updateTimestamp(unoStmp)
END IF
END SUB
Now the timestamp we have created is transferred to the field using updateTimestamp and
stored in the form.
In earlier tutorials, NanoSeconds were called HundrethSeconds. This does not match the
LibreOffice AI and will cause an error message.
One event – several implementations
It can happen when using forms that a macro linked to a single event is run twice. This occurs
because more than one process is linked simultaneously to, for example, the storage of a modified
record. The differing causes for such an event can be determined in the following way:
SUB Determine_eventcause(oEvent AS OBJECT)
DIM oForm AS OBJECT
oForm = oEvent.Source
MsgBox oForm.ImplementationName
END SUB
When a modified record is stored, there are two implementations involved named
org.openoffice.comp.svx.FormController and
com.sun.star.comp.forms.ODatabaseForm. Using these names, we can ensure that a
macro only runs through its code once. A duplicate run usually causes just a (small) pause in the
program execution, but it can lead to things like a cursor being put back two records instead of
one. Each implementation allows only specific commands, so knowing the name of the
implementation can be important.
Saving with confirmation
For complicated record alterations, it makes sense to ask the user before execution whether the
change should actually be carried out. If the answer in the dialog is
No
No, the save is aborted, the
change discarded, and the cursor remains on the current record.
SUB Save_confirmation(oEvent AS OBJECT)
DIM oFormFeature AS OBJECT
DIM oFormOperations AS OBJECT
DIM inAnswer AS INTEGER
oFormFeature = com.sun.star.form.runtime.FormFeature
SELECT CASE oEvent.Source.ImplementationName
CASE "org.openoffice.comp.svx.FormController"
inAnswer = MsgBox ("Should the record be changed?" ,4, "Change_record")
SELECT CASE inAnswer
Improving usability 59

CASE 6 ' Yes, no further action
CASE 7 ' No, interrupt save
oFormOperations = oEvent.Source.FormOperations
oFormOperations.execute(oFormFeature.UndoRecordChanges)
CASE ELSE
END SELECT
CASE "com.sun.star.comp.forms.ODatabaseForm"
END SELECT
END SUB
There are two trigger moments with different implementation names. These two implementations
are distinguished in SELECT CASE. The code will be executed only for the FormController
implementation. This is because only FormController has the variable FormOperations.
Apart from
Yes
Yes and
No
No, the user might also click on the close button. This however yields the
same value as
No
No, namely 7.
If the form is navigated with the tab key, the user sees only the dialog with the confirmation prompt.
However, users who use the navigation bar will also see a message saying that the record will not
be altered.
Primary key from running number and year
When invoices are prepared, yearly balances are affected. This often leads to a desire to separate
the invoice tables of a database by year and to begin a new table each year.
The following macro solution uses a different method. It automatically writes the value of the “ID”
field into the table but also takes account of the “Year” field which exists in the table as a
secondary primary key. So the following primary keys might occur in the table:
year ID
2014 1
2014 2
2014 3
2015 1
2015 2
In this way an overview of the year is more easily obtained for documents.
SUB Current_Date_and_ID
DIM oDatasource AS OBJECT
DIM oConnection AS OBJECT
DIM oSQL_Command AS OBJECT
DIM stSql AS STRING
DIM oResult AS OBJECT
DIM oDoc AS OBJECT
DIM oDrawpage AS OBJECT
DIM oForm AS OBJECT
DIM oField1 AS OBJECT
DIM oField2 AS OBJECT
DIM oField3 AS OBJECT
DIM inIDnew AS INTEGER
DIM inYear AS INTEGER
DIM unoDate
oDoc = thisComponent
oDrawpage = oDoc.drawpage
oForm = oDrawpage.forms.getByName("MainForm")
oField1 = oForm.getByName("fmt_year")
oField2 = oForm.getByName("fmtID")
oField3 = oForm.getByName("dat_date")
IF IsEmpty(oField2.getCurrentValue()) THEN
IF IsEmpty(oField3.getCurrentValue()) THEN
60 Macros

unoDate = createUnoStruct("com.sun.star.util.Date")
unoDate.Year = Year(Date)
unoDate.Month = Month(Date)
unoDate.Day = Day(Date)
inYear = Year(Date)
ELSE
inYear = oField3.CurrentValue.Year
END IF
oDatasource = ThisComponent.Parent.CurrentController
If NOT (oDatasource.isConnected()) THEN
oDatasource.connect()
END IF
oConnection = oDatasource.ActiveConnection()
oSQL_Command = oConnection.createStatement()
stSql = "SELECT MAX( ""ID"" )+1 FROM ""orders"" WHERE ""year"" = '"
+ inYear + "'"
oResult = oSQL_Command.executeQuery(stSql)
WHILE oResult.next
inIDnew = oresult.getInt(1)
WEND
IF inIDnew = 0 THEN
inIDnew = 1
END IF
oField1.BoundField.updateInt(inYear)
oField2.BoundField.updateInt(inIDnew)
IF IsEmpty(oField3.getCurrentValue()) THEN
oField3.BoundField.updateDate(unoDate)
END IF
END IF
END SUB
All variables are declared. The form controls in the main form are accessed. The rest of the code
runs only if the entry for the field “fmtID” is still empty. Then, if no date has been entered, a date
structure is created so that the current date and year can be carried across into the relevant fields.
Then a connection is made to the database, if it does not exist already. The highest value of “ID”
field for the current year is incremented by 1. If the result set is empty, it means there are no
entries in the “ID” field. At this point ‘0’ could be entered in the “fmtID” control, but numbering for
orders should begin at 1 so the “inIDnew” variable is given the value ‘1’.
The returned value for the year, the ID and the current date (if no date has been entered) are
transferred to the form.
In the form, the fields for the primary keys “ID” and “Year” are write-protected. Consequently they
can only be given values using this macro.
Database tasks expanded using macros
Making a connection to a database
oDataSource = ThisComponent.Parent.DataSource
IF NOT oDataSource.IsPasswordRequired THEN
oConnection = oDataSource.GetConnection("","")
Here it would be possible to provide a username and a password, if one were necessary. In that
case the brackets would contain ("Username","Password"). Instead of including the username and
a password in clear text, the dialog for password protection is called up:
ELSE
oAuthentication = createUnoService("com.sun.star.sdb.InteractionHandler")
oConnection = oDataSource.ConnectWithCompletion(oAuthentication)
END IF
If however a form within the same Base file is accessing the database, you only need:
Database tasks expanded using macros 61

oDataSource = ThisComponent.Parent.CurrentController
IF NOT (oDataSource.isConnected()) Then
oDataSource.connect()
End IF
oConnection = oDataSource.ActiveConnection()
Here the database is known so a username and a password are not necessary, as these are
already switched off in the basic HSQLDB configuration for internal version.
For forms outside Base, the connection is made through the first form:
oDataSource = Thiscomponent.Drawpage.Forms(0)
oConnection = oDataSource.activeConnection
Copying data from one database to another
The internal database is a single-user database. The records are stored inside the *.odb file. The
exchange of data between different database files was not allowed for but is nevertheless possible
using export and import.
But often *.odb files are set up to allow automatic data exchange between databases. The
following procedure can be helpful here.
After the variables have been declared, the path to the current database is read from a button on
the form. The database name is separated from the rest of the path. The target file for the records
is also present in this folder. The name of this file is attached to the path to allow a connection to
be made to the target database.
The connection to the source database is determined relative to the form that contains the button:
ThisComponent.Parent.CurrentController. The connection to the external database is set
up using the DatabaseContext and the path.
SUB DataCopy
DIM oDatabaseContext AS OBJECT
DIM oDatasource AS OBJECT
DIM oDatasourceZiel AS OBJECT
DIM oConnection AS OBJECT
DIM oConnection Ziel AS OBJECT
DIM oDB AS OBJECT
DIM oSQL_Command AS OBJECT
DIM oSQL_CommandTarget AS OBJECT
DIM oResult AS OBJECT
DIM oResultTarget AS OBJECT
DIM stSql AS String
DIM stSqlTarget AS String
DIM inID AS INTEGER
DIM inIDTarget AS INTEGER
DIM stName AS STRING
DIM stTown AS STRING
oDB = ThisComponent.Parent
stDir = Left(oDB.Location,Len(oDB.Location)-Len(oDB.Title))
stDir = ConvertToUrl(stDir & "TargetDB.odb")
oDatasource = ThisComponent.Parent.CurrentController
If NOT (oDatasource.isConnected()) THEN
oDatasource.connect()
END IF
oConnection = oDatasource.ActiveConnection()
oDatabaseContext = createUnoService("com.sun.star.sdb.DatabaseContext")
oDatasourceTarget = oDatabaseContext.getByName(stDir)
oConnectionTarget = oDatasourceTarget.GetConnection("","")
oSQL_Command = oConnection.createStatement()
stSql = "SELECT * FROM ""table"""
oResult = oSQL_Command.executeQuery(stSql)
WHILE oResult.next
inID = oResult.getInt(1)
stName = oResult.getString(2)
62 Macros

stTown = oResult.getString(3)
oSQL_CommandTarget = oConnectionTarget.createStatement()
stSqlTarget = "SELECT ""ID"" FROM ""table"" WHERE ""ID"" = '"+inID+"'"
oResultTarget = oSQL_CommandZiel.executeQuery(stSqlTarget)
inIDZiel = - 1
WHILE oResultTarget.next
inIDTarget = oResultTarget.getInt(1)
WEND
IF inIDTarget = - 1 THEN
stSqlTarget = "INSERT INTO ""table"" (""ID"",""name"",""town"") VALUES
('"+inID+"','"+stName+"','"+stTown+"')"
oSQL_CommandTarget.executeUpdate(stSqlZiel)
END IF
WEND
END SUB
The complete tables of the source database are read and inserted, line by line, into the tables of
the target database using the connection that has been set up. Before the insertion, a check is
made to see whether a value has been set for the primary key. If so, the record is not copied.
It can also be arranged that, instead of a new record being copied over, an existing record will be
updated. In all cases, this makes certain that the target database contains records with the correct
primary key of the source database.
Access to queries
It is easier to create queries in the graphical user interface than to transfer their text into macros,
with the additional complication that duplicate double quotes are needed for all table and field
names.
SUB QueryContent
DIM oDatabaseFile AS OBJECT
DIM oQuery AS OBJECT
DIM stQuery AS STRING
oDatabaseFile = ThisComponent.Parent.CurrentController.DataSource
oQuery = oDatabaseFile.getQueryDefinitions()
stQuery = oQuery.getByName("Query").Command
msgbox stQuery
END SUB
Here the content of a *.odb file is accessed from a form. The query is reached using
getQueryDefinitions(). The SQL code for the query is in its Command field. This can then be
used to utilize the command further within a macro.
When you are using the SQL code of the query, you must take care that the code does not refer to
another query. That leads inevitably to the message that the (apparent) table from the database is
unknown. Because of this, it is simpler to create views from queries and then access the views in
the macro.
Securing your database
It can sometimes happen, especially when a database is being created, that the ODB file is
unexpectedly truncated. Frequent saving after editing is therefore useful, especially when using the
Reports module.
When the database is in use, it can be damaged by operating system failure, if this occurs just as
the Base file is being terminated. This is when the content of the database is being written into the
file.
In addition, there are the usual suspects for files that suddenly refuse to open, such as hard drive
failure. It does no harm therefore to have a backup copy which is as up-to-date as possible. The
state of the data does not change as long as the ODB file remains open. For this reason, safety
subroutines can be directly linked to the opening of the file. You simply copy the file using the
Database tasks expanded using macros 63

backup path given in Tools > Options > LibreOffice > Paths. The macro begins to overwrite the
oldest version after a specific number of copies (inMax).
SUB Databasebackup(inMax AS INTEGER)
DIM oPath AS OBJECT
DIM oDoc AS OBJECT
DIM sTitle AS STRING
DIM sUrl_End AS STRING
DIM sUrl_Start AS STRING
DIM i AS INTEGER
DIM k AS INTEGER
oDoc = ThisComponent
sTitle = oDoc.Title
sUrl_Start = oDoc.URL
DO WHILE sUrl_Start = ""
oDoc = oDoc.Parent
sTitle = oDoc.Title
sUrl_Start = oDoc.URL
LOOP
If the macro is run when you launch the ODB file, sTitle and sUrl_Start will be correct. However, if
the macro is carried out by a form, it must first determine whether a URL is available. If the URL is
empty, a higher level (oDoc.Parent) for a value is looked up.
oPath = createUnoService("com.sun.star.util.PathSettings")
FOR i = 1 TO inMax + 1
IF NOT FileExists(oPath.Backup & "/" & i & "_" & sTitle) THEN
IF i > inMax THEN
FOR k = 1 TO inMax - 1 TO 1 STEP -1
IF FileDateTime(oPath.Backup & "/" & k & "_" & sTitle) <=
FileDateTime(oPath.Backup & "/" & k+1 & "_" & sTitle) THEN
IF k = 1 THEN
i = k
EXIT FOR
END IF
ELSE
i = k + 1
EXIT FOR
END IF
NEXT
END IF
EXIT FOR
END IF
NEXT
sUrl_End = oPath.Backup & "/" & i &"_" & sTitle
FileCopy(sUrl_Start,sUrl_End)
END SUB
You can also do a backup while Base is running, provided that the data can be written back out of
the cache into the file before the Databasebackup subroutine is carried out. It might be useful to do
this, perhaps after a specific elapsed time or when an on-screen button is pressed. This cache-
clearing is handled by the following subroutine:
SUB Write_data_out_of_cache
DIM oData AS OBJECT
DIM oDataSource AS OBJECT
oData = ThisDatabaseDocument.CurrentController
IF NOT ( oData.isConnected() ) THEN oData.connect()
oDataSource = oData.DataSource
oDataSource.flush
END SUB
64 Macros

If all this is to be launched from a single button on a form, both procedures must be called by a
further procedure:
SUB BackupNow
Write_data_out_of_cache
DatabaseBackup(10)
END SUB
Especially for a security macro, it might make sense to make the macro accessible via the
database’s toolbar. This is done in the main window of the Base file using Tools > Customize >
Toolbars. Select the Standard toolbar, which works in all parts of Base.
The command must be stored in the Base file, which in this case is Media_with_Macros.odb.
Add displays a window for adding commands. At the bottom of this window is a possibility to insert
macros from the database. Select the procedure BackupNow.
Database tasks expanded using macros 65

The command is now available for use in the top-level toolbar. To carry out the procedure, just
press the button on the toolbar.
Now you can choose an icon for your command. Modify > Change icon opens the following
dialog:
Select a suitable icon. You can also create and add your own icon.
66 Macros

The icon now appears instead of the name of the procedure. The name becomes a tooltip.
Database compaction
This is simply a SQL command (SHUTDOWN COMPACT), which should be carried out now and
again, especially after a lot of data has been deleted. The database stores new data, but still
reserves the space for the deleted data. In cases where the data have been substantially altered,
you therefore need to compact the database.
Note
Since LibreOffice version 3.6, this command is automatically carried out for the
internal HSQLDB when the database is closed. Therefore this macro is no longer
necessary for the internal database.
Once compaction is carried out, the tables are no longer accessible. The file must be reopened.
Therefore this macro closes the form from which it is called. Unfortunately you cannot close the
document itself without causing a recovery when it is opened again. Therefore this function is
commented out.
SUB Database_compaction
DIM stMessage AS STRING
oDataSource = ThisComponent.Parent.CurrentController ' Accessible from
the form
IF NOT (oDataSource.isConnected()) THEN
oDataSource.connect()
END IF
oConnection = oDataSource.ActiveConnection()
oSQL_Statement = oConnection.createStatement()
stSql = "SHUTDOWN COMPACT" ' The database is being compacted and shut down
oSQL_Statement.executeQuery(stSql)
stMessage = "The database is being compacted." + CHR(13) + "The form will
now close."
stMessage = stMessage + CHR(13) + "Following this, the database file
should be closed."
stMessage = stMessage + CHR(13) + "The database can only be accessed after
reopening the database file."
msgbox stMessage
ThisDatabaseDocument.FormDocuments.getByName( "Maintenance" ).close
REM The closing of the database file causes a recovery operation when you
open it again.
' ThisDatabaseDocument.close(True)
END SUB
Decreasing the table index for autovalue fields
If a lot of data is deleted from a table, users are often concerned that the sequence of automatically
generated primary keys simply continues upwards instead of starting again at the highest current
value of the key. The following subroutine reads the currently highest value of the "ID" field in a
table and sets the next initial key value 1 higher than this maximum.
If the primary key field is not called “ID”, the macro must be edited accordingly.
SUB Table_index_down(stTable AS STRING)
REM This subroutine sets the automatically incrementing primary key field
mit the preset name of "ID" to the lowest possible value.
DIM inCount AS INTEGER
DIM inSequence_Value AS INTEGER
oDataSource = ThisComponent.Parent.CurrentController ' Accessible through
the form
IF NOT (oDataSource.isConnected()) THEN
Database tasks expanded using macros 67

oDataSource.connect()
END IF
oConnection = oDataSource.ActiveConnection()
oSQL_Statement = oConnection.createStatement()
stSql = "SELECT MAX(""ID"") FROM """+stTable+"""" ' The highest value in
"ID" is determined
oQuery_result = oSQL_Statement.executeQuery(stSql) ' Query is launched and
the return value stored in the variable oQuery_result
IF NOT ISNULL(oQuery_result) THEN
WHILE oQuery_result.next
inCount = oQuery_result.getInt(1) ' First data field is read
WEND ' next record, in this case none as only one record exists
IF inCount = "" THEN ' If the highest value is not a value, meaning the
table is empty, the highest value is set to -1
inCount = -1
END IF
inSequence_Value = inCount+1 ' The highrst value is increased by 1
REM A new command is prepared for the database. The ID will start
afresh from inCount+1.
REM This statement has no return value, as no record is being read
oSQL_statement = oConnection.createStatement()
oSQL_statement.executeQuery("ALTER TABLE """ + stTable + """ ALTER
COLUMN ""ID"" RESTART WITH " + inSequence_Value + "")
END IF
END SUB
Printing from Base
The standard way of getting a printable document frrom Base is to use a report. Alternatively,
tables and queries can be copied into Calc and prepared for printing there. Of course direct printing
of a form from the screen is also possible.
Printing a report from an internal form
Normally the generation of reports is done from the Base user interface. A click on the report name
launches the preparation of the report. It would be easier of course if the report could be launched
directly from a form.
SUB Reportlaunch
ThisDatabaseDocument.ReportDocuments.getByName("Report").open
END SUB
All the reports are accessed by name from their container ReportDocuments. They are opened
with open. If a report is bound to a query that is filtered through the form, this method allows the
current record to be printed.
Launching, formatting, directly printing and closing a report
It would be even nicer if the report could be sent directly to the printer. The following combination of
procedures adds a few little features. It first selects the active record in the form, reformats the
report so that the text fields are set automatically for the correct height, and then launches the
report. Finally the report is printed and optionally stored as a pdf. And all this happens almost
completely in the background, as the report is switched to invisible directly after the form is opened
and is closed again after printing. Sugestions for the various procedures were made by Andrew
Piontak, Thomas Krumbein and Lionel Elie Mamane.
SUB ReportStart(oEvent AS OBJECT)
DIM oForm AS OBJECT
DIM stSql AS STRING
DIM oDatasource AS OBJECT
DIM oConnection AS OBJECT
DIM oSQL_command AS OBJECT
68 Macros

DIM oReport AS OBJECT
DIM oReportView AS OBJECT
oForm = oEvent.Source.model.parent
stSql = "UPDATE ""Filter"" SET ""Integer"" = '" +
oForm.getInt(oForm.findColumn("ID")) + "' WHERE ""ID"" = TRUE"
oDatasource = ThisComponent.Parent.CurrentController
If NOT (oDatasource.isConnected()) THEN
oDatasource.connect()
END IF
oConnection = oDatasource.ActiveConnection()
oSQL_command = oConnection.createStatement()
oSQL_command.executeUpdate(stSql)
oReport = ThisDatabaseDocument.ReportDocuments.getByName("Reportname").open
oReportView = oReport.CurrentController.Frame.ContainerWindow
oReportView.Visible = False
ReportLineHeightAuto(oReport)
END SUB
The ReportStart procedure is linked to a button in the form. Using this button, the primary key of
the current record can be read. From the event that launches the macro, we can reach the form
(oForm). The name of the primary key field is given here as "ID". Using
oForm.getInt(oForm.findColumn("ID")), the key is read from the field as an integer. This
value is stored in a filter table. The filter table controls a query to ensure that only the current
record will be used for the report.
The report can be opened without reference to the form. It is then accessible as an object
(oReport). The report window is made invisible. Unfortunately it cannot be invisible when it is
called up, so it appears briefly, then is filled with the appropriate content in the background.
Next the ReportLineHeightAuto procedure is launched. This procedure is passed a reference to the
open report as an argument.
The height of the record line can be set automatically at print time. If there is likely to be too much
text in a particular field, the text is truncated and the remainder indicated by a red triangle. When
this is not working, the following procedure will ensure that in all tables with the name “Detail”,
automatic height control will be switched on.
SUB ReportLineHeightAuto(oReport AS OBJECT)
DIM oTables AS OBJECT
DIM oTable AS OBJECT
DIM inT AS INTEGER
DIM inI AS INTEGER
DIM oRows AS OBJECT
DIM oRow AS OBJECT
oTables = oReport.getTextTables()
FOR inT = 0 TO oTables.count() - 1
oTable = oTables.getByIndex(inT)
IF Left$(oTable.name, 6) = "Detail" THEN
oRows = oTable.Rows
FOR inI = 0 TO oRows.count - 1
oRow = oRows.getByIndex(inI)
oRow.IsAutoHeight = True
NEXT inI
ENDIF
NEXT inT
PrintCloseReport(oReport)
END SUB
When the report is created, care must be taken that all fields on the same line of the Detail section
have the same height. Otherwise, the automatic height control can suddenly set a line to double
height.
Once all tables with the name Detail have had automatic height control set, the report is sent to the
printer by the PrintCloseReport procedure.
The Props array contains the values that are associated with a printer in a document. For the print
command, the name of the default printer is important. The report should remain open until the
Database tasks expanded using macros 69

printing is actually completed. This is ensured by giving the printer name and the “Wait until I’m
finished” (Wait) command as arguments.
Sub ReortrintClose(oReport AS OBJECT)
DIM Props
DIM stPrinter AS STRING
Props = oReport.getPrinter()
stPrinter = Props(0).value
DIM arg(1) AS NEW com.sun.star.beans.PropertyValue
arg(0).name = "Name"
arg(0).value = "<" & stPrinter & ">"
arg(1).name = "Wait"
arg(1).value = True
oReport.print(arg())
oReport.close(true)
End Sub
Only when the print has been completely sent to the printer is the document closed.
For printer settings, see the Printer and print settings section from the AOO Wiki.
If, instead of (or in addition to) a print-out, you want a pdf of the document as a security copy, the
storeToURL() method can be used:
Sub ReportPDFstore(oReport AS OBJECT)
DIM stUrl AS STRING
DIM arg(0) AS NEW com.sun.star.beans.PropertyValue
arg(0).name = "FilterName"
arg(0).value = "writer_pdf_Export"
stUrl = "file:///...."
oReport.storeToURL(stUrl, arg())
End Sub
The URL must of course be a complete URL address. Better still, this address should be linked to a
permanent record of the printed document such as an invoice number. Otherwise it could happen
that a security file could simply be overwritten by the next print.
Printing reports from an external form
There are problems when external forms are being used. The reports lie within the *.odb file and
are not available using the datasource browser.
SUB Reportstart(oEvent AS OBJECT)
DIM oFeld AS OBJECT
DIM oForm AS OBJECT
DIM oDocument AS OBJECT
DIM oDocView AS OBJECT
DIM Arg()
oField = oEvent.Source.Model
oForm = oField.Parent
sURL = oForm.DataSourceName
oDocument = StarDesktop.loadComponentFromURL(sURL, "_blank", 0, Arg() )
oDocView = oDocument.CurrentController.Frame.ContainerWindow
oDocView.Visible = False
oDocument.getCurrentController().connect
Wait(100)
oDocument.ReportDocuments.getByName("Report").open
oDocument.close(True)
END SUB
The report is launched from a button on the external form. The button tells the form the path to the
*.odb file: oForm.DataSourceName. Then the file is opened using loadComponentFromUrl.
The file should remain in the background, so the document view is accessed and the interface is
set to Visible = False. Ideally this should have been done directly using the argument list
Arg(), but tests show that this does not give the correct result.
The report cannot be called up immediately from the opened document as the connection is not yet
ready. The report appears with a gray background and then LibreOffice crashes. A short wait of
70 Macros

100 milliseconds solves this problem. Practical tests are necessary to determine the minimum
waiting time. Now the report is launched. As the report will be in a separate text file, the open *.odb
file can be closed again. The oDocument.close(True) method passes this instruction to the
*.odb file. The file will only be closed when it is no longer active, i.e. no more records are to be
passed to the report.
A similar access can be launched from forms within the *.odb file, but in this case the document
should not be closed.
You can obtain good quality prints significantly faster than with the Report Builder by using macros
combined with the mailmerge function or text fields.
Doing a mail merge from Base
Sometimes a report is simply inadequate to produce good-quality letters to addressees. The text
fields in a report are of very limited use in practice. Instead, a mailmerge letter can be created in
Writer. It is not however necessary to open Writer first, do all the entry and customization there and
then print. You can do all that directly from Base, using a macro.
SUB MailmergePrint
DIM oMailMerge AS OBJECT
DIM aProps()
oMailMerge = createunoservice("com.sun.star.text.MailMerge")
The name given for the data source is the one under which the database is registered in LO. This
name need not be identical with the file name. The registered name in this example is “Addresses”.
oMailMerge.DataSourceName = "Addresses"
The path to the mailmerge file must be formatted according to the conventions of your operating
system, in this example an absolute path in a Linux system.
oMailMerge.DocumentURL = ConvertToUrl("home/user/Dokuments/mailmerge.odt")
The type of command is set out. '0' stands for a table, '1' for a query and '2' for a direct SQL
command.
oMailMerge.CommandType = 1
Here a query has been chosen with the name “MailmergeQuery”.
oMailMerge.Command = "MailmergeQuery"
A filter is used to determine which records are to be used for the mailmerge print. This filter might,
for example, be specified using a form control and passed from Base to the macro. Using the
primary key of a record could cause a single document to be printed.
In this example, the field “Gender” in the MailmergeQuery is selected and then searched for
records that have ‘m’ in this field.
oMailMerge.Filter = """Gender""='m'"
Available output types are Printer (1), File (2) and Mail (3). Here for test purposes, an output file is
chosen. This file is stored on the given path. For each mailmerge record there will be one print. To
distinguish this print, the surname field is incorporated into the filename.
oMailMerge.OutputType = 2
oMailMerge.OutputUrl = ConvertToUrl("home/user/Documents")
oMailMerge.FileNameFromColumn = True
oMailMerge.Filenameprefix = "Surname"
oMailMerge.execute(aProps())
END SUB
If the filter is provided with its data via the form, this provides a way of doing mailmerges without
opening Writer.
Database tasks expanded using macros 71

Printing via text fields
Using Insert > Fields > Functions > Placeholder, a model can be created in Writer for a
document that is to be printed in the future. The placeholders should be provided with the same
names as the fields in the database table or query underlying the form from which the macro is
called.
For the simple case, the type to choose for the placeholder is Text.
The path to the model must be provided in the macro. A new document Unknown1.odt is created.
The macro fills the placeholders with the contents of the current record from the query. The open
document can then be edited as required.
The example database Example_database_mailmerge_direct.odb shows how a complete
invoice can be produced with the help of text fields and access to a prepared table within the
model document. Unlike the invoices created with the Report Builder, this type of invoice creation
does not have height limitations for the fields from the table. All text is displayed.
Here is part of the code, mainly supplied by Dpunch:
http://de.openoffice.info/viewtopic.php?f=8&t=45868#p194799
SUB Filling_Textfields
oForm = thisComponent.Drawpage.Forms.MainForm
IF oForm.RowCount = 0 THEN
msgbox "No available record for printing"
EXIT SUB
END IF
The main form is activated. The button that launches the macro could also be used to find the
form. Then the macro establishes that the form actually contains printable data.
oColumns = oForm.Columns
oDB = ThisComponent.Parent
Direct access to the URL from the form is not possible. It must be done using the higher-level
reference to the database.
stDir = Left(oDB.Location,Len(oDB.Location)-Len(oDB.Title))
The database title is separated from the URL
stDir = stDir & "Beispiel_Textfelder.ott"
The model is found and opened
DIM args(0) AS NEW com.sun.star.beans.PropertyValue
args(0).Name = "AsTemplate"
args(0).Value = True
oNewDoc = StarDesktop.loadComponentFromURL(stDir,"_blank",0,args)
The text fields are written in
oTextfields = oNewDoc.Textfields.createEnumeration
DO WHILE oTextfields.hasMoreElements
oTextfield = oTextfields.nextElement
IF oTextfield.supportsService("com.sun.star.text.TextField.JumpEdit") THEN
stColumnname = oTextfield.PlaceHolder
Placeholder represents the text field
IF oColumns.hasByName(stColumnname) THEN
If the name of the text field is the same as the column name in the underlying dataset, the content
of the database is transferred to the field in the text document.
inIndex = oForm.findColumn(stColumnname)
oTextfield.Anchor.String = oForm.getString(inIndex)
END IF
END IF
LOOP
END SUB
72 Macros

Calling applications to open files
This procedure allows a single click in a text field to call up the program that is linked to the
filename suffix in the operating system. In this way internet links can be followed or an email
program launched for a specific address stored in the database.
For this section see also the example database Example_Mail_File_activate.odb.
SUB Website_Mail_activate
DIM oDoc AS OBJECT
DIM oDrawpage AS OBJECT
DIM oForm AS OBJECT
DIM oField AS OBJECT
DIM oShell AS OBJECT
DIM stField AS STRING
oDoc = thisComponent
oDrawpage = oDoc.Drawpage
oForm = oDrawpage.Forms.getByName("form")
oField = oForm.getByName("url_mail")
The content of the named field is read. This could be a web address beginning with 'http://',
an email address beginning with '@' or a path to a document (for example an externally stored
image or PDF file).
stFeld = oField.Text
IF stField = "" THEN
EXIT SUB
END IF
If the field is empty, the macro exits immediately. During data entry, it often happens that fields are
accessed using the mouse, but clicking the field for the purpose of writing into it for the first time
should not lead to the macro code being executed.
Now the field is searched for a '@' character. This would indicate an email address. The email
program should be launched to send mail to this address.
IF InStr(stField,"@") THEN
stField = "mailto:"+stField
If there is no '@', the term is converted into a URL. If this starts with 'http://', we are not
dealing with a file in the local filesystem but with an Internet resource that must be looked up with a
web browser. Otherwise the path will begin with the term 'file:///'.
ELSE
stFeld = convertToUrl(stField)
END IF
Now the program assigned by the operating system to such files is searched for. For the keyword
'mailto:' this is the mail program, for 'http://' the browser, and otherwise the system must
decide using the filename suffix.
oShell = createUnoService("com.sun.star.system.SystemShellExecute")
oShell.execute(stField,,0)
END SUB
Calling a mail program with predefined content
The previous example can be extended to launch a mail program with a predefined subject and
content.
For this section see also the example database Example_Mail_File_activate.odb.
The mail program is launched using 'mailto:recipient?subject= &body= &cc= &bcc= '.
The last two entries are not present in the form. Attachments are not provided for in the definition of
'mailto' but sometimes 'attachment=' works .
Database tasks expanded using macros 73

SUB Mail_activate
DIM oDoc AS OBJECT
DIM oDrawpage AS OBJECT
DIM oForm AS OBJECT
DIM oField1 AS OBJECT
DIM oField2 AS OBJECT
DIM oField3 AS OBJECT
DIM oField4 AS OBJECT
DIM oShell AS OBJECT
DIM stField1 AS STRING
DIM stField2 AS STRING
DIM stField3 AS STRING
DIM stField4 AS STRING
oDoc = thisComponent
oDrawpage = oDoc.Drawpage
oForm = oDrawpage.Forms.getByName("form")
oField1 = oForm.getByName("mail_to")
oField2 = oForm.getByName("mail_subject")
oField3 = oForm.getByName("mail_body")
stField1 = oField1.Text
IF stField1 = "" THEN
msgbox "Missing email address." & CHR(13) &
"Email program would not be activated" , 48, "Send Email"
EXIT SUB
END IF
The conversion to URL is necessary to prevent special characters and line breaks from interfering
with the call. This does however prefix the term 'file:///' to the path. These 8 characters at
the beginning are not transferred.
stField2 = Mid(ConvertToUrl(oFeld2.Text),9)
stField3 = Mid(ConvertToUrl(oFeld3.Text),9)
In contrast to a simple program launch, the details of the mail invocation are given here as part of
the execute call.
oShell = createUnoService("com.sun.star.system.SystemShellExecute")
oShell.execute("mailto:" + stField1 + "?subject=" + stField2 + "&body=" +
stField3,,0)
END SUB
Note
Sending email with the help of a mail program can also be done using the following
code, but the actual content of the email cannot be inserted this way.
DIM attachs(0)
oMailer = createUnoService("com.sun.star.system.SimpleSystemMail")
oMailProgramm = oMailer.querySimpleMailClient()
oNewmessage = oMailProgramm.createSimpleMailMessage()
oNeemessage.setRecipient(stField1)
oNewmessage.setSubject(stField2)
attachs(0) = "file:///..."
oNeueNachricht.setAttachement(attachs())
oMailprogramm.sendSimpleMailMessage(oNeuenachricht, 0 )
For possible parameters see:
http://api.libreoffice.org/docs/idl/ref/interfacecom_1_1sun_1_1star_1_1system_1_1X
SimpleMailMessage.html
Changing the mouse pointer when traversing a link
This is normal on the Internet and Base recreates it: the mouse pointer traverses a link and
changes into a pointing hand. The link text might also change its properties, becoming blue and
74 Macros

underlined. The resemblance to an Internet link is perfect. Any user will expect a click to open an
external program.
For this section see the example database Example_Mail_File_activate.odb.
This short procedure should be bound to the textbox’s 'Mouse inside' event
SUB Mouse_pointer(Event AS OBJECT)
REM See also Standardlibraries: Tools → ModuleControls → SwitchMousePointer
DIM oPointer AS OBJECT
oPointer = createUnoService("com.sun.star.awt.Pointer")
oPointer.setType(27)'Types see com.sun.star.awt.SystemPointer
Event.Source.Peer.SetPointer(oPointer)
END SUB
Showing forms without a toolbar
New Base users are often irritated that a menubar exists but is not usable within a form. These
menubars can be removed in various ways. The best ways in all LO versions are the two described
below.
Window sizes and toolbars are usually controlled by a macro that is launched from a form
document using Tools > Customize > Events > Open Document. This refers to the whole
document, not an individual main or subform.
Forms without a toolbar in the window
The size of a window can be varied. Using the appropriate button it can also be closed. These
tasks are carried out by your system’s window manager. The position and size of a window on the
screen can be supplied by a macro when the program starts.
SUB Hide_toolbar
DIM oFrame AS OBJECT
DIM oWin AS OBJECT
DIM oLayoutMng AS OBJECT
DIM aElements()
oFrame = StarDesktop.getCurrentFrame()
The form title is to be shown in the window’s title bar.
oFrame.setTitle "My Form"
oWin = oFrame.getContainerWindow()
The window is maximized. This is not the same thing as full-screen mode, since the taskbar is still
visible and the window has a title bar, which can be used to change its size or close it..
oWin.IsMaximized = true
It is possible to create a window with a specific size and position. This is carried out with
'oWin.setPosSize(0,0,600,400,15)'. Here the window appears at the top left corner of the
screen with a width of 600 pixels and a height of 400. The last number indicates that all pixels are
given. It is called 'Flag'. 'Flag' is calculated from the sum of the following values: x=1, y=2,
breadth=4, height=8. As x, y, breadth and height are all given, 'Flag' has the size 1+2+4+8=15.
oLayoutMng = oFrame.LayoutManager
aElements = oLayoutMng.getElements()
FOR i = LBound(aElements) TO UBound(aElements)
IF aElements(i).ResourceURL =
"private:resource/toolbar/formsnavigationbar" THEN
ELSE
oLayoutMng.hideElement(aElements(i).ResourceURL)
END IF
NEXT
END SUB
Database tasks expanded using macros 75

In the case of a form navigation bar, nothing is to be done. The form must after all remain usable in
cases where a navigation bar control has not been built in (which would cause the navigation bar
to be hidden anyway). Only toolbars other than the navigation bar should be hidden. For this
reason there is no action for this case.
If the toolbars are not restored directly after leaving the form, they will still be hidden. They can of
course be restored using View > Toolbars. But it would be rather annoying if the standard toolbar
(View > Toolbars > Standard) or the status bar (View > Status Bar) was missing.
This procedure restores ('showElement') the toolbars from their hidden state
('hideElement'). The comments contain the bars whose absence is most likely to be noticed.
SUB Show_toolbar
DIM oFrame AS OBJECT
DIM oLayoutMng AS OBJECT
DIM aElements()
oFrame = StarDesktop.getCurrentFrame()
oLayoutMng = oFrame.LayoutManager
aElements = oLayoutMng.getElements()
FOR i = LBound(aElements) TO UBound(aElements)
oLayoutMng.showElement(aElements(i).ResourceURL)
NEXT
' important elements which may be absent:
' "private:resource/toolbar/standardbar"
' "private:resource/statusbar/statusbar"
END SUB
The macros are bound to: Tools > Customize > Events > Open Document > Hide_toolbar and
Close Document > Show_toolbar.
Unfortunately the toolbars often fail to come back. In the worst cases, it can be helpful not to read
out those elements that the layout manager already knows, but first to create particular toolbars
and then show them:
Sub Hide_toolbar
DIM oFrame AS OBJECT
DIM oLayoutMng AS OBJECT
DIM i AS INTEGER
DIM aElements(5) AS STRING
oFrame = StarDesktop.getCurrentFrame()
oLayoutMng = oFrame.LayoutManager
aElements(0) = "private:resource/menubar/menubar"
aElements(1) = "private:resource/statusbar/statusbar"
aElements(2) = "private:resource/toolbar/formsnavigationbar"
aElements(3) = "private:resource/toolbar/standardbar"
aElements(4) = "private:resource/toolbar/formdesign"
aElements(5) = "private:resource/toolbar/formcontrols"
FOR EACH i IN aElemente()
IF NOT(oLayoutMng.requestElement(i)) THEN
oLayoutMng.createElement(i)
END IF
oLayoutMng.showElement(i)
NEXT i
END SUB
The toolbars that are to be created are named explicitly. If a corresponding toolbar is not available
to the layout manager, it is created using createElement and then displayed using
showElement.
Forms in full-screen mode
In full-screen mode, the whole screen is covered by the form. There is no taskbar or other
elements which might show if other programs are running.
FUNCTION Fullscreen(boSwitch AS BOOLEAN)
76 Macros

DIM oDispatcher AS OBJECT
DIM Props(0) AS NEW com.sun.star.beans.PropertyValue
oDispatcher = createUnoService("com.sun.star.frame.DispatchHelper")
Props(0).Name = "FullScreen"
Props(0).Value = boSwitch
oDispatcher.executeDispatch(ThisComponent.CurrentController.Frame,
".uno:FullScreen", "", 0, Props())
END FUNCTION
This function is launched using the following procedure. In the procedure, the previous procedure
also runs simultaneously to remove the toolbars – otherwise the toolbar will appear and the full-
screen mode can be switched off using it. This is also a toolbar, although it has only one symbol.
SUB Fullscreen_on
Fullscreen(true)
Hide_toolbar
END SUB
You exit from full-screen mode by pressing the 'ESC'key. If instead, a specific button is to be used
for this command, the following line can be used:
SUB Fullscreen_off
Fullscreen(false)
Show_toolbar
END SUB
Launching forms directly from the opening of the database
When the toolbars are gone or a form is to be shown in full-screen mode, the database file must
launch the form directly when it opens. Unfortunately a simple command to open a form will not
work, as the database connection does not yet exist when the file is opened.
The following macro is launched from Tools > Customize > Events > Open Document. Use the
option Save in > Databasefile.odb.
SUB Form_Directstart
DIM oDatasource AS OBJECT
oDatasource = ThisDatabaseDocument.CurrentController
If NOT (oDatasource.isConnected()) THEN
oDatasource.connect()
END IF
ThisDatabaseDocument.FormDocuments.getByName("Formname").open
END SUB
First a connection to the database must be made. The controller is part of
ThisDatabaseDocument, just as the form is. Then the form can be launched and can read its
data out of the database.
Accessing a MySQL database with macros
All the macros shown up to now have been part of an internal HSQLDB database. When working
with external databases, a few changes and extensions are necessary.
MySQL code in macros
When the internal database is being accessed, tables and fields must be enclosed in duplicate
double quotes, compared with the SQL:
SELECT "Field" FROM "Table"
As these SQL commands must be prepared inside macros, the double quotes must be masked:
stSQL = "SELECT ""Field"" FROM ""Table"""
MySQL queries use a different form of masking:
Accessing a MySQL database with macros 77
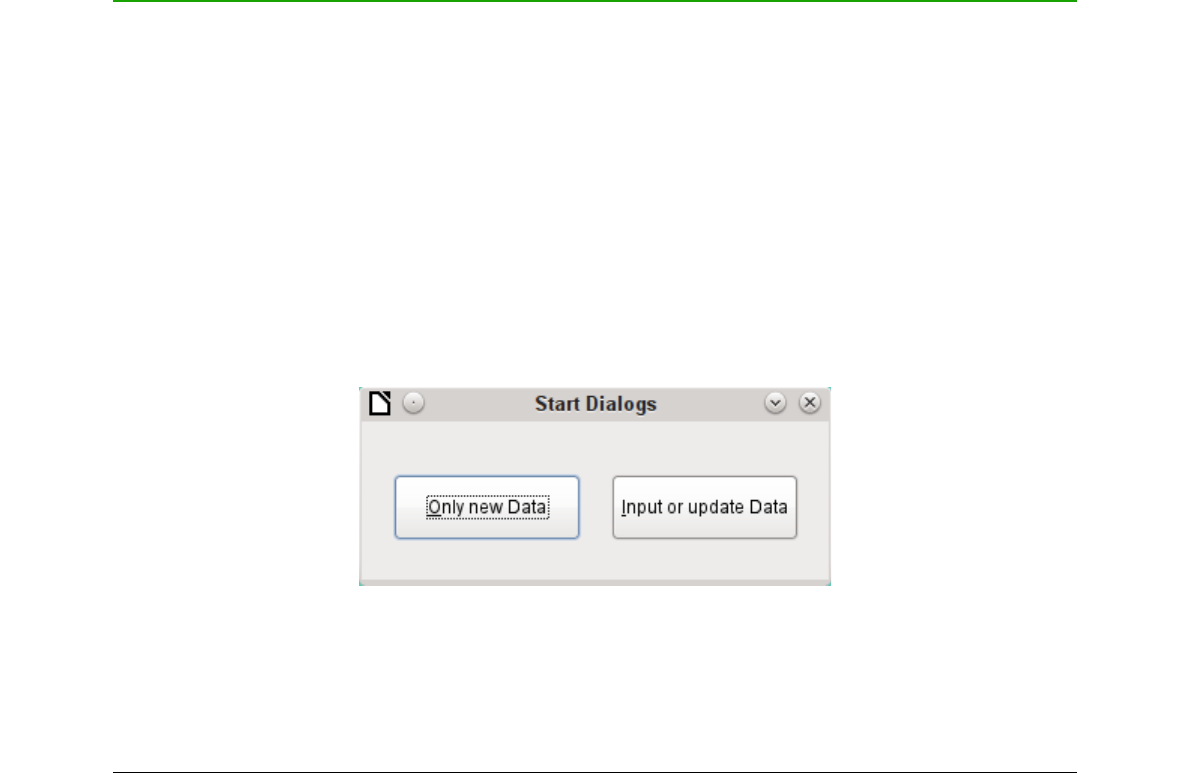
SELECT `Field` FROM `Database`.`Table`
Inside the macro code, this form of masking appears as:
stSql = "SELECT `Field` FROM `Database`.`Table`"
Temorary tables as individual intermediate storage
In the previous chapter, a one-line table was frequently used for searching or filtering tables. This
will not work in a multi-user system, as other users would then be dependent on someone else’s
filter value. Temporary tables in MySQL are only accessible to the user of the active connection, so
these tables can be accessed for searching and filtering.
Naturally such tables cannot be created in advance. They must be created when the Base file is
opened. Therefore the following macro should be bound to the opening of the *.odb file.
SUB CreateTempTable
oDatasource = thisDatabaseDocument.CurrentController
IF NOT (oDatasource.isConnected()) THEN oDatasource.connect()
oConnection = oDatasource.ActiveConnection()
oSQL_Statement = oConnection.createStatement()
stSql = "CREATE TEMPORARY TABLE IF NOT EXISTS `Searchtmp` (`ID` INT PRIMARY KEY,
`Name` VARCHAR(50))"
oSQL_Statement.executeUpdate(stSql)
END SUB
When the *.odb file is first opened, there is no connection to an external MySQL database. The
connection must be created. Then a temporary table with the necessary fields can be set up.
Dialogs
In Base you can use dialogs rather than forms for data entry, data modification or database
maintenance. Dialogs can be directly customized for the current application environment, but
naturally they are not as comfortably defined in advance as forms are. Here is a short introduction
ending in a quite complicated example for use in database maintenance.
Launching and ending dialogs
First the dialog must be created on the appropriate computer. This is done using Tools > Macros >
Organize Dialogs > Database filename > Standard > New. The dialog apears with a continuous
gray surface and a titlebar with a close icon. This empty dialog can now be called up and then
closed again.
When the dialog is clicked, there is a possibility under general properties to set a size and position.
Also the content of the title “Start Dialogs“ can be entered.
The toolbar at the bottom edge of the window contains various form controls. From this, two
buttons have been selected for our dialog, allowing it to launch other dialogs. The editing of content
and the binding of macros to events is carried out in the same way as for buttons in forms.
78 Macros

The positioning of variable declarations for dialogs requires special care. The dialog is declared as
a global variable so that it can be accessed by different procedures. In this case, the dialog is
called oDialog0 because there will be further dialogs with higher sequence numbers.
DIM oDialog0 AS OBJECT
First the library for the dialog is loaded. It is in the Standard directory, if no other name was chosen
when the dialog was created. The dialog itself can be reached in this library by using the name
“Dialog0”. Execute() launches the dialog.
SUB Dialog0Start
DialogLibraries.LoadLibrary("Standard")
oDialog0 = createUnoDialog(DialogLibraries.Standard.Dialog0)
oDialog0.Execute()
END SUB
In principle, a dialog can be closed using the close button on the frame. However if you want
another specific button for this, the command EndExecute() should be used within the
procedure.
SUB Dialog0Ende
oDialog0.EndExecute()
END SUB
Within this framework, any number of dialogs can be launched and closed again.
Simple dialog for entering new records
This dialog is a first step for the following dialog for editing records. First the basic approach to
managing tables is clarified. Here we are dealing with the storage of records with new primary keys
or the complete new entry of records. How far a little dialog like this can suffice for input into a
particular database depends on the requirements of the user.
DIM oDialog1 AS OBJECT
directly creates a global variable for the dialog at the top level of the module before all procedures.
The dialog is opened and closed in the same way as for the previous dialog. Only the name is
changed from Dialog0 to Dialog1. The procedure for closing the dialog is bound to the Exit button.
The New button is used to clear all controls in the dialog from earlier entries, using the
DatafieldsClear procedure.
SUB DatafieldsClear
oDialog1.getControl("NumericField1").Text = ""
oDialog1.getControl("TextField1").Text = ""
oDialog1.getControl("TextField2").Text = ""
END SUB
Dialogs 79

Each control that has been inserted into a dialog is accessible by name. The user interface will
ensure that names are not duplicated, which is not the case with controls in a form.
The getControl method is used with the name of the control. Numeric fields too have a Text
property which can be used here. That is the only way a numeric field can be emptied. Empty text
exists but there is no such thing as an empty number. Instead a 0 must be written in the primary
key field.
The
Save
Save button launches the Data1Save procedure:
SUB Data1Save
DIM oDatasource AS OBJECT
DIM oConnection AS OBJECT
DIM oSQL_Command AS OBJECT
DIM loID AS LONG
DIM stForename AS STRING
DIM stSurname AS STRING
loID = oDialog1.getControl("NumericField1").Value
stForename = oDialog1.getControl("TextField1").Text
stSurname = oDialog1.getControl("TextField2").Text
IF loID > 0 AND stSurname <> "" THEN
oDatasource = thisDatabaseDocument.CurrentController
If NOT (oDatasource.isConnected()) THEN
oDatasource.connect()
END IF
oConnection = oDatasource.ActiveConnection()
oSQL_Command = oConnection.createStatement()
stSql = "SELECT ""ID"" FROM ""name"" WHERE ""ID"" = '"+loID+"'"
oResult = oSQL_Command.executeQuery(stSql)
WHILE oResult.next
MsgBox ("The value for field 'ID' already exist",16,
"Duplicate Value")
EXIT SUB
WEND
stSql = "INSERT INTO ""name"" (""ID"", ""forename"", ""surname"")
VALUES ('"+loID+"','"+stForename+"','"+stSurname+"')"
oSQL_Command.executeUpdate(stSql)
DatafieldsClear
END IF
END SUB
As in the DatafieldsClear procedure, the entry fields are accessed. This time the access is for
reading only. Only if the ID field has an entry greater than 0 and the Surname field also contains
text will the record be passed on. A null value for the ID can be excluded because a numeric
variable for integer numbers is always initialized to 0. An empty field is therefore stored with a zero
value.
If both fields have been supplied with content, a connection is made to the database. As the
controls are not in a form, the database connection must be made using
thisDatabaseDocument.CurrentController.
First the database is queried to see if a record with the given primary key already exists. If this
query produces a result, a message box appears containing a Stop symbol (code: 16) and the
message “Duplicate record entry”. Then the procedure exits with Exit SUB.
If the query finds no record with the same primary key, the new record is inserted into the database
using the insert command. Then the DatafieldsClear procedure is called to provide a new empty
form.
80 Macros

Dialog for editing records in a table
This dialog clearly offers more possibilities than the previous one. Here all records can be
displayed and you can navigate through them, create new ones or delete records. Naturally the
code is much more complicated.
The
Exit
Exit button is bound to the procedure, modified for Dialog2, which was described in the
previous dialog for entering new records. Here the remaining buttons and their functions are
described.
Data entry in the dialog is restricted in that the ID field must have a minimum value of ‘1’. This
limitation has to do with the handling of variables in Basic: numeric variables are by definition
initialized to ‘0’. Therefore if numeric values from empty fields and those from fields containing ‘0’
are read out, Basic can detect no difference between them. This means that if a ‘0’ were to be used
in the “ID“ field, it would have to be read first as text and perhaps converted to a number later.
The dialog is loaded under the same conditions as before. However the loading procedure is made
dependent on a zero value for the variable passed by the “DataLoad“ procedure.
SUB DataLoad(loID AS LONG)
DIM oDatasource AS OBJECT
DIM oConnection AS OBJECT
DIM oSQL_Command AS OBJECT
DIM stForename AS STRING
DIM stSurname AS STRING
DIM loRow AS LONG
DIM loRowMax AS LONG
DIM inStart AS INTEGER
oDatasource = thisDatabaseDocument.CurrentController
If NOT (oDatasource.isConnected()) THEN
oDatasource.connect()
END IF
oConnection = oDatasource.ActiveConnection()
oSQL_Command = oConnection.createStatement()
IF loID < 1 THEN
stSql = "SELECT MIN(""ID"") FROM ""name"""
oResult = oSQL_Command.executeQuery(stSql)
WHILE oResult.next
loID = oResult.getInt(1)
WEND
inStart = 1
END IF
The variables are declared. The database connection for the dialog is established as described
above. At the beginning, loID is 0. This case provides the lowest primary key value allowed by
SQL. The corresponding record will later be displayed in the dialog. At the same time the inStart
variable is set to ‘1’, so that the dialog can be launched later. If the table does not contain any
Dialogs 81

records, loID will remain 0. In that case, there will be no need to search for the number and
contents of any corresponding records.
Only if loID is greater than 0 will a query test to see which records are available in the database.
Then a second query will count all records that are to be displayed. The third query gives the
position of the current record by counting all records with the current primary key or less.
IF loID > 0 THEN
stSql = "SELECT * FROM ""name"" WHERE ""ID"" = '"+loID+"'"
oResult = oSQL_Command.executeQuery(stSql)
WHILE oResult.next
loID = oResult.getInt(1)
stForename = oResult.getString(2)
stSurname = oResult.getString(3)
WEND
stSql = "SELECT COUNT(""ID"") FROM ""name"""
oResult = oSQL_Command.executeQuery(stSql)
WHILE oResult.next
loRowMax = oResult.getInt(1)
WEND
stSql = "SELECT COUNT(""ID"") FROM ""name"" WHERE ""ID"" <= '"+loID+"'"
oResult = oSQL_Command.executeQuery(stSql)
WHILE oResult.next
loRow = oResult.getInt(1)
WEND
oDialog2.getControl("NumericField1").Value = loID
oDialog2.getControl("TextField1").Text = stForename
oDialog2.getControl("TextField2").Text = stSurname
END IF
oDialog2.getControl("NumericField2").Value = loRow
oDialog2.getControl("NumericField3").Value = loRowMax
IF loRow = 1 THEN
' previous Row
oDialog2.getControl("CommandButton4").Model.enabled = False
ELSE
oDialog2.getControl("CommandButton4").Model.enabled = True
END IF
IF loRow <= loRowMax THEN
' next Row | new Row | delete
oDialog2.getControl("CommandButton5").Model.enabled = True
oDialog2.getControl("CommandButton2").Model.enabled = True
oDialog2.getControl("CommandButton6").Model.enabled = True
ELSE
oDialog2.getControl("CommandButton5").Model.enabled = False
oDialog2.getControl("CommandButton2").Model.enabled = False
oDialog2.getControl("CommandButton6").Model.enabled = False
END IF
IF inStart = 1 THEN
oDialog2.Execute()
END IF
END SUB
The retrieved values are transferred to the dialog fields. The entries for the current record number
and the total number of records retrieved are always written in, replacing the default numeric value
of 0.
The navigation buttons (CommandButton5 and CommandButton4) are only usable when it is
possible to reach the corresponding record. Otherwise they are temporarily deactivated with
enabled = False. The same is true for the New and Delete buttons. They should not be
available when the number of the displayed row is higher than the maximum number of rows that
was determined. This is the default setting of this dialog when entering records.
If possible, the dialog should only be launched when it is to be created directly from a starting file
using DataLoad(0). That is why the special variable inStart is given the value 1 at the
beginning of the procedure.
82 Macros

The
<
< button is used to navigate to the previous record. Therefore this button is active only when
the record displayed is not the first in the list. Navigation requires the primary key for the current
record to be read from the field NumericField1.
Here there are two possible cases:
1) You are moving forward to a new entry, so that the corresponding field has no value. In this
case, loID has the default value which, according to the definition of an integer variable, is
0.
2) Otherwise loID will contain a value that is greater than 0. Then a query can determine the
ID value directly below the current one.
SUB PreviousRow
DIM loID AS LONG
DIM loIDnew AS LONG
loID = oDialog2.getControl("NumericField1").Value
oDatasource = thisDatabaseDocument.CurrentController
If NOT (oDatasource.isConnected()) THEN
oDatasource.connect()
END IF
oConnection = oDatasource.ActiveConnection()
oSQL_Command = oConnection.createStatement()
IF loID < 1 THEN
stSql = "SELECT MAX(""ID"") FROM ""name"""
ELSE
stSql = "SELECT MAX(""ID"") FROM ""name"" WHERE ""ID"" < '"+loID+"'"
END IF
oResult = oSQL_Command.executeQuery(stSql)
WHILE oResult.next
loIDnew = oResult.getInt(1)
WEND
IF loIDnew > 0 THEN
DataLoad(loIDnew)
END IF
END SUB
If the ID field is empty, the display should change to the highest value of the primary key number.
If, on the other hand, the ID field refers to a record, the previous value of ID should be returned.
The result of this query is used to run the DataLoad procedure again with the corresponding key
value.
The
>
> button is used to navigate to the next record. This possibility should exist only when the
dialog has not been emptied for the entry of a new record. This will naturally be the case when the
dialog is launched and also with an empty table.
A value in NumericField1 is mandatory. Starting from this value, SQL can determine which primary
key is the next highest in the table. If the query’s result set is empty because there is no
corresponding record, the value for loIDnew = 0. Otherwise the content of the next record is
read using “DataLoad”.
SUB NextRow
DIM loID AS LONG
DIM loIDnew AS LONG
loID = oDialog2.getControl("NumericField1").Value
oDatasource = thisDatabaseDocument.CurrentController
If NOT (oDatasource.isConnected()) THEN
oDatasource.connect()
END IF
oConnection = oDatasource.ActiveConnection()
oSQL_Command = oConnection.createStatement()
stSql = "SELECT MIN(""ID"") FROM ""name"" WHERE ""ID"" > '"+loID+"'"
oResult = oSQL_Command.executeQuery(stSql)
WHILE oResult.next
loIDnew = oResult.getInt(1)
WEND
Dialogs 83

IF loIDnew > 0 THEN
DataLoad(loIDnew)
ELSE
Datafields2Clear
END IF
END SUB
If when navigating to the next record, there is no further record, the navigation key launches the
following procedure Datafields2Clear, which serves to prepare for the input of a new record.
The Datafields2Clear procedure does not just empty the data fields themselves. The position of the
current record is set to one higher than the maximum record number, making it clear that the
record currently being worked on is not yet included in the database.
As soon as Datafields2Clear has been launched, the possibility of jumping to the previous record is
activated, Jumps to a following record, and the use of the procedures for
New
New and
Delete
Delete are
deactivated.
SUB Datafields2Clear
loRowMax = oDialog2.getControl("NumericField3").Value
oDialog2.getControl("NumericField1").Text = ""
oDialog2.getControl("TextField1").Text = ""
oDialog2.getControl("TextField2").Text = ""
oDialog2.getControl("NumericField2").Value = loRowMax + 1
oDialog2.getControl("CommandButton4").Model.enabled = True ' Previous record
oDialog2.getControl("CommandButton5").Model.enabled = False ' Next record
oDialog2.getControl("CommandButton2").Model.enabled = False ' New record
oDialog2.getControl("CommandButton6").Model.enabled = False ' Delete
END SUB
Saving records should only be possible when the ID and Surname fields contain entries. If this
condition is met, the procedure tests whether this is a new record. This makes use of the record
pointer which is set for new records to be one higher than the maximum number of records
For new records, checks are made to ensure that the save operation will be successful. If the
number used for the primary key has been used before, a warning is displayed. If the associated
question is answered with
Yes
Yes, the existing record with this number is overwritten. Otherwise, the
save will be aborted. If there are no existing entries in the database (loRowMax = 0), this test is
unnecessary and the new record can be saved directly. For a new record, the number of records is
incremented by 1 and the entries are cleared for the next record.
Existing records are simply overwritten with an update command.
SUB Data2Save(oEvent AS OBJECT)
DIM oDatasource AS OBJECT
DIM oConnection AS OBJECT
DIM oSQL_Command AS OBJECT
DIM oDlg AS OBJECT
DIM loID AS LONG
DIM stForename AS STRING
DIM stSurname AS STRING
DIM inMsg AS INTEGER
DIM loRow AS LONG
DIM loRowMax AS LONG
DIM stSql AS STRING
oDlg = oEvent.Source.getContext()
loID = oDlg.getControl("NumericField1").Value
stForename = oDlg.getControl("TextField1").Text
stSurname = oDlg.getControl("TextField2").Text
IF loID > 0 AND stSurname <> "" THEN
oDatasource = thisDatabaseDocument.CurrentController
If NOT (oDatasource.isConnected()) THEN
oDatasource.connect()
END IF
oConnection = oDatasource.ActiveConnection()
oSQL_Command = oConnection.createStatement()
loRow = oDlg.getControl("NumericField2").Value
loRowMax = oDlg.getControl("NumericField3").Value
84 Macros

IF loRowMax < loRow THEN
IF loRowMax > 0 THEN
stSql = "SELECT ""ID"" FROM ""name"" WHERE ""ID"" = '"+loID+"'"
oResult = oSQL_Command.executeQuery(stSql)
WHILE oResult.next
inMsg = MsgBox ("The value for field 'ID' already exist." &
CHR(13) & "Should the row be updated?",20,
"Duplicate Value")
IF inMsg = 6 THEN
stSql = "UPDATE ""name"" SET ""forename""='"+stForename+"',
""surname""='"+stSurname+"' WHERE ""ID"" = '"+loID+"'"
oSQL_Command.executeUpdate(stSql)
DataLoad(loID) ' With update a row has been rewritten. Rowcount
must be resetted
END IF
EXIT SUB
WEND
END IF
stSql = "INSERT INTO ""name"" (""ID"", ""forename"", ""surname"") VALUES
('"+loID+"','"+stForename+"','"+stSurname+"')"
oSQL_Command.executeUpdate(stSql)
oDlg.getControl("NumericField3").Value = loRowMax + 1
' After instert one row is added
Datafields2Clear
' After insert would be moved to next insert
ELSE
stSql = "UPDATE ""name"" SET ""forename""='"+stForename+"',
""surname""='"+stSurname+"' WHERE ""ID"" = '"+loID+"'"
oSQL_Command.executeUpdate(stSql)
END IF
END IF
END SUB
The delete procedure is provided with a supplementary question to prevent accidental deletions.
Since this button is deactivated when the entry fields are empty, an empty NumericField1 should
never occur. Therefore the check condition IF loID > 0 can be omitted.
Deletion causes the number of records to be decremented by 1. This must be corrected using
loRowMax – 1. Then the record following the current one is displayed.
SUB DataDelete(oEvent AS OBJECT)
DIM oDatasource AS OBJECT
DIM oConnection AS OBJECT
DIM oSQL_Command AS OBJECT
DIM oDlg AS OBJECT
DIM loID AS LONG
oDlg = oEvent.Source.getContext()
loID = oDlg.getControl("NumericField1").Value
IF loID > 0 THEN
inMsg = MsgBox ("Should current data be deleted?",20,
"Delete current row")
IF inMsg = 6 THEN
oDatasource = thisDatabaseDocument.CurrentController
If NOT (oDatasource.isConnected()) THEN
oDatasource.connect()
END IF
oConnection = oDatasource.ActiveConnection()
oSQL_Command = oConnection.createStatement()
stSql = "DELETE FROM ""name"" WHERE ""ID"" = '"+loID+"'"
oSQL_Command.executeUpdate(stSql)
loRowMax = oDlg.getControl("NumericField3").Value
oDlg.getControl("NumericField3").Value = loRowMax - 1
NextRow
END IF
ELSE
MsgBox ("No row deleted." & CHR(13) &
"No data selected.",64,"Delete impossible")
END IF
Dialogs 85

END SUB
This little dialog has shown that the use of macro code can provide a basis for processing records.
Access via forms is much easier, but a dialog can be very flexible in adapting to the requirements
of the program. However it is not suitable for the quick creation of a database interface.
Using a dialog to clean up bad entries in tables
Input errors in fields are often only noticed later. Often it is necessary to modify identical entries in
several records at the same time. It is awkward to have to do this in normal table view, especially
when several records must be edited, as each record requires an individual entry to be made.
Forms can use macros to do this kind of thing, but to do it for several tables, you would need
identically constructed forms. Dialogs can do the job. A dialog can be supplied at the beginning
with the necessary data for appropriate tables and can be called up by several different forms.
Dialogs are saved along with the modules for macros. Their creation is similar to that of a form.
Very similar control fields are available. Only the table control of forms is absent as a special entry
possibility.
The appearance of dialog controls is determined by the settings for the graphical user interface.
The dialog shown above serves in the example database to edit tables which are not used directly
as the basis of a form. So, for example, the media type is accessible only through a listbox (in the
86 Macros

macro version it becomes a combobox). In the macro version, the field contents can be expanded
by new content but an alteration of existing content is not possible. In the version without macros,
alterations are carried out using a separate table control.
While alterations in this case are easy to carry out without macros, it is quite difficult to change the
media type of many media at once. Suppose the following types are available: "Book, bound",
"Book, hard-cover", "Paperback" and "Ringfile". Now it turns out, after the database has been in
use for a long time, that more active contemporaries foresaw similar additional media types for
printed works. The task of differentiating them has become excessive. We therefore wish to reduce
them, preferably to a single term. Without macros, the records in the media table would have to be
found (using a filter) and individually altered. If you know SQL, you can do it much better using a
SQL command. You can change all the records in the Media table with a single entry. A second
SQL command then removes the now surplus media types which no longer have any link to the
Media table. Precisely this method is applied using this dialog's Replace With box – only the SQL
command is first adapted to the Media Type table using a macro that can also edit other tables.
Often entries slip into a table which with hindsight can be changed in the form, and so are no
longer needed. It does no harm simply to delete such orphaned entries, but they are quite hard to
find using the graphical user interface. Here again a suitable SQL command is useful, coupled with
a delete instruction. This command for affected tables is included in the dialog under Delete all
superfluous entries.
If the dialog is to be used to carry out several changes, this is indicated by the Edit multiple records
checkbox. Then the dialog will not simply terminate when the OK button is clicked.
The macro code for this dialog can be seen in full in the example database. Only excerpts are
explained below.
SUB Table_purge(oEvent AS OBJECT)
The macro should be launched by entering into the Additional information section for the relevant
buttons:
0: Form, 1: Subform, 2: SubSubform, 3: Combobox or table control, 4: Foreign
key field in a form, empty for a table control, 5: Table name of auxiliary
table, 6: Table field1 of auxiliary table, 7: Table field2 of auxiliary
table, or 8: Table name of auxiliary table for table field2
The entries in this area are listed at the beginning of the macro as comments. The numbers bound
to them are transferred and the relevant entry is read from an array. The macro can edit listboxes,
which have two entries, separated by ">". These two entries can also come from different tables
and be brought together using a query, as for instance in the Postcode table, which has only the
foreign key field Town_ID for the town, requiring the Town table to display the names of towns.
DIM aForeignTable(0, 0 to 1)
DIM aForeignTable2(0, 0 to 1)
Among the variables defined at the beginning are two arrays. While normal arrays can be created
by the Split() command during execution of the subroutine, two-dimensional arrays must be
defined in advance. Two-dimensional arrays are necessary to store several records from one query
when the query itself refers to more than one field. The two arrays declared above must be able to
interpret queries that refer to two table fields. Therefore they are defined for two different contents
by using 0 to 1 for the second dimension.
stTag = oEvent.Source.Model.Tag
aTable() = Split(stTag, ", ")
FOR i = LBound(aTable()) TO UBound(aTable())
aTable(i) = trim(aTable(i))
NEXT
The variables provided are read. The sequence is that set up in the comment above. There is a
maximum of nine entries, and you need to declare if an eighth entry for the table field2 and a
nineth entry for a second table exist.
Dialogs 87

If values are to be removed from a table, it is first necessary to check that they do not exist as
foreign keys in some other table. In simple table structures a given table will have only one foreign
key connection to another table. However, in the given example database, there is a Town table
which is used for both the place of publication of media and the town for addresses. Thus the
primary key of the Town table is entered twice into different tables. These tables and foreign key
names can naturally also be entered using the Additional Information field. It would be nicer though
if they could be provided universally for all cases. This can be done using the following query.
stSql = "SELECT ""FKTABLE_NAME"", ""FKCOLUMN_NAME"" FROM
""INFORMATION_SCHEMA"".""SYSTEM_CROSSREFERENCE"" WHERE ""PKTABLE_NAME"" = '"
+ aTable(5) + "'"
In the database, the INFORMATION_SCHEMA area contains all information about the tables of the
database, including information about foreign keys. The tables that contain this information can be
accessed using "INFORMATION_SCHEMA"."SYSTEM_CROSSREFERENCE". KTABLE_NAME"
gives the table that provides its primary key for the connection. FKTABLE_NAME gives the table
that uses this primary key as a foreign key. Finally FKCOLUMN_NAME gives the name of the
foreign key field.
The table that provides its primary key for use as a foreign key is in the previously created array at
position 6. A the count begins with 0, the value is read from the array using aTable(5).
inCount = 0
stForeignIDTab1Tab2 = "ID"
stForeignIDTab2Tab1 = "ID"
stAuxiltable = aTable(5)
Before the reading of the arrays begins, some default values must be set. These are the index for
the array in which the values from the auxiliary table will be written, the default primary key if we do
not need the foreign key for a second table, and the default auxiliary table, linked to the main table,
for postcode and town, the Postcode table.
When two fields are linked for display in a listbox, they can, as described above, come from two
different tables. For the display of Postcode and town the query is:
SELECT "Postcode"."Postcode" || ' > ' || "Town"."Town" FROM "Postcode", "Town" WHERE
"Postcode"."Town_ID" = "Town"."ID"
The table for the first field (Postcode), is linked to the second table by a foreign key. Only the
information from these two tables and the Postcode and Town fields is passed to the macro. All
primary keys are by default called ID in the example database. The foreign key of Town in
Postcode must therefore be determined using the macro.
In the same way the macro must access each table with which the content of the listbox is
connected by a foreign key.
oQuery_result = oSQL_Statement.executeQuery(stSql)
IF NOT ISNULL(oQuery_result) THEN
WHILE oQuery_result.next
ReDim Preserve aForeignTable(inCount,0 to 1)
The array must be freshly dimensioned each time. In order to preserve the existing contents, they
are backed up using (Preserve).
aForeignTables(inCount,0) = oQuery_result.getString(1)
Reading the first field with the name of the table which contains the foreign key. The result for the
Postcode table is the Address table.
aForeignTables(inCount,1) = oQuery_result.getString(2)
Reading the second field with the name of the foreign key field. The result for the Postcode table is
the field Postcode_ID in the Address table.
In cases where a call to the subroutine includes the name of a second table, the following loop is
run. Only when the name of the second table occurs as the foreign key table for the first table is
88 Macros

the default entry changed. In our case this does not occur, as the Town table has no foreign key
from the Postcode table. The default entry for the auxiliary table therefore remains Postcode; finally
the combination of postcode and town is a basis for the Address table, which contains a foreign
key from the Postcode table.
IF UBound(aTable()) = 8 THEN
IF aTable(8) = aForeignTable(inCount,0) THEN
stForeignIDTab2Tab1 = aForeignTable(inCount,1)
stAuxiltable = aTable(8)
END IF
END IF
inCount = inCount + 1
As further values may need to be read in, the index is incremented to redimension the arrays. Then
the loop ends.
WEND
END IF
If, when the subroutine is called, a second table name exists, the same query is launched for this
table:
IF UBound(aTable()) = 8 THEN
It runs identically except that the loop tests whether perhaps the first table name occurs as a
foreign key table name. That is the case here: the Postcode table contains the foreign key
Town_ID from the Town table. This foreign key is now assigned to the variable
stForeignIDTab1Tab2, so that the relationship between the tables can be defined.
IF aTable(5) = aForeignTable2(inCount,0) THEN
stForeignIDTab1Tab2 = aForeignTable2(inCount,1)
END IF
After a few further settings to ensure a return to the correct form after running the dialog
(determining the line number of the form, so that we can jump back to that line number after a new
read), the loop begins, which recreates the dialog when the first action is completed but the dialog
is required to be kept open for further actions. The setting for repetition takes place using the
corresponding checkbox.
DO
Before the dialog is launched, first of all the content of the listboxes is determined. Care must be
taken if the listboxes represent two table fields and perhaps even are related to two different
tables.
IF UBound(aTable()) = 6 THEN
The listbox relates to only one table and one field, as the argument array ends at Tablefield1 of the
auxiliary table.
stSql = "SELECT """ + aTable(6) + """ FROM """ + aTable(5) + """
ORDER BY """ + aTable(6) + """"
ELSEIF UBound(aTable()) = 7 THEN
The listbox relates to two table fields but only one table, as the argument array ends at Tablefield2
of the auxiliary table.
stSql = "SELECT """ + aTable(6) + """||' > '||""" + aTable(7) + """
FROM """ + aTable(5) + """ ORDER BY """ + aTable(6) + """"
ELSE
The listbox is based on two table fields from two tables. This query corresponds to the example
with the postcode and the town.
stSql = "SELECT """ + aTable(5) + """.""" + aTable(6) + """||' >
'||""" + aTable(8) + """.""" + aTable(7) + """ FROM """ + aTable(5) + """,
""" + aTable(8) + """ WHERE """ + aTable(8) + """.""" + stForeignIDTab2Tab1 +
Dialogs 89

""" = """ + aTable(5) + """.""" + stForeignIDTab1Tab2 + """ ORDER BY """ +
aTable(6) + """"
END IF
Here we have the first evaluation to determine the foreign keys. The variables
stForeignIDTab2Tab1 and stForeignIDTab1Tab2 start with the value ID. For stForeignIDTab1Tab2
evaluation of the previous query yields a different value, namely the value of Town_ID. In this way
the previous query construction yields exactly the content already formulated for postcode and
town – only enhanced by sorting.
Now we must make contact with the listboxes, to supply them with the content returned by the
queries. These listboxes do not yet exist, since the dialog itself has not yet been created. This
dialog is created first in memory, using the following lines, before it is actually drawn on the screen.
DialogLibraries.LoadLibrary("Standard")
oDlg = CreateUnoDialog(DialogLibraries.Standard.Dialog_Table_purge)
Next come the settings for the fields of the dialog. Here, for example, is the listbox which is to be
supplied with the results of the above query:
oCtlList1 = oDlg.GetControl("ListBox1")
oCtlList1.addItems(aContent(),0)
Access to the fields of the dialog is accomplished by using GetControl with the appropriate
name. In dialogs it is not possible for two fields to use the same name as this would create
problems when evaluating the dialog.
The listbox is supplied with the contents of the query, which have been stored in the array
aContent() . The listbox contains only the content to be displayed as a field, so only the position 0
is filled.
After all fields with the desired content have been filled, the dialog is launched.
Select Case oDlg.Execute()
Case 1'Case 1 means the "OK" button has been clicked
Case 0'If it was the "Cancel" button
inRepetition = 0
End Select
LOOP WHILE inRepetition = 1
The dialog runs repeatedly as long as the value of "inRepetition" is 1. This is set by the
corresponding checkbox.
Here, in brief, is the content after the "OK" button is clicked:
Case 1
stInhalt1 = oCtlList1.getSelectedItem() 'Read value from Listbox1 ...
REM ... and determine the corresponding ID-value.
The ID value of the first listbox is stored in the variable "inLB1".
stText = oCtlText.Text ' Read the field value.
If the text field is not empty, the entry in the text field is handled. Neither the listbox for a
replacement value nor the checkbox for deleting all orphaned records are considered. This is made
clear by the fact that text entry sets these other fields to be inactive.
IF stText <> "" THEN
If the text field is not empty, the new value is written in place of the old one using the previously
read ID field in the table. There is the possibility of two entries, as is also the case in the listbox.
The separator is >. For two entries in different tables, two UPDATE-commands must be launched,
which are created here simultaneously and forwarded, separated by a semicolon.
ELSEIF oCtlList2.getSelectedItem() <> "" THEN
If the text field is empty and the listbox 2 contains a value, the value from listbox 1 must be
replaced by the value in listbox 2. This means that all records in the tables for which the records in
90 Macros

the listboxes are foreign keys must be checked and, if necessary, written with an altered foreign
key.
stInhalt2 = oCtlList2.getSelectedItem()
REM Read value from listbox.
REM Determine ID for the value of the listbox.
The ID value of the second listbox is stored in the variable inLB2. Here too, things develop
differently depending on whether one or two fields are contained in the listbox, and also on whether
one or two tables are the basis of the listbox content.
The replacement process depends on which table is defined as the table which supplies the
foreign key for the main table. For the obove example, this is the Postcode table, as the
Postcode_ID is the foreign key which is forwarded through Listbox 1 and Listbox 2.
IF stAuxilTable = aTable(5) THEN
FOR i = LBound(aForeignTables()) TO UBound(aForeignTables())
Replacing the old ID value by the new ID value becomes problematic in n:m-relationships, as in
such cases, the same value can be assigned twice. That might be what you want, but it must be
prevented when the foreign key forms part of the primary key. So in the table rel_Media_Author a
medium cannot have the same author twice because the primary key is constructed from
Media_ID and Author_ID. In the query, all key fields are searched which collectively have the
property UNIQUE or were defined as foreign keys with the UNIQUE property using an index.
So if the foreign key has the UNIQUE property and is already represented there with the desired
future inLB2, that key cannot be replaced.
stSql = "SELECT ""COLUMN_NAME"" FROM
""INFORMATION_SCHEMA"".""SYSTEM_INDEXINFO"" WHERE ""TABLE_NAME"" = '" +
aForeignTables(i,0) + "' AND ""NON_UNIQUE"" = False AND ""INDEX_NAME"" =
(SELECT ""INDEX_NAME"" FROM ""INFORMATION_SCHEMA"".""SYSTEM_INDEXINFO"" WHERE
""TABLE_NAME"" = '" + aForeignTables(i,0) + "' AND ""COLUMN_NAME"" = '" +
aForeignTables(i,1) + "')"
' "NON_UNIQUE" = False ' gives the names of columns that are UNIQUE. However not all
column names are needed but only those which form an index with the foreign key field. This is
handled by the Subselect with the same table names (which contain the foreign key) and the
names of the foreign key fields.
If now the foreign key is present in the set, the key value can only be replaced if other fields are
used to define the corresponding index as UNIQUE. You must take care when carrying out
replacements that the uniqueness of the index combination is not compromised.
IF aForeignTables(i,1) = stFieldname THEN
inUnique = 1
ELSE
ReDim Preserve aColumns(inCount)
aColumns(inCount) = oQuery_result.getString(1)
inCount = inCount + 1
END IF
All column names, apart from the known column names for foreign key fields as Index with the
UNIQUE property, are stored in the array. As the column name of the foreign key field also belongs
to the group, it can be used to determine whether uniqueness is to be checked during data
modification.
IF inUnique = 1 THEN
stSql = "UPDATE """ + aForeignTables(i,0) + """ AS ""a"" SET """ +
aForeignTables(i,1) + """='" + inLB2 + "' WHERE """ + aForeignTables(i,1) +
"""='" + inLB1 + "' AND ( SELECT COUNT(*) FROM """ + aForeignTables(i,0) +
""" WHERE """ + aForeignTables(i,1) + """='" + inLB2 + "' )"
IF inCount > 0 THEN
stFieldgroup = Join(aColumns(), """|| ||""")
Dialogs 91

If there are several fields, apart from the foreign key field, which together form a 'UNIQUE' index,
they are combined here for a SQL grouping. Otherwise only "aColumns(0)" appears as
"stFieldgroup".
stFieldname = ""
FOR ink = LBound(aColumns()) TO UBound(aColumns())
stFieldname = stFieldname + " AND """ + aColumns(ink) + """ =
""a"".""" + aColumns(ink) + """ "
The SQL parts are combined for a correlated subquery.
NEXT
stSql = Left(stSql, Len(stSql) – 1)
The previous query ends with a bracket. Now further content is to be added to the subquery, so
this closure must be removed again. After that, the query is expanded with the additional
conditions.
stSql = stSql + stFeldbezeichnung + "GROUP BY (""" + stFeldgruppe + """) ) < 1"
END IF
If the foreign key has no connection with the primary key or with a UNIQUE index, it does not
matter if content is duplicated.
ELSE
stSql = "UPDATE """ + aForeignTables(i,0) + """ SET """ +
aForeignTables(i,1) + """='" + inLB2 + "' WHERE """ + aForeignTables(i,1) +
"""='" + inLB1 + "'"
END IF
oSQL_Statement.executeQuery(stSql)
NEXT
The update is carried out for as long as different connections to other tables occur; that is, as long
as the current table is the source of a foreign key in another table. This is the case twice over for
the Town table: in the Media table and in the Postcode table.
Afterwards the old value can be deleted from listbox 1, as it no longer has any connection to other
tables.
stSql = "DELETE FROM """ + aTable(5) + """ WHERE ""ID""='" + inLB1 + "'"
oSQL_Statement.executeQuery(stSql)
In some cases, the same method must now be carried out for a second table that has supplied
data for the listboxes. In our example, the first table is the Postcode table and the second is the
Town table.
If the text field is empty and listbox 2 also contains nothing, we check if the relevant checkbox
indicates that all surplus entries are to be deleted. This means the entries which are not bound to
other tables by a foreign key.
ELSEIF oCtlCheck1.State = 1 THEN
stCondition = ""
IF stAuxilTable = aTable(5) THEN
FOR i = LBound(aForeignTables()) TO UBound(aForeignTables())
stCondition = stCondition + """ID"" NOT IN (SELECT """ +
aForeignTables(i,1) + """ FROM """ + aForeignTables(i,0) + """) AND "
NEXT
ELSE
FOR i = LBound(aForeignTables2()) TO UBound(aForeignTables2())
stCondition = stCondition + """ID"" NOT IN (SELECT """ +
aForeignTables2(i,1) + """ FROM """ + aForeignTables2(i,0) + """) AND "
NEXT
END IF
The last AND must be removed, since otherwise the delete instruction would end with AND.
stCondition = Left(stCondition, Len(stCondition) - 4) '
stSql = "DELETE FROM """ + stAuxilTable + """ WHERE " + stCondition + ""
92 Macros

oSQL_Statement.executeQuery(stSql)
As the table has already been purged once, the table index can be checked and optionally
corrected downwards. See the subroutine described in one of the previous sections.
Table_index_down(stAuxilTable)
Afterwards, if necessary the listbox in the form from which the Table_purge dialog was called can
be updated. In some cases, the whole form needs to be reread. For this purpose, the current
record is determined at the beginning of the subroutine so that after the form has been refreshed,
the current record can be reinstated.
oDlg.endExecute() 'End dialog ...
oDlg.Dispose() '... and remove from storage
END SUB
Dialogs are terminated with the endExecute() command and completely removed from memory
with Dispose().
Accessing macros with Access2Base
Versions of LibreOffice from 4.2 onwards have integrated Access2Base. To access this library, use:
Sub DBOpen(Optional oEvent As Object)
If GlobalScope.BasicLibraries.hasByName("Access2Base") then
GlobalScope.BasicLibraries.loadLibrary("Access2Base")
End If
Call Application.OpenConnection(ThisDatabaseDocument)
End Sub
An English language description with examples can be found at
http://www.access2base.com/access2base.html
The library does not make any additional functions available, but instead tries to make access to
the possibilities of the LibreOffice API easier for the user. A short description can be found in
LibreOffice Help.
Accessing macros with Access2Base 93
